Upscaling using Let’s Enhance is one of the fastest ways to increase the resolution of your photos. All you have to do is upload the photo, choose your upscale size, and let the onboard AI handle all the rest. Once your photo is upscaled (which usually takes less than a minute), you can save it to your device.
Video tutorial on how to upscale photos using Let's Enhance.
In this tutorial we will cover:
- Quick Upscale Guide
- What is upscaling?
- How to Upscale Photo with Let’s Enhance
- How to upscale multiple photos
- Different upscale types in Let’s Enhance
- FAQ about upscaling
Quick Guide to Upscaling
Step 1. Visit https://letsenhance.io/boost to login or create an account.
Step 2. Upload your image.
Step 3. Select the image type and upscale size.
Step 4. Click Start processing and once it's finished click on the downward arrow button to save the image to your device.
What is upscaling?
Let’s imagine you have a photo taken with one of those ancient flip phones that have a 1MP camera. The photo looks fine on the tiny 176 x 220 screen of your Samsung Z500 that came out 17 years ago, but it looks unbearably small and pixelated on modern screens.

By upscaling a photo, you increase its DPI (dots per inch), as well as its resolution, meaning the enlarged photo will not look pixelated and all its finer details will be preserved. Upscaling is made possible with the help of AI-powered software such as Let’s Enhance.
How to Upscale Photo with Let’s Enhance
Upscaling photos with Let’s Enhance is a very simple and quick process. Here is an in-depth guide on how you can take a small 780 by 525px image and upscale it 8 times its original size.
Step 1: Log in or register and go to My Images

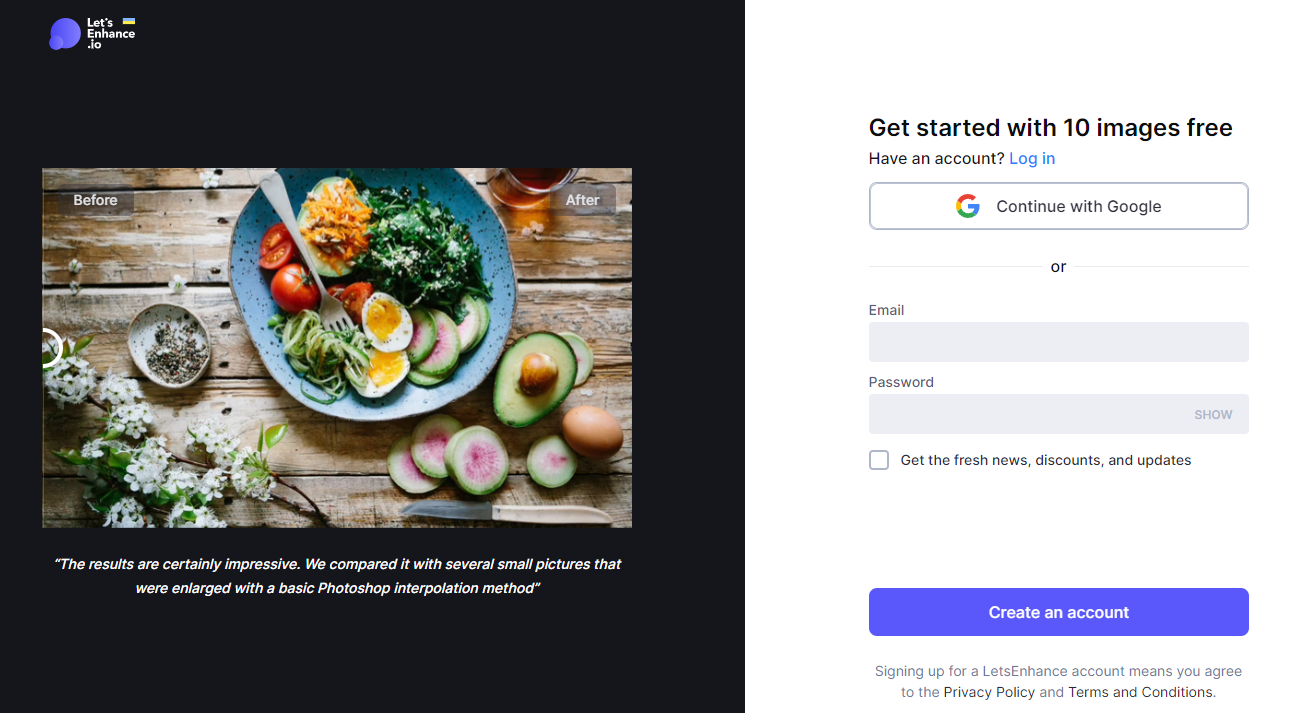
Go to Letsenhance.io and click on Try for free. If you have not yet registered on Let’s Enhance, you will be asked to do so.
Once registered and logged in, click on My images in the top right corner which will take you to the photo editing dashboard.
Step 2: Upload desired photo

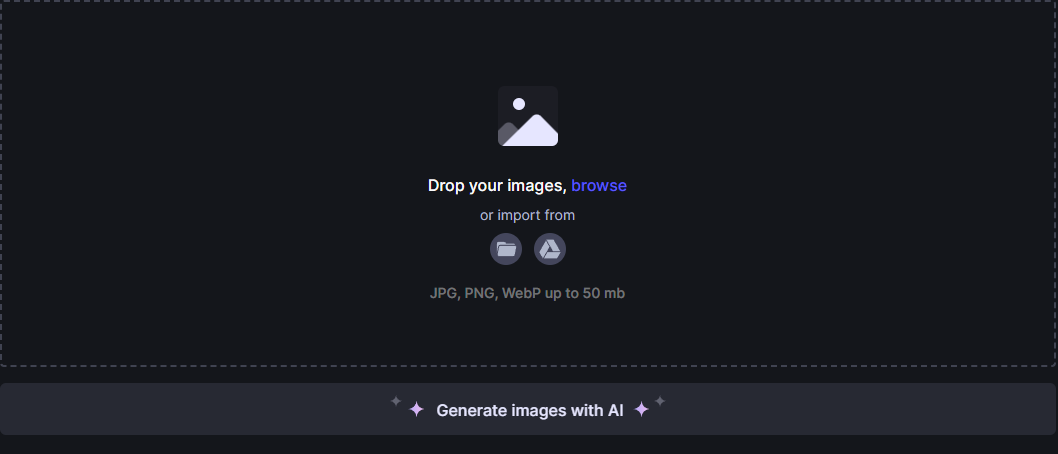
In the photo editing dashboard, click on the round folder button to select a photo from your device. Alternatively, you can upload a photo from Google Drive. Select the photo you wish to upscale and wait for it to upload.
Step 3: Select upscale type

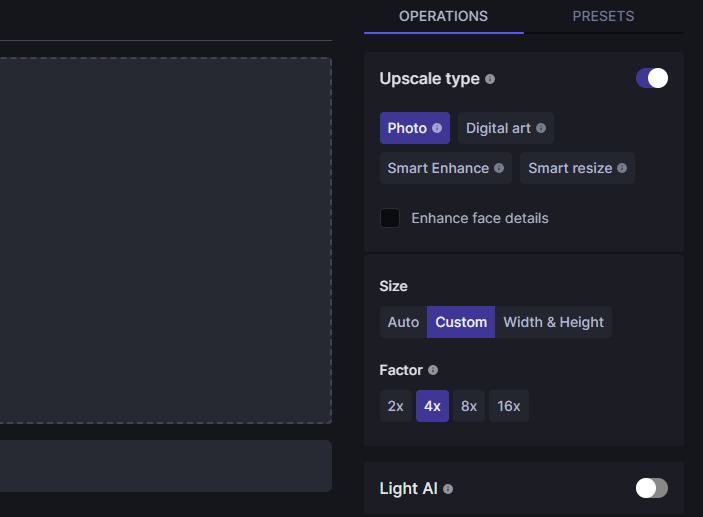
In the right panel you will find the Upscale type category. There are 4 main upscale types to choose from:
- Photo;
- Digital art;
- Smart Enhance;
- Smart resize;
as well as two legacy versions:
- Photo 1.0;
- Illustration.
Depending on the type of your image you’re upscaling or the kind of results you’re looking for, each upscale type will accomplish different things.
Since the uploaded image is a photo, the Photo upscale type was selected.
Step 4: Select upscale size

While we recommend selecting Auto in the size category of your upscaling, you can also pick Custom and decide the size of the upscaling yourself. Depending on the upscale type you selected (we selected Photo) you will have the option to upscale your image 2x, 4x, 8x, or 16x its original size.
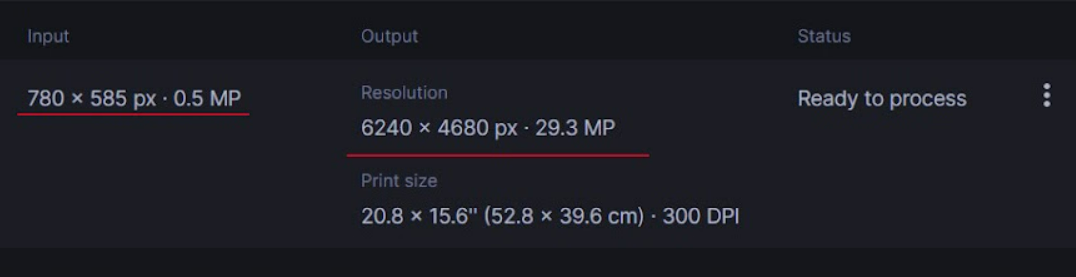
In the center of the dashboard, under the Input category, you will notice the original resolution of your uploaded image. By selecting an upscale size under the Factor category, you will receive the output resolution size of your photo under the Output category. So in this case, the original 780 x 585px photo will be upscaled 8x, so the output will be 6240 x 4680.
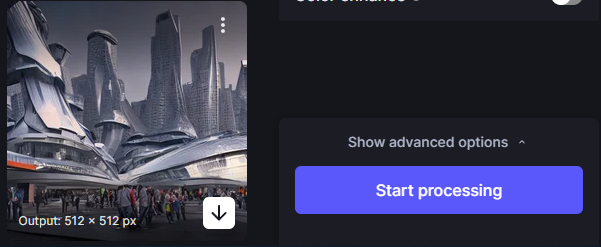
Step 5: Tweak additional settings

Let’s Enhance also provides users with additional options for enhancing other aspects of images. You can tweak these sliders to apply various degrees of enhancements to your image.
Light AI provides lighting and some color correction for images by increasing the dynamic range. It works something akin to an intelligent HDR filter.
Tone enhance is used to tweak the contrast and brightness of the photo, as well as the exposure.
Color enhance is an automatic color correction that can bring out some much needed vibrancy if the image looks too dull and monotone.
You can ignore these settings completely if you have no need for them. If you wish to turn them off, click on the switches in the top right corner of each setting.
Step 6: Process and download

Once you’ve tweaked all the necessary settings and chosen your resize type and factor, click on the Start processing button at the bottom right of the dashboard to start the upscaling.
Depending on the dimensions of your original photo and its output, it can take anywhere from a few seconds to half a minute for the photo to process.
Upscaling a 780 x 585 photo 8x its original resolution (6240 x 4680) took us around 30 seconds to process.

Once the processing is finished, click on the download button (downwards pointing arrow) to save the upscaled image to your device.
How to Upscale Photos in Bulk
Let's Enhance is primarily a consumer-focused tool. It's very potent at upscaling and enhancing a few photos at a time. However, for very large batches of images (we're talking about thousands, if not more), our commercial alternative, Claid.ai, is far more effective.
But upscaling a small batch of photos with Let's Enhance is still possible. It’s just a matter of repeating a single step from the tutorial above several times and then continuing as you would with an individual image upscale.
As with step 2 of the upscaling tutorial above, click on the Folder icon in the center of the dashboard to upload a photo. Once you have it uploaded, instead of tweaking the upscaling options and processing the photo, click on the Folder icon once more to upload another image.

Upload the photos into the dashboard to have them all processed at the same time. You can upload photos up to 20 photos, up to 50MB for each photo.

After the images have been uploaded and they all say Ready to process, tweak the necessary settings in the Operations panel, as per the tutorial above, and click the Start processing button at the bottom right of the dashboard to upscale the photos.
Tip: Keep in mind, that by upscaling photos in bulk, the same upscaling settings and tweaks will be applied to every uploaded image. To upscale each image with its own unique settings, upload and process them individually.
If 20 images and 50MB each is not a big enough threshold for your bulk upscaling, then try Claid.ai. While Let's Enhance has a 20 image limit, Claid.ai can process thousands of images to the same upscaling parameters.
Claid.ai a very useful tool for online vendors, food delivery software, fashion stores, and just about any company dealing with huge quantities of visual content. The powerful AI-based API will upscale thousands upon thousands of photos, delivering high-fidelity results on a much larger scale.
Let’s Enhance Upscale Types
Here is some basic information on what the different Let’s Enhance upscaler types are capable of and how they can be useful.
Photo
Let’s Enhance is very effective at upscaling photos of people, landscapes, food, and just about anything else that comes to mind. Additionally, if you wish to enhance facial details for a portrait photo, Let’s Enhance has the Enhance face details functionality.

By activating Enhance face details, the algorithm detects various facial features and applies a softer upscaling to them. This smooths out various areas on the face, reducing that jagged effect on areas such as eyes, lips, and nose.

This is a 2x upscaling performed by Let’s Enhance, without and with the Enhance face details respectively. This effect is most prevalent on the lips and cheeks, where there is significant less noise.
Digital Art

The digital art option works great with drawings, illustrations, paintings, cartoons, sketches, and other forms of drawn or illustrated content. This option is great for artists looking to print their work onto a larger canvas and need to significantly upscale their art for galleries, exhibitions, and auctions.
Smart Enhance

Smart Enhance specializes in enhancing various aspects of photos such as sharpening, removing artifacts, and producing high-fidelity textures on top of upscaling the images. While this upscaler type only upscales 2x the original image resolution, the additional enhancements it provides make it a great tool for sharpening blurry photos and removing artifacts.
Smart Resize

When it comes to detail-oriented upscaling, Smart Resize will get the job done. Because of the softer upscaling effect it applies, minor details, such as text, are more clear when zoomed in, making this the perfect upscale type for product images.
This allows buyers to get up close and personal with what they are looking to buy, learning more about their product thanks to a larger and more detailed image.
FAQ
Some common questions about upscaling that may help you understand how and why you should upscale images.
Why Upscale Photos?
Upscaling has its uses for just about anyone, regardless of their occupation. For the general public, most common use-cases include enhancing old photos, improving the quality of photos taken with weaker cameras, posting higher-quality social media content, etc.
But a big chunk of benefits have to do with industry-specific use-cases.
Is Upscaling Important in eCommerce?
Upscaling eCommerce product photos is an incredibly effective way to improve brand image. Our recent study showed, that using high-quality visual content on food delivery application can boost sales by 15%, which is a substantial increase. And this is in the food industry alone.
Aside from the improved brand image of consistently high-quality and high-resolution eCommerce visuals, being able to zoom into products to see the finer details of a product is also a great way to improve the customer experience.
Upscaling is also great for product photos for use in eCommerce, when small photos do not provide that level of detail that most buyers today are looking for. Online shoppers love to zoom into product images to see every little detail of the item they are about to purchase.

The larger your image is, the more buyers can zoom in to see all the intricate details of your products. By using larger, higher-quality product images, you provide buyers with more information on the item on sale, increasing the chances of the buyer’s making the purchase.
Let's Enhance also promotes the use of high-quality eCommerce images through our B2B alternative, Claid.ai. As was already mentioned, Claid.ai offers a versatile roster of tools to produce professional visual content for eCommerce. One of the latest tools released by is AI Photoshoot, a powerful tool that can take your eCommerce marketing and brand building to a whole new level.
AI Photoshoot uses the power of generative AI to render gorgeous backgrounds for product photos, be it food, furniture, health, and beauty, footwear, or car.
How Can Upscaling Help in Real Estate?
Speaking of eCommerce, many real estate brokers also upscale photos of property they are selling so prospective buyers can see every little detail of the property being sold. If you’re looking for a new house to buy, the real estate photos are going to have a large impact on your decision. The bigger and more detailed the image, the more your potential buyers can see.

Another reason for upscaling photos is for print. Say you have a photo that you need printed onto a large flier or poster. Simply increasing the image resolution would make the print pixelated and low-quality, especially when viewed from up close. By upscaling the photo, the resolution of the print will be as good as the original photo.
Can Artists Upscale Digital Art with Let's Enhance?
Absolutely. As was mentioned in the guide above, Let's Enhance has an upscale setting that is optimized specifically for digital art. Additional settings can also be utilized to add unique effects to digital art as well, making Let's Enhance a powerful tool for those working with digital art.
Additionally, in this day and age, it's hard to ignore the power of generative AI and we're proud to say that Let's Enhance is quite capable of upscaling AI generated images as well.
And on another note, Let's Enhance also comes with its own built-in AI image generator, which allows you to render images and upscale them all on one platform. This is super convenient for those in search of unique visual assets that are also of large resolution and DPI.
Check out our guide on how to write effective AI image generator text prompts.
Upscaling vs Increasing Image Resolution
If you were to upscale this photo, you would enlarge it, but also increase its resolution so as not to make it pixelated. Keep in mind, that if you were simply to increase the image resolution, all you’d be doing is taking the 176 x 220 pixels of the original photo and simply enlarging them, meaning you’d have a very pixelated photo.
Here’s a comparison of upscaling a photo 8x vs simply increasing the image resolution 8 times the original resolution.

Since the image on the right was simply increased in resolution without increasing the resolution as well, it came out very pixelated, with several visual artifacts, such as the color smearing around the turn signal light.
Why Use AI for Upscaling?
Upscaling a photo yourself takes a lot of work. You’d have to go through each image individually in a photo editing software such as Photoshop, individually raising the resolution and applying different settings.
In theory, all of this is doable, but would take an inhumane amount of time and effort. Not to mention how upscaling by hand would leave room for tons of error.
Upscaling leverages the power of AI to eliminate this hassle. Modern AI technology is laser accurate when it comes to upscaling and its an almost instant process. It takes the Let’s Enhance AI a minute to upscale a photo 8x times its original resolution. Compare this to upscaling by hand, which could be hours of non-stop work.
