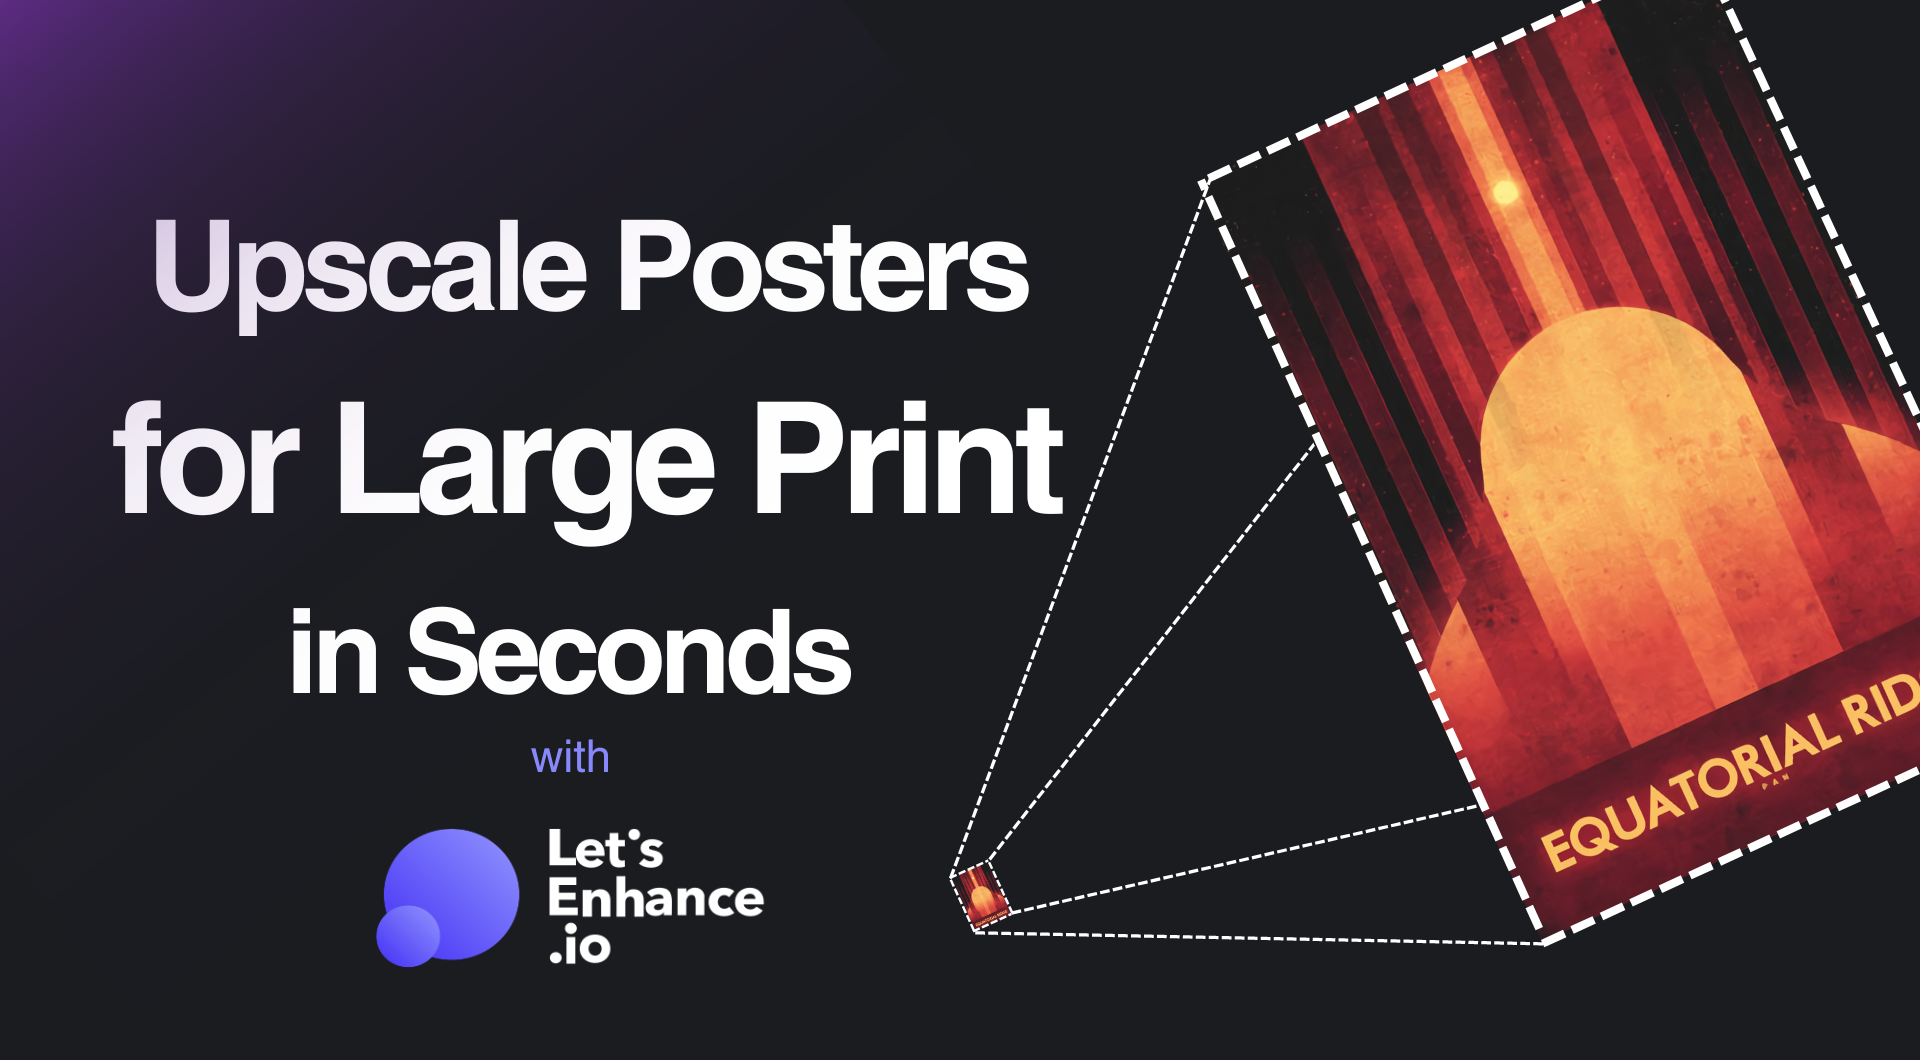
Getting images to look sharp on paper is the hardest part. Today, AI upscaling generates new pixels to increase resolution and deliver sharp results for large-format printing.
Continue reading to learn the difference between screen and print resolution, and get step-by-step guide to upscale posters using LetsEnhance.
Takeaways
- Screens only require 72 DPI, but posters require 300 DPI for sharp results.
- Standard resizing stretches pixels; LetsEnhance generates new details for a lossless look.
- Choosing the right models is critical for the best texture reproduction.
- The workflow with LetsEnhance is user-friendly and takes under two minutes.
Why standard images look bad on posters
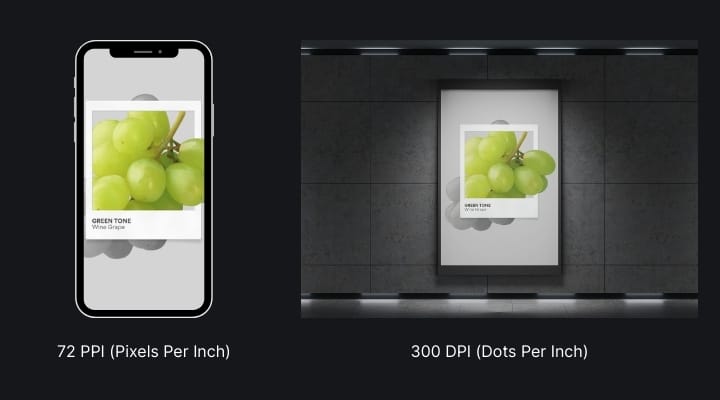
Digital screens display images at roughly 72 PPI (Pixels Per Inch). Printers, however, operate at a much higher density, usually 300 DPI (Dots Per Inch).
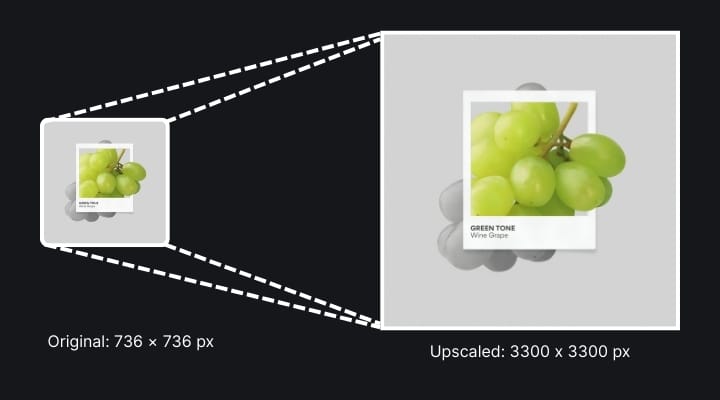
If you take a standard web image (e.g., 1920 x 1080 pixels) and print it at 300 DPI, the physical size would only be about 6.4 x 3.6 inches, which is the size of a postcard. If you stretch that same image to fit a poster (24 x 36 inches), the printer will drop the density and you'll have an image with with visible pixels and blurry edges.
For a 24 x 36 inch poster, you technically need an image resolution of 7200 x 10800 pixels. And since traditional resizing leaves visible artifacts, AI upscaling becomes more than essential.
How to upscale poster for print: step-by-step
Upscaling posters for larger print using LetsEnhance is a very short process that requires nothing more than a browser and stable internet connection.
Step 1. Log in or register on LetsEnhance
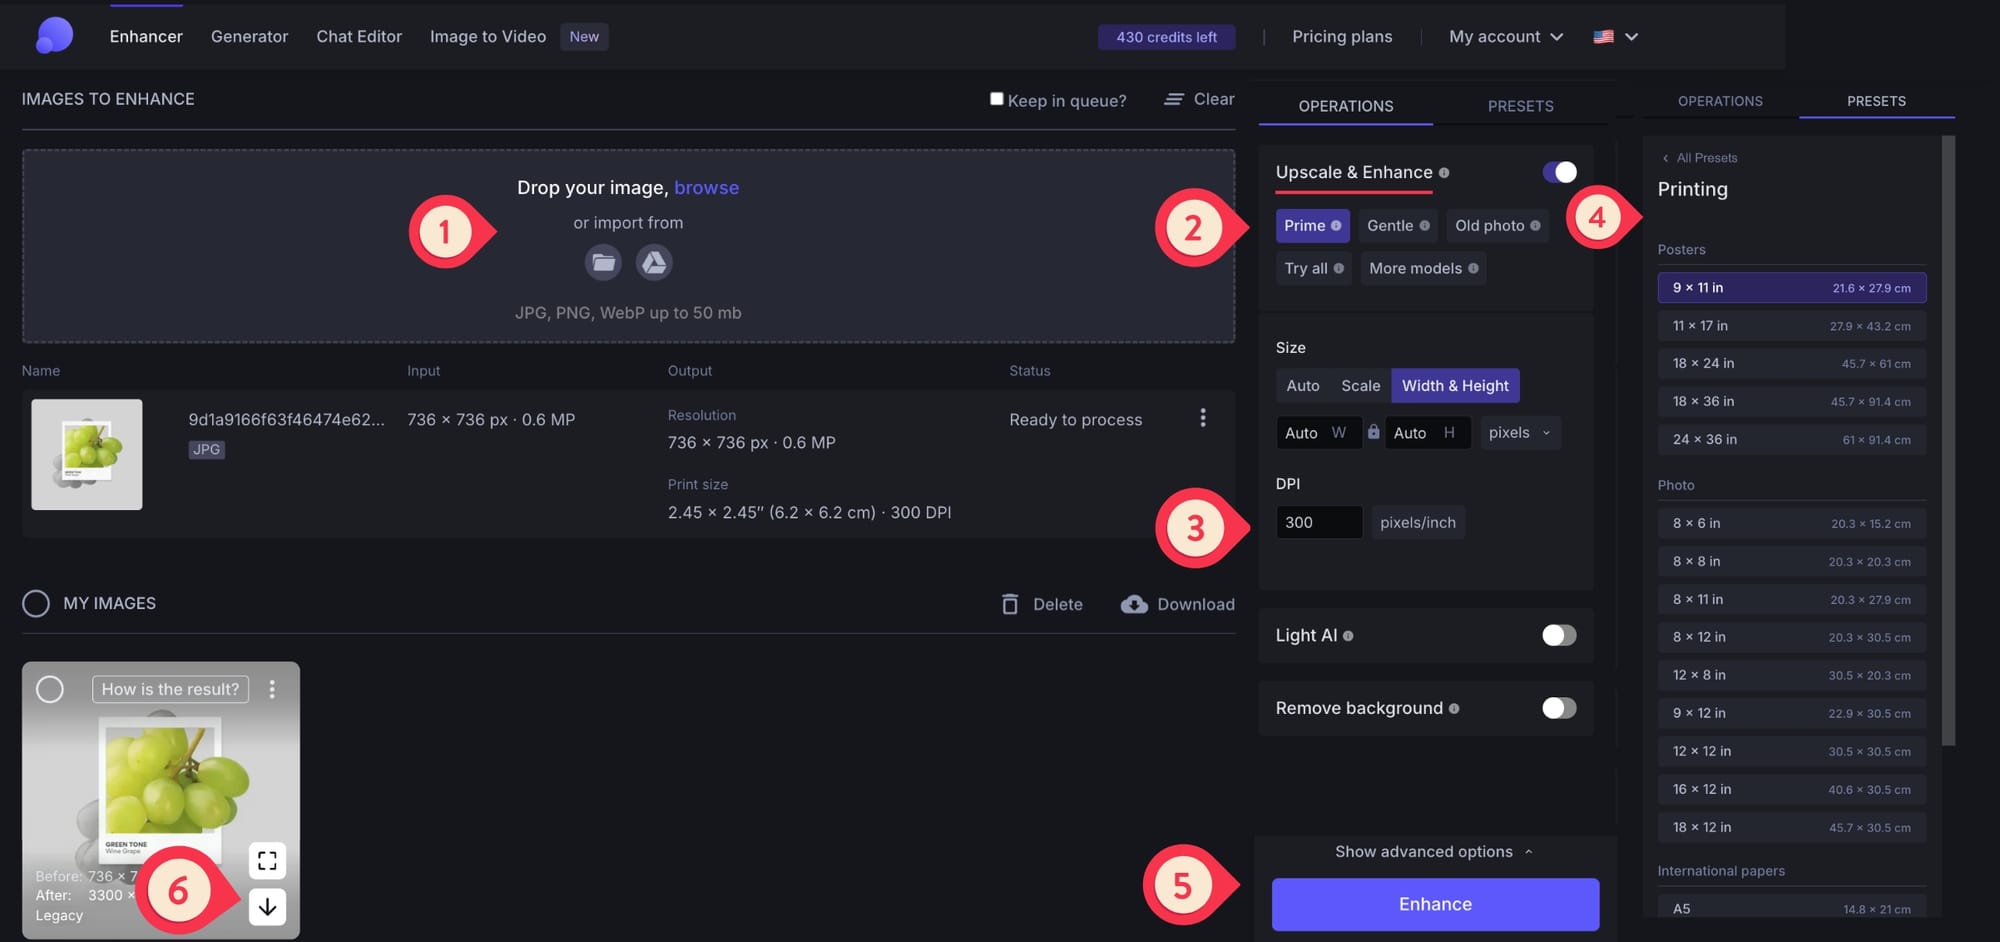
Visit LetsEnhance to log in. If you are new, you can sign up and get 10 free credits to test the tool. Once on the dashboard, drag and drop your image into the upload area. It supports JPG, PNG, and WebP formats up to 50MB.
Step 2. Choose the right AI model
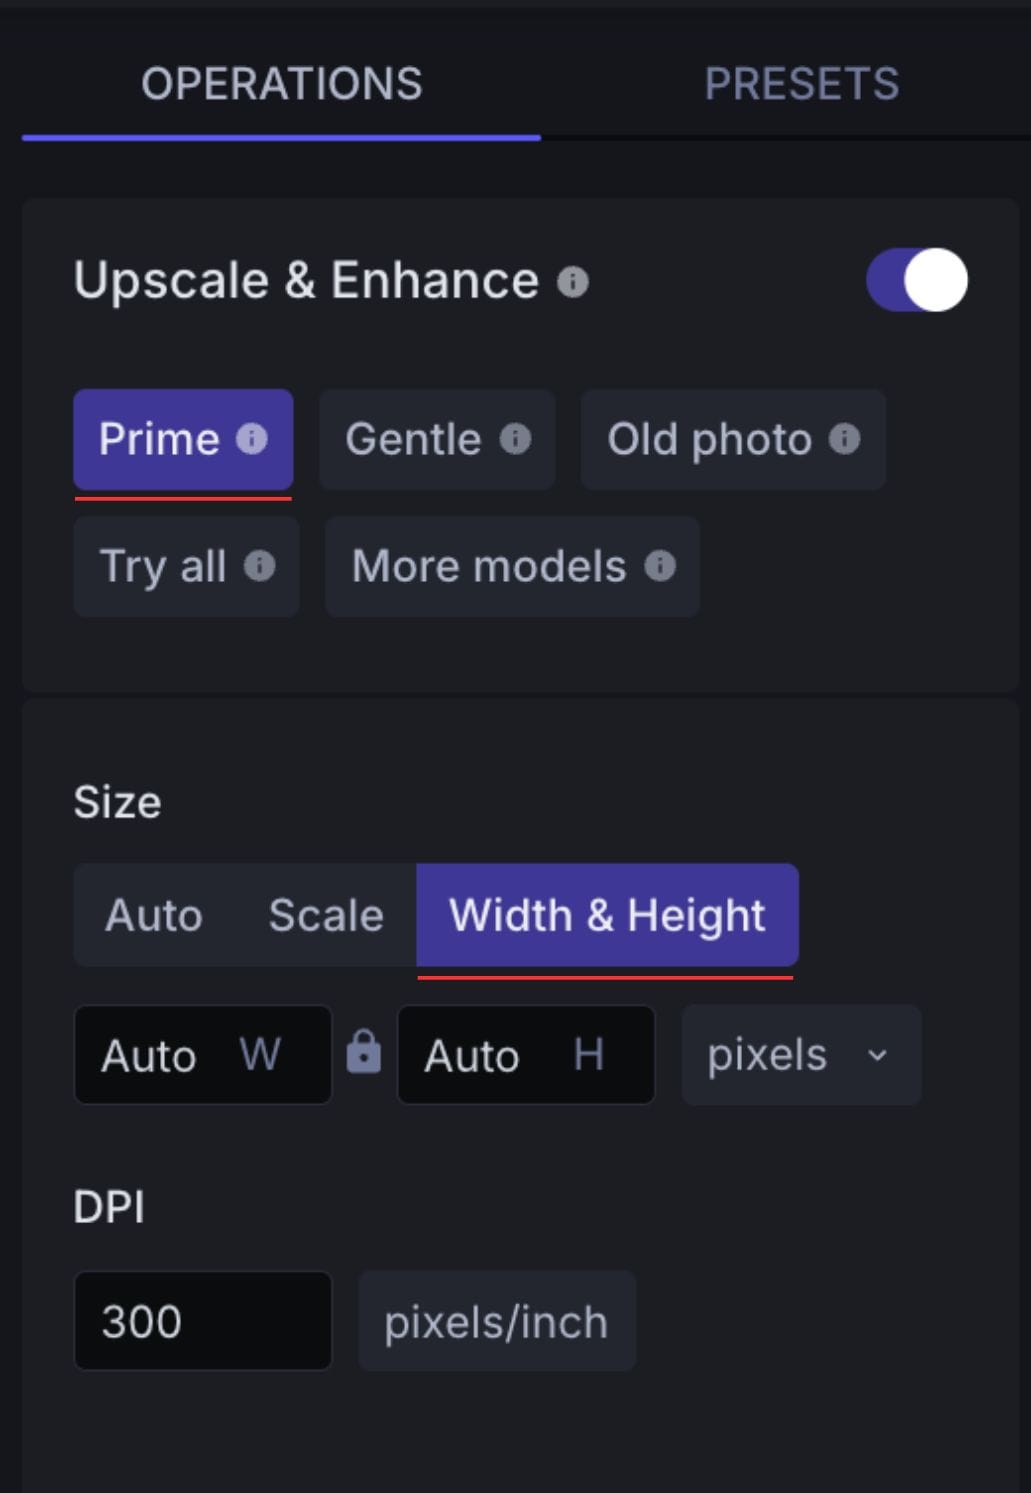
Once your image is uploaded, you need to select an upscaler from the available seven options. Choosing the right one depends on the quality of your source image and what is on your poster.
- Prime is our recent and most realistic AI upscaler. It's designed for portraits, skin, food & fashion photography and anywhere where natural detail and texture matters.
- For illustrations, anime, logos and artistic pieces choose Digital art. It preserves clean lines and solid colors without introducing "noise" or unneeded texture.
- Use Gentle if your poster design includes text overlays, brand logos, or sharp graphic vectors. It enlarges the image without hallucinating weird textures inside your text or warping the shape of your logos.
- For blurry or out-of-focus photos use Strong, which focused on maximum sharpness. It artificially tightens edges and removes motion blur, making "unusable" shots printable. If your photo also involves people, toggle on the Enhance Face feature to enhance facial details specifically.
- Ultra is the most transformative and powerful AI upscaler. It also offers Size of changes and Intensity settings to control how transformative or natural your results look.
- Balanced upscaler gives medium-strength enhancement to everyday photos.
Step 3. Adjust print settings
Once you have selected your model, you need to define the output size. Scale allows you to simply multiply the resolution. You can select a factor from 1x to 16x (depending on your plan) to quickly boost the resolution and quality without targeting a specific physical size.
Width & Height is useful when you have a specific frame to fill (e.g., a 24x36" poster). Click the dropdown menu to change the unit from pixels to inches or cm, and type in your exact required dimensions. Also, make sure you set the DPI to 300 for professional printing.
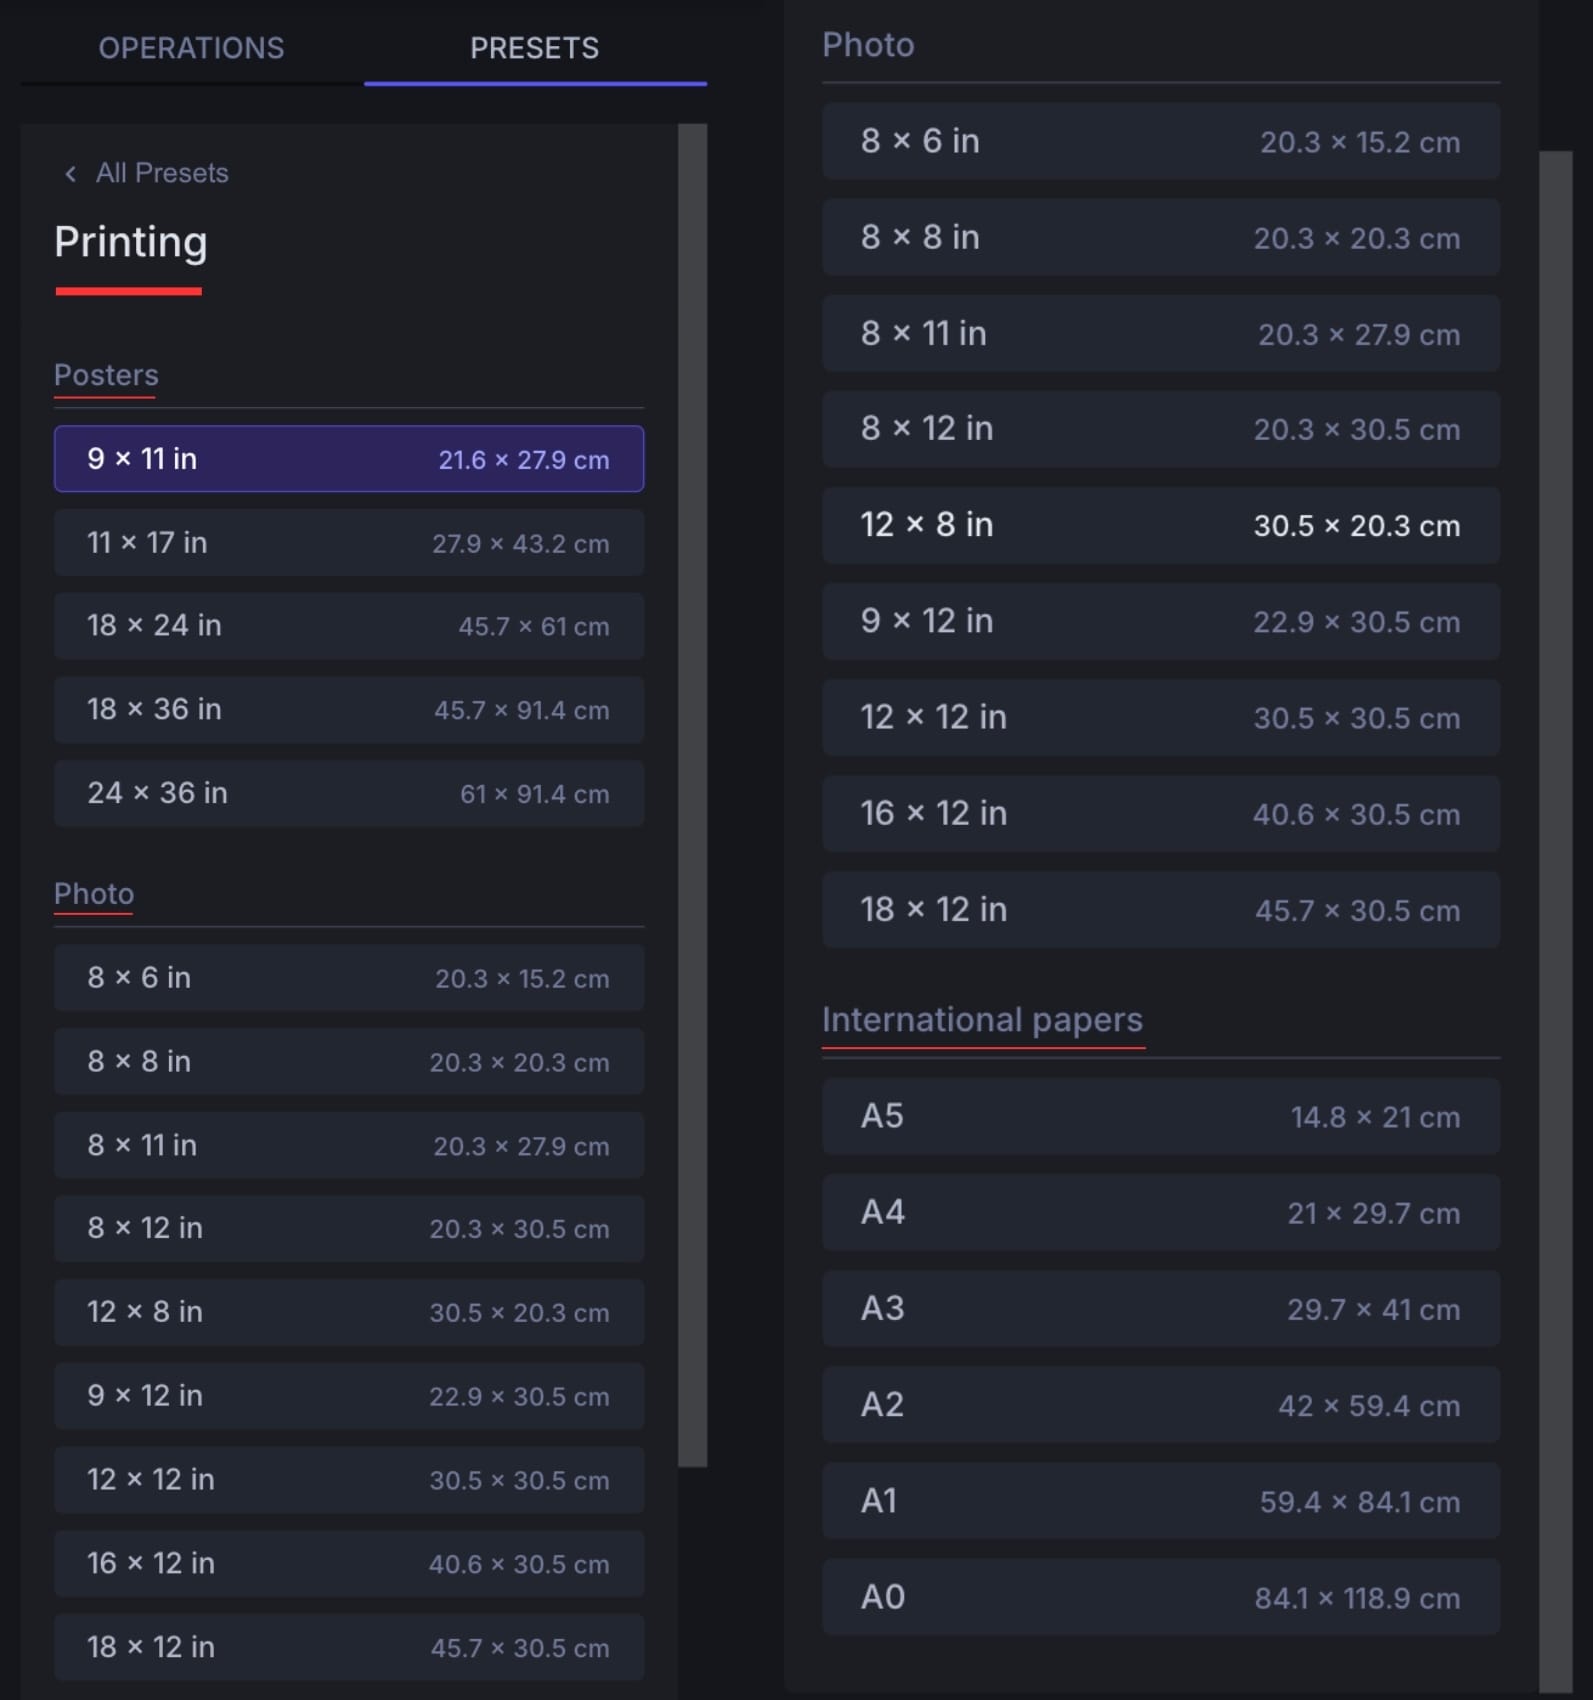
Step 4. Use printing presets for speed
If you are printing a standard poster size (like for a movie poster or a store-bought frame), you can skip the manual configuration entirely by using Presets.
At the very top of the dashboard, click on Presets. Here, you can select standard formats like 24 × 36 in for posters or A4/A3 for international paper sizes. Once you click a size, the system will automatically set the correct resolution, aspect ratio, and the crucial 300 DPI setting for you.
Step 5. Process and download
Once you're done with all the settings, click Enhance at the bottom of the screen to render the image. After a few seconds, the upscaled image will appear at the bottom of the dashboard.
Why use LetsEnhance to upscale posters
LetsEnhance offers AI restoration with a simple drag-and-drop interface that allows anyone to create high-quality prints in seconds. Here's what it offers:
Easy and fast workflow
It's built from the ground-up with usability and accessibility in mind. All it takes is a couple clicks to perform complex upscaling and image enhancement tasks that would otherwise require years of photo editing knowledge and experience.
No hardware requirements
Professional image editing software requires a pretty powerful computer to pull off extensive photo upscaling and enhancements. Luckily, LetsEnhance functions completely server-side, meaning so long as you have a stable internet connection, you should have no trouble upscaling to huge resolutions.
Different upscalers instead of a general one
LetsEnhance offers seven different upscaling models tuned for different content types and needs. For example, Prime is best for high-fidelity enhancement, Ultra and Strong for more aggressive reconstruction, Gentle and Balanced for minimal enhancement, etc.
Batch editing
This is ideal for print-on-demand sellers or photographers with large collections. You can upload 20 images at once, apply your print settings and process the entire batch simultaneously.
Sign up and start upscaling now!
It takes almost no time to create a LetsEnhance account and start upscaling your images.
Sign up now, get 10 free credits and upscale your images to professional poster sizes in minutes.
FAQ
How do I convert a low-res image to 300 DPI for printing?
Use use an AI upscaler like LetsEnhance to convert an image to 300 DPI without losing quality. Upload your photo to LetsEnhance, choose the right model, select Custom Size and enter your desired print dimensions (e.g., 24x36 inches). Set the resolution to 300 DPI and click "Enhance."
Can I print a photo from my iPhone/Android on a large poster?
Yes, but you need to upscale it first. Most smartphones take photos at 12MP (4000 x 3000 px). While this looks great on a screen, it is only large enough for a crisp 10x13 inch print.
If you try to print an iPhone photo on a 24x36" poster, it will look soft and pixelated. You can use LetsEnhance's AI upscaling models to increase the resolution and DPI to make them suitable for large format printing.
What is the best resolution for poster printing?
For high-quality viewing at arm's length, the industry standard is 300 DPI (Dots Per Inch). For Small/Medium Posters (18x24"), aim for at least 300 DPI. For Large Posters (24x36"), you can sometimes get away with 150-200 DPI, but 300 DPI is safer for sharp text. Billboards mostly need 10-50 DPI because they are viewed from hundreds of feet away.
Why does my downloaded image look blurry but the print shop says it's small?
This is a common confusion between Screen Resolution (72 PPI) and Print Resolution (300 DPI). Your image might look huge on your monitor because screens have low pixel density. However, printers pack pixels much tighter. An image that fills your laptop screen might only be 3 inches wide when printed. Always check the pixel dimensions, not just how it looks on screen. For a 24x36" poster, you need approximately 7200 x 10800 pixels.
Does LetsEnhance work for Print-on-Demand (POD)?
Absolutely. It offers batch processing, where you can upload y20 images, upscale them to 300 DPI in one click, and download print-ready visuals in minutes.
Is JPEG or PNG better for printing posters?
PNG is technically superior because it is "lossless," meaning it preserves every single pixel of detail. However, high-quality JPEG (quality 100) is the standard for most online print shops because the file sizes are smaller and easier to upload. Recommendation: Download as PNG for your master archive, but if your print shop has a file size limit (e.g., 20MB), convert it to a high-quality JPEG.e
