You can increase the DPI of an image with LetsEnhance, Photoshop, GIMP, and free online converters. Your choice depends on whether you need to
(a) simply change the file's DPI value or
(b) increase actual pixel density for sharper prints.
This guide will help you pick the right tool for your needs, whether you're optimizing for printing or just need to hit a file requirement.
How to improve image DPI: 15-second summary
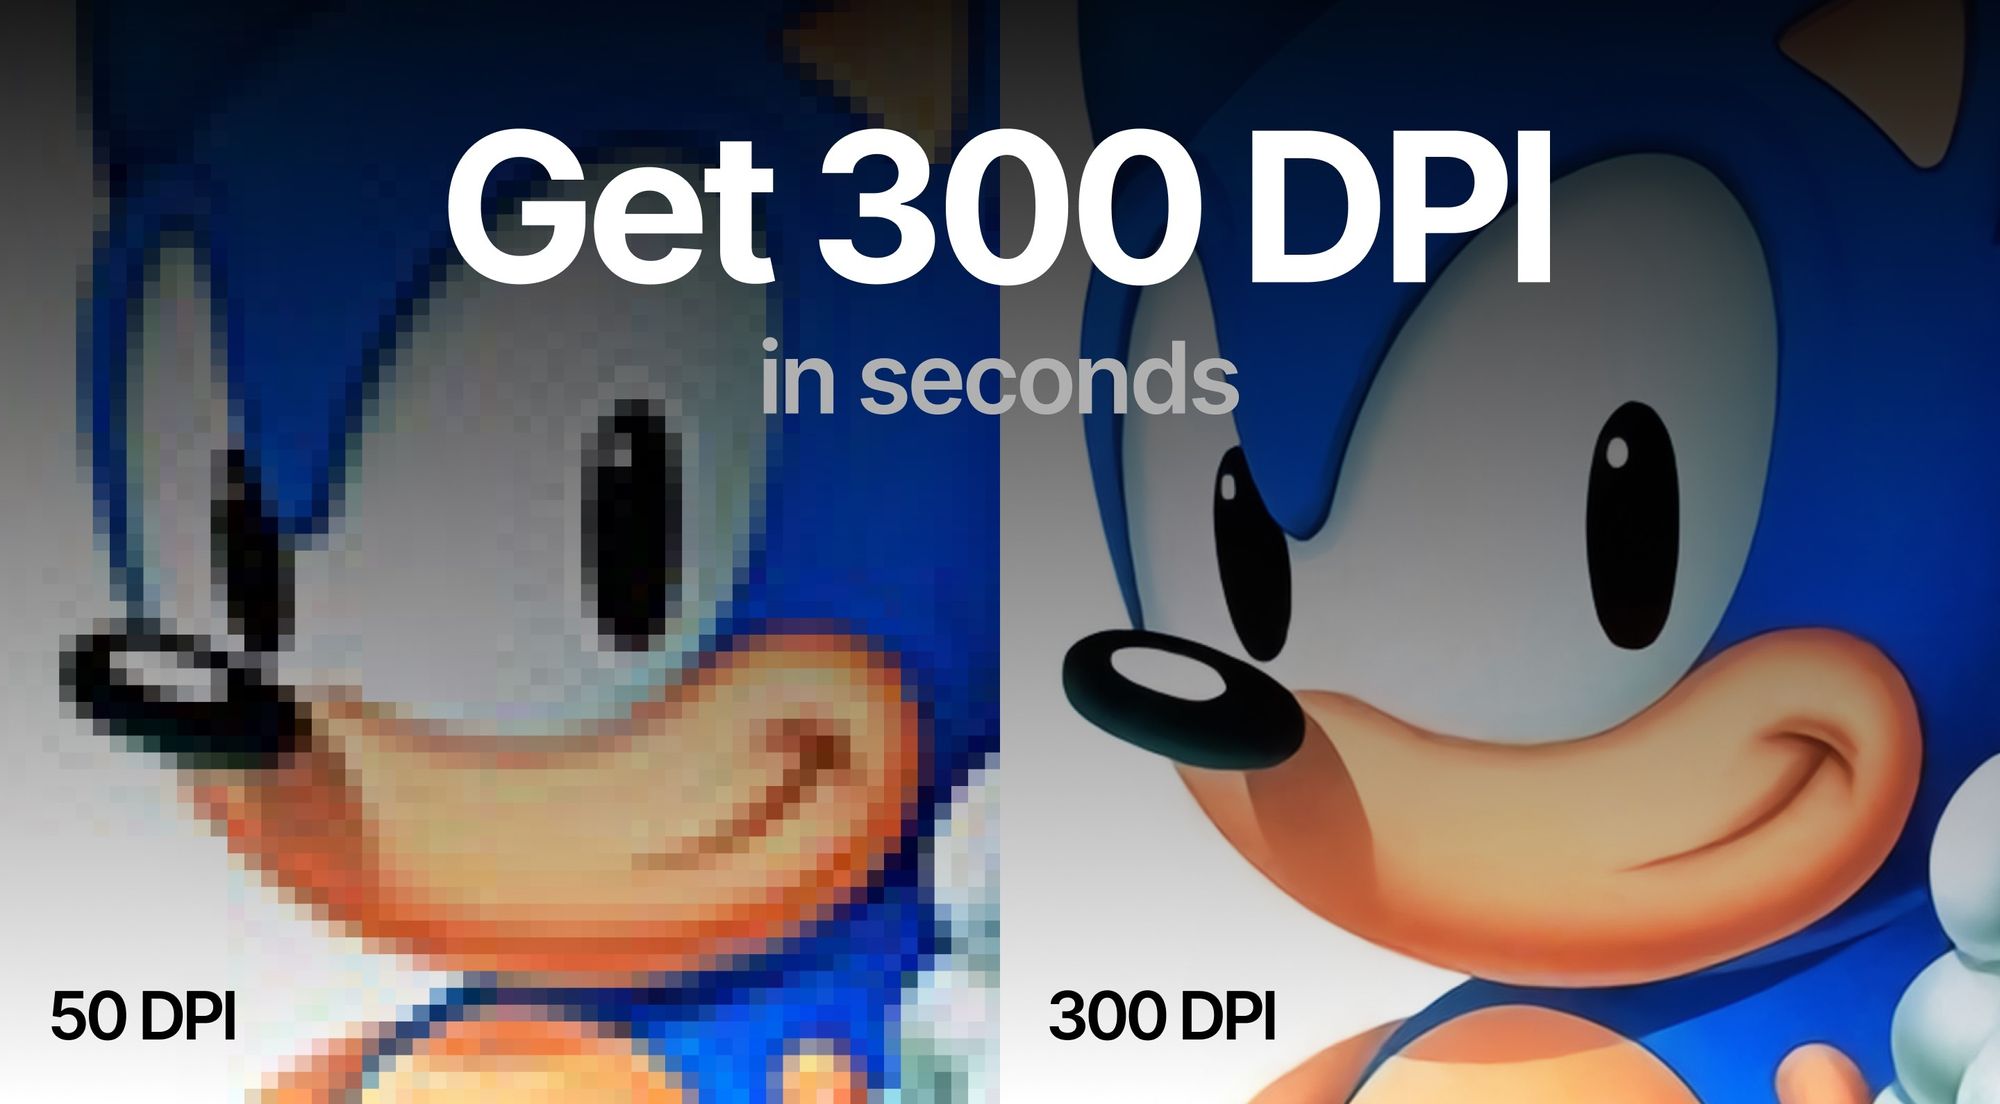
- Use LetsEnhance to upscale images to 300+ DPI for crisp prints.
- Aim for 300-400 DPI for close-up viewing (e.g., photo books), and 100-200 DPI for posters.
- In Photoshop, go to Image > Image Size, uncheck "Resample", and set desired DPI.
- For online uploads requiring specific DPI, use free tools like convert.town/image-dpi.
- DPI isn’t the only factor behind sharp photos. Total pixel count matters too, and LetsEnhance Prime upscaler helps you increase it.
Want more nuanced guidance? Keep reading.
How to increase DPI of your photo for bigger and sharper prints with LetsEnhance
Follow these simple steps to transform your photos into print-ready, high-resolution visuals with LetsEnhance.
Step 1. Log in to LetsEnhance
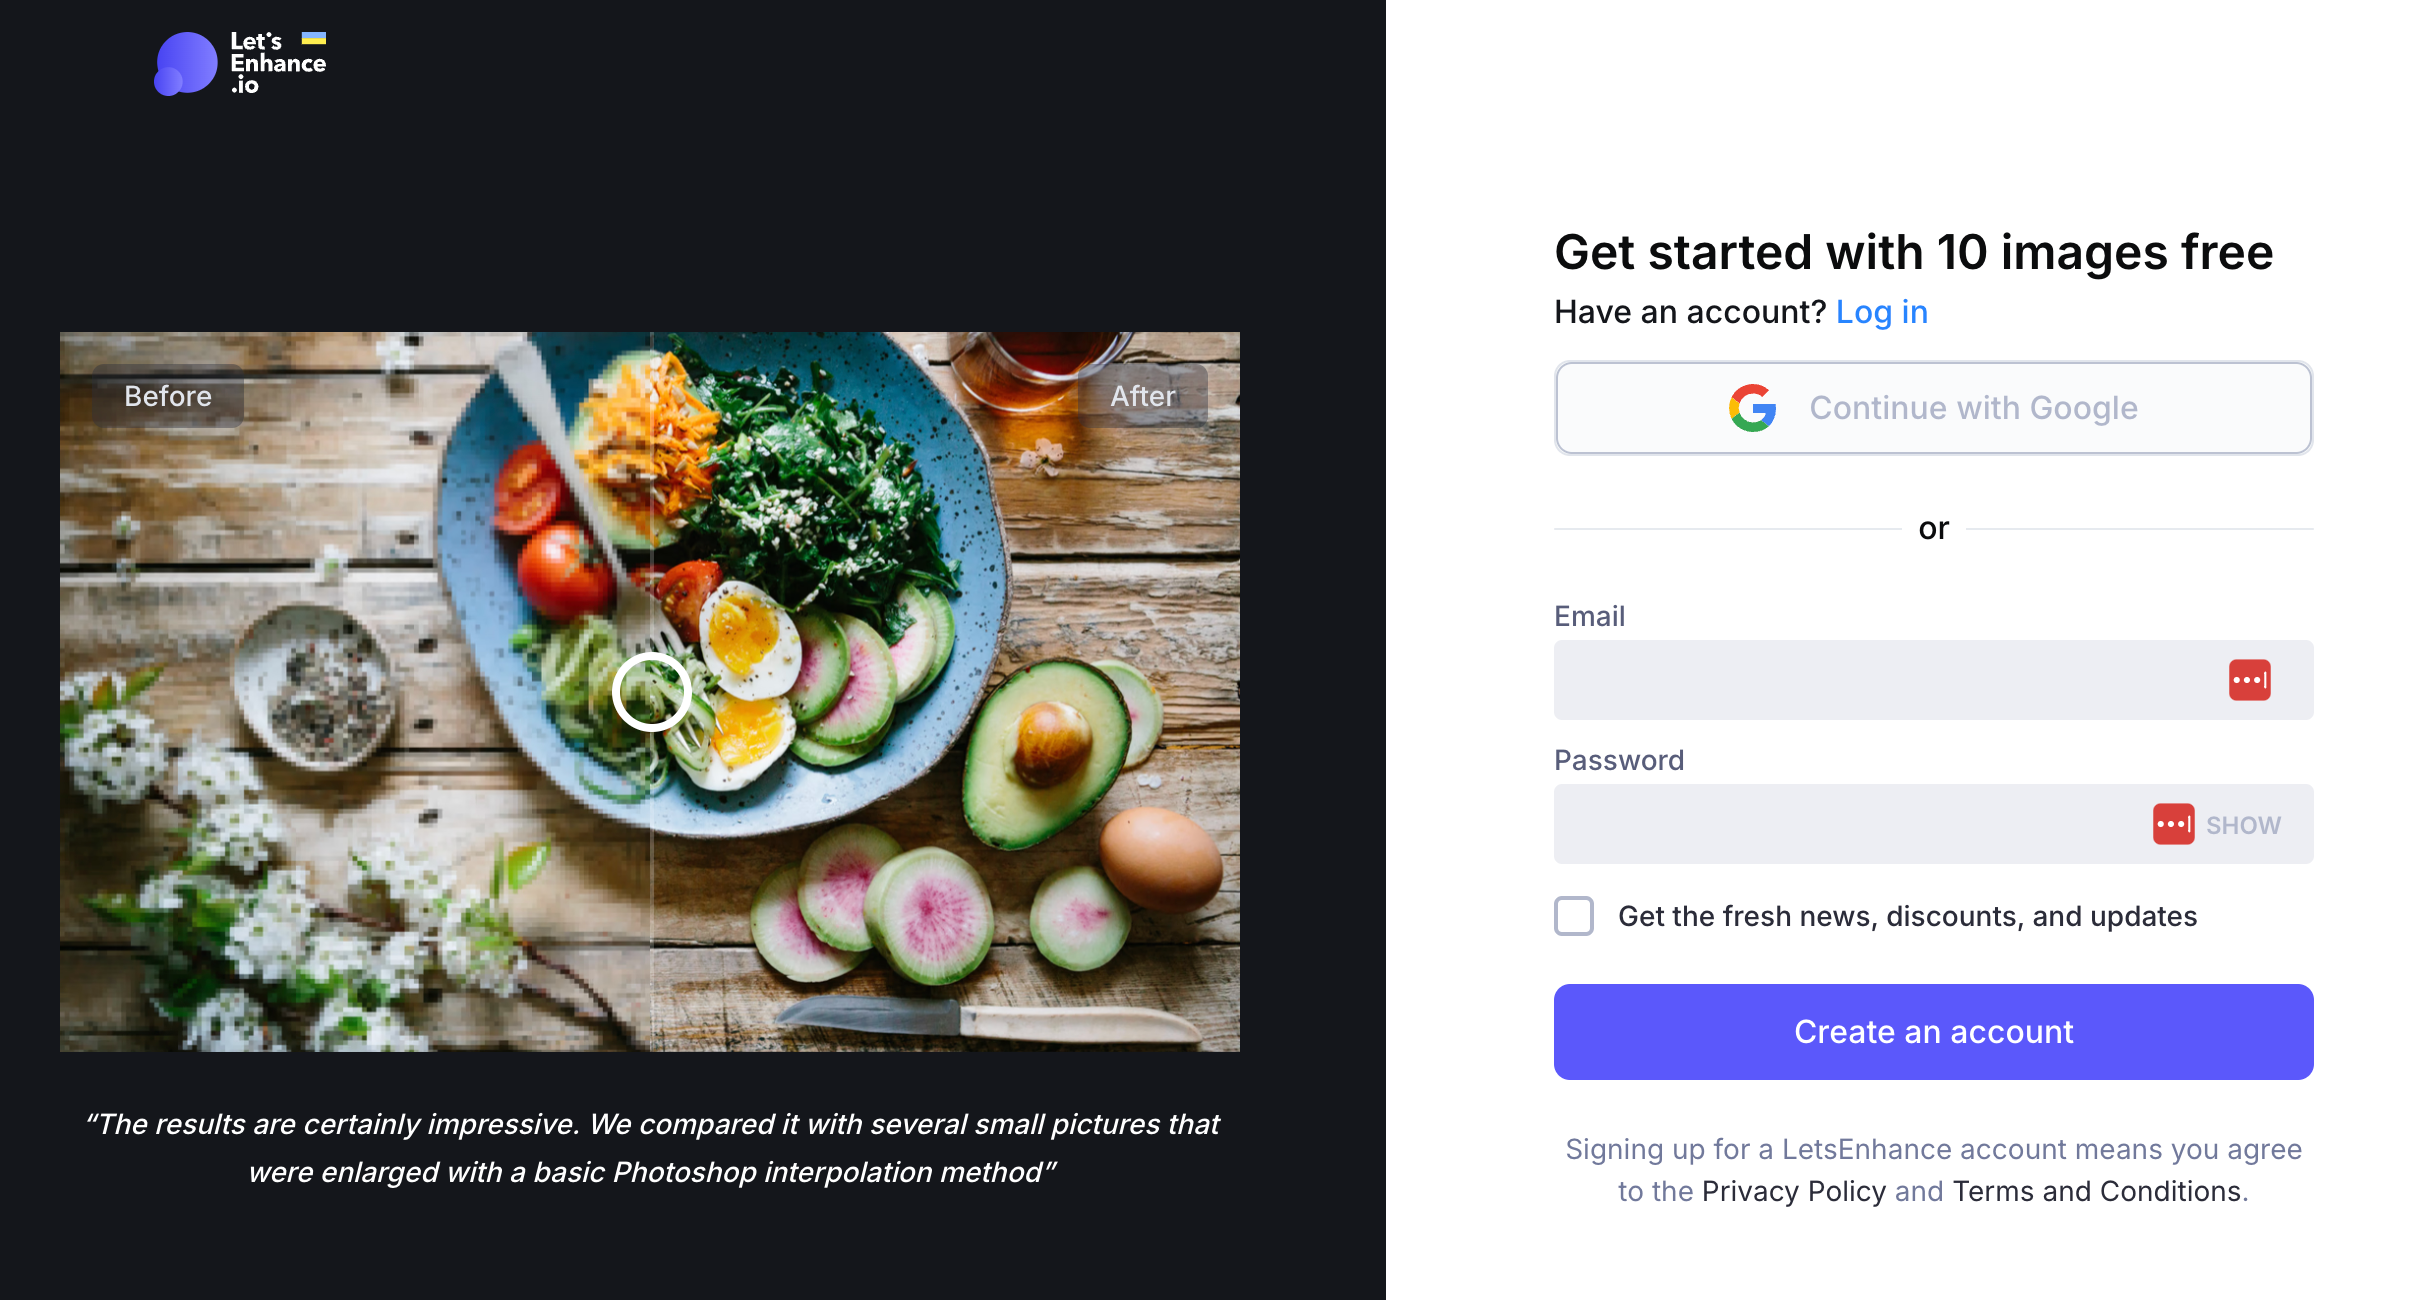
Log in to your LetsEnhance account or create a new one and get 10 free credits. You can also sign in with Google.
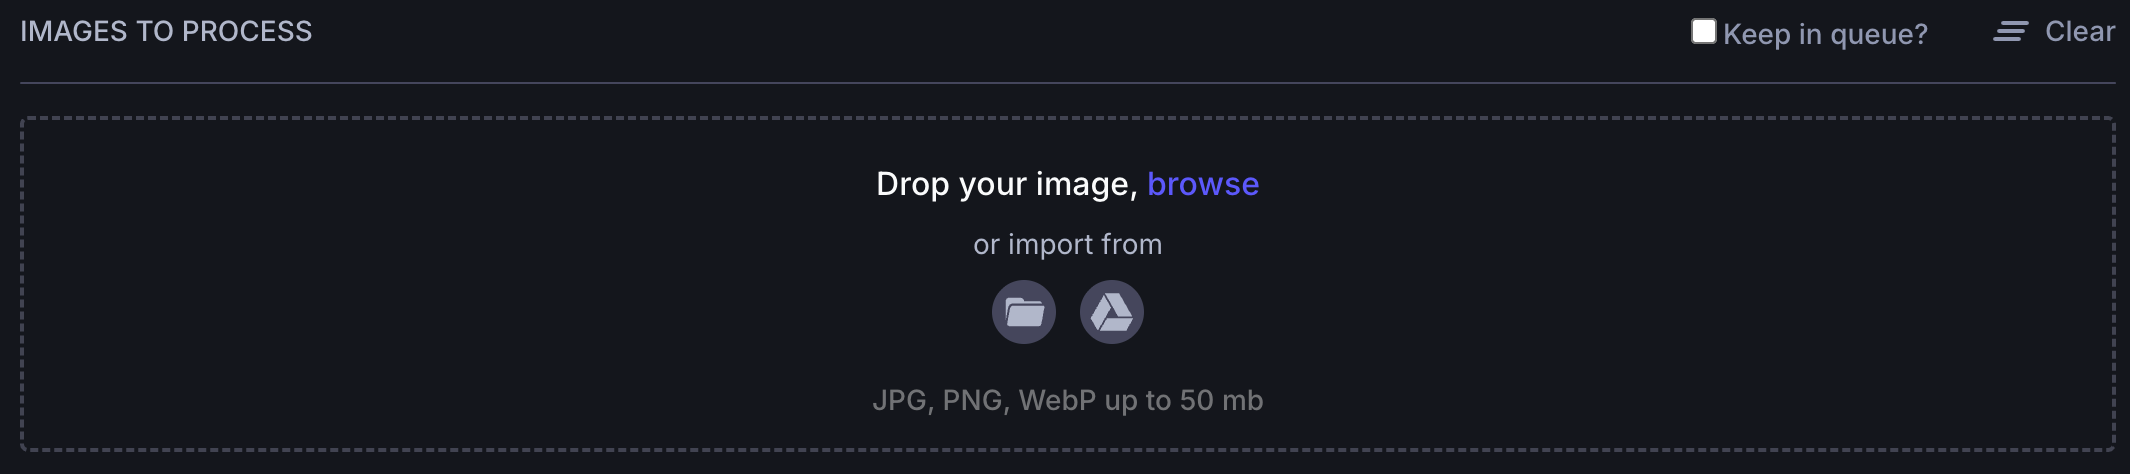
Step 2. Upload your images
Upload photos you want to enhance. You can do this by
- Using drag & drop
- Selecting files from your device
- Importing them from Google Drive or URL
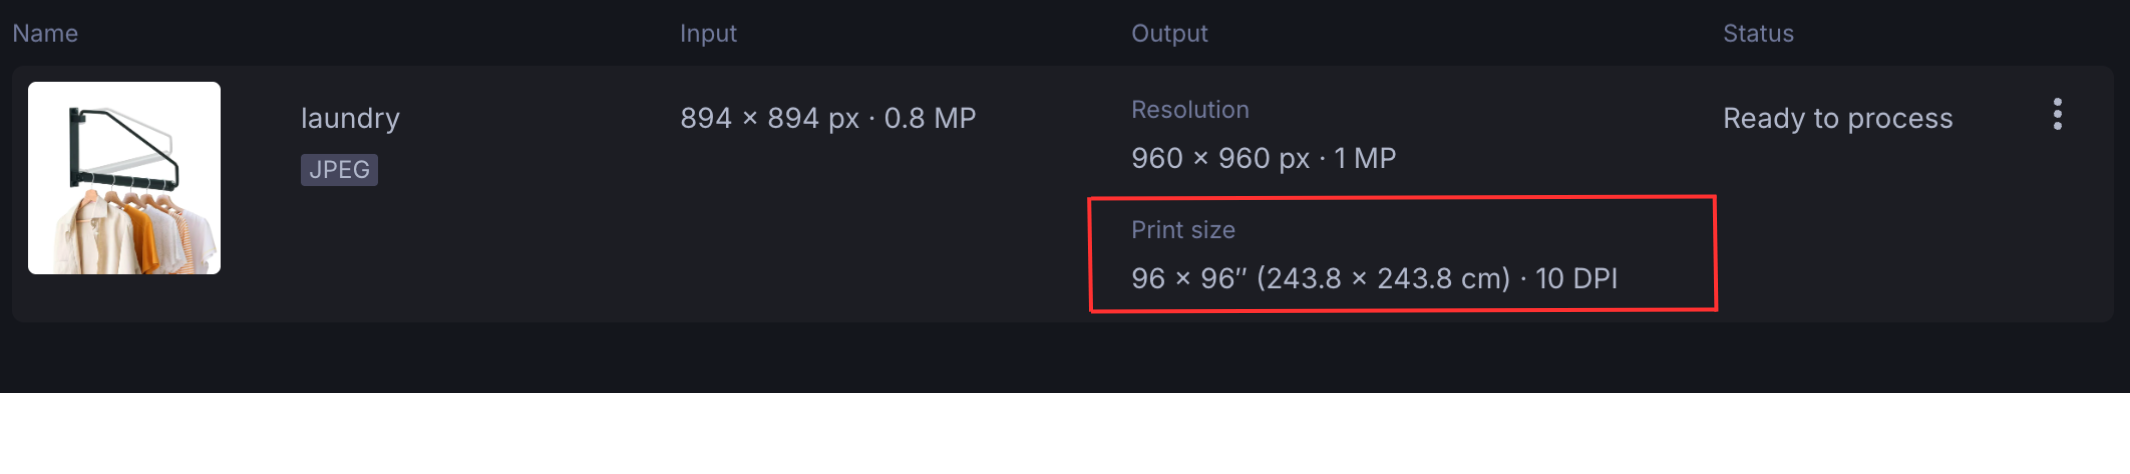
You can check the output DPI value below the resolution in the uploader.
Step 3. Set the desired resolution and DPI
When editing photos with LetsEnhance, you can set your desired DPI metadata value and resolution.
Our default DPI is 300 for all operations. If you upload the image with a different DPI value, the output DPI would be rewritten to 300, in case you don’t change the settings.
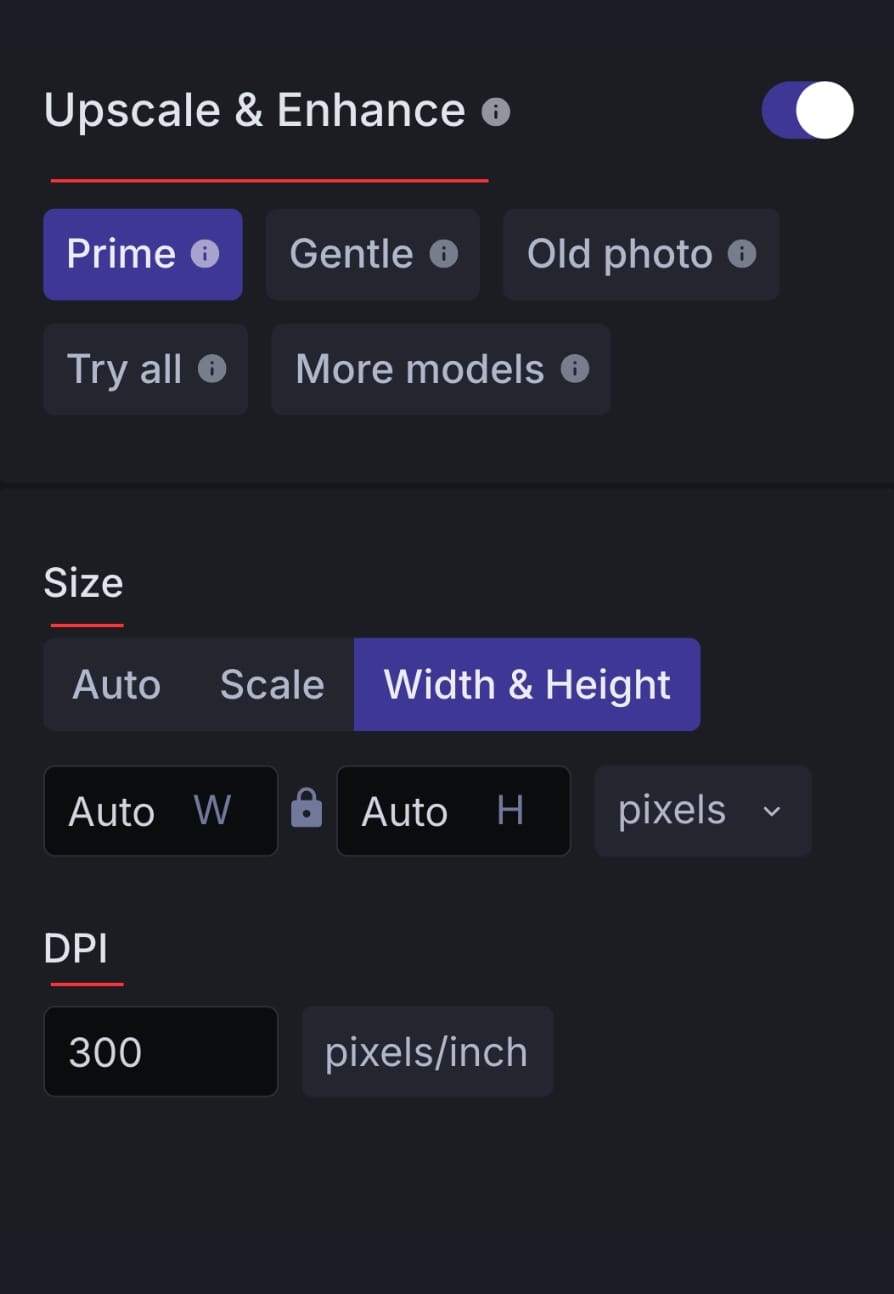
LetsEnhance.io offers 7 unique upscalers, each designed for specific image types and enhancement needs. All can increase resolution up to 16x or 512 megapixels.
- Prime: Most realistic upscaler. Best for portraits, food, text and fine textures.
- Gentle: Subtle enhancement for text-heavy images like product labels, maps, or posters.
- Balanced: Improves clarity and detail in everyday photos such as nature, architecture, and food.
- Strong: Fixes blur and improves faces, especially for small portraits.
- Ultra: Most transformative, offers superior quality and detail enhancement.
- Digital Art: Ideal for illustrations and anime. Preserves or reimagines based on creativity setting.
- Old Photo: Fixes scratches, fading, and damage. Adds realistic color to B&W photos.
You can customize the Resolution setting with any of the upscaler types.
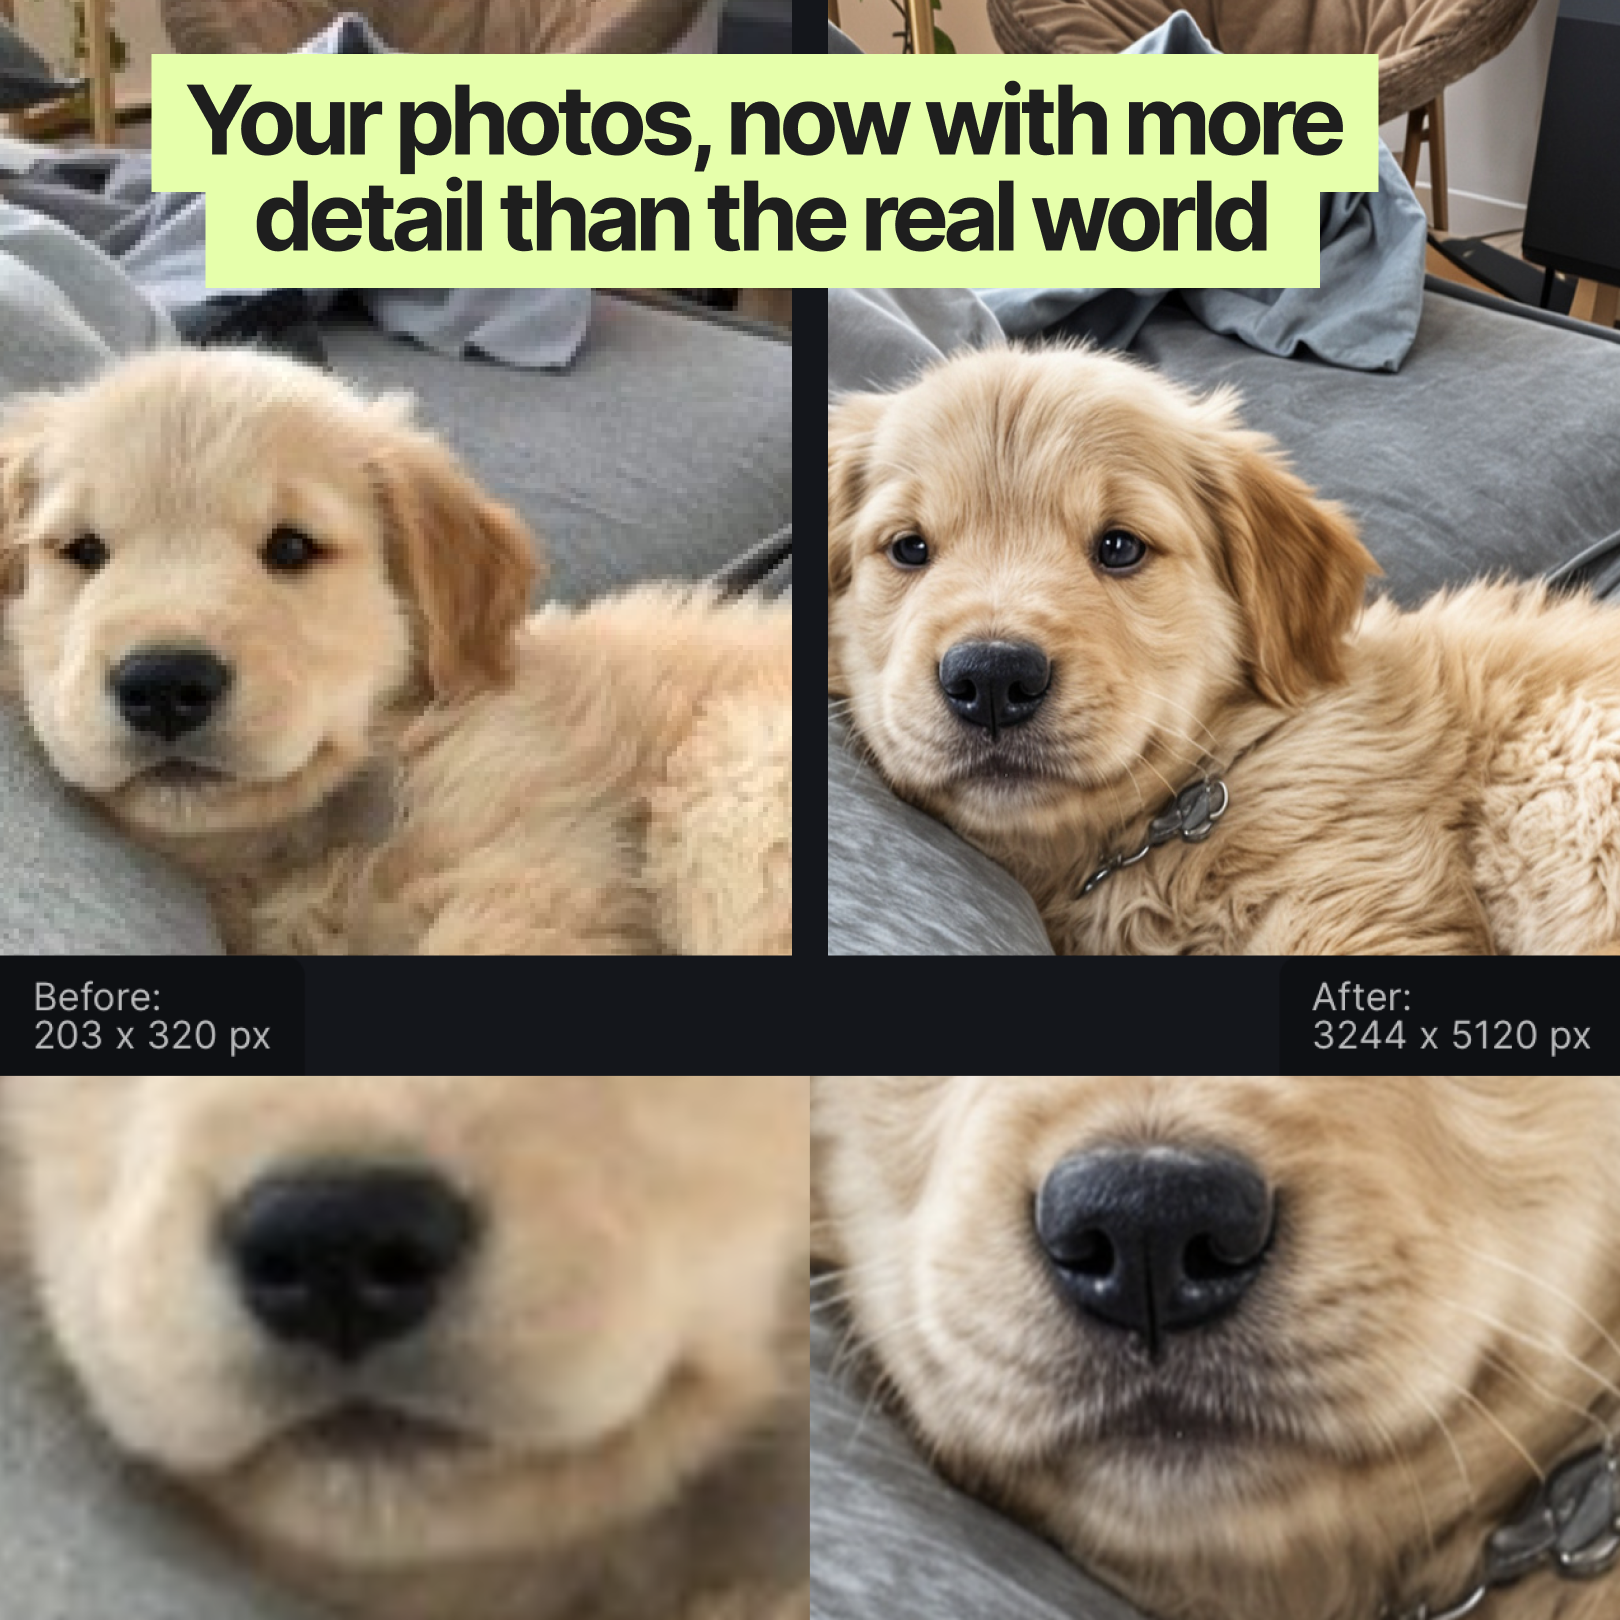
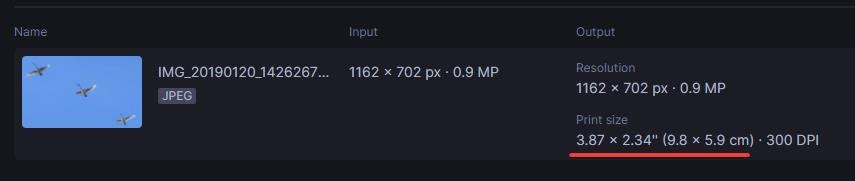
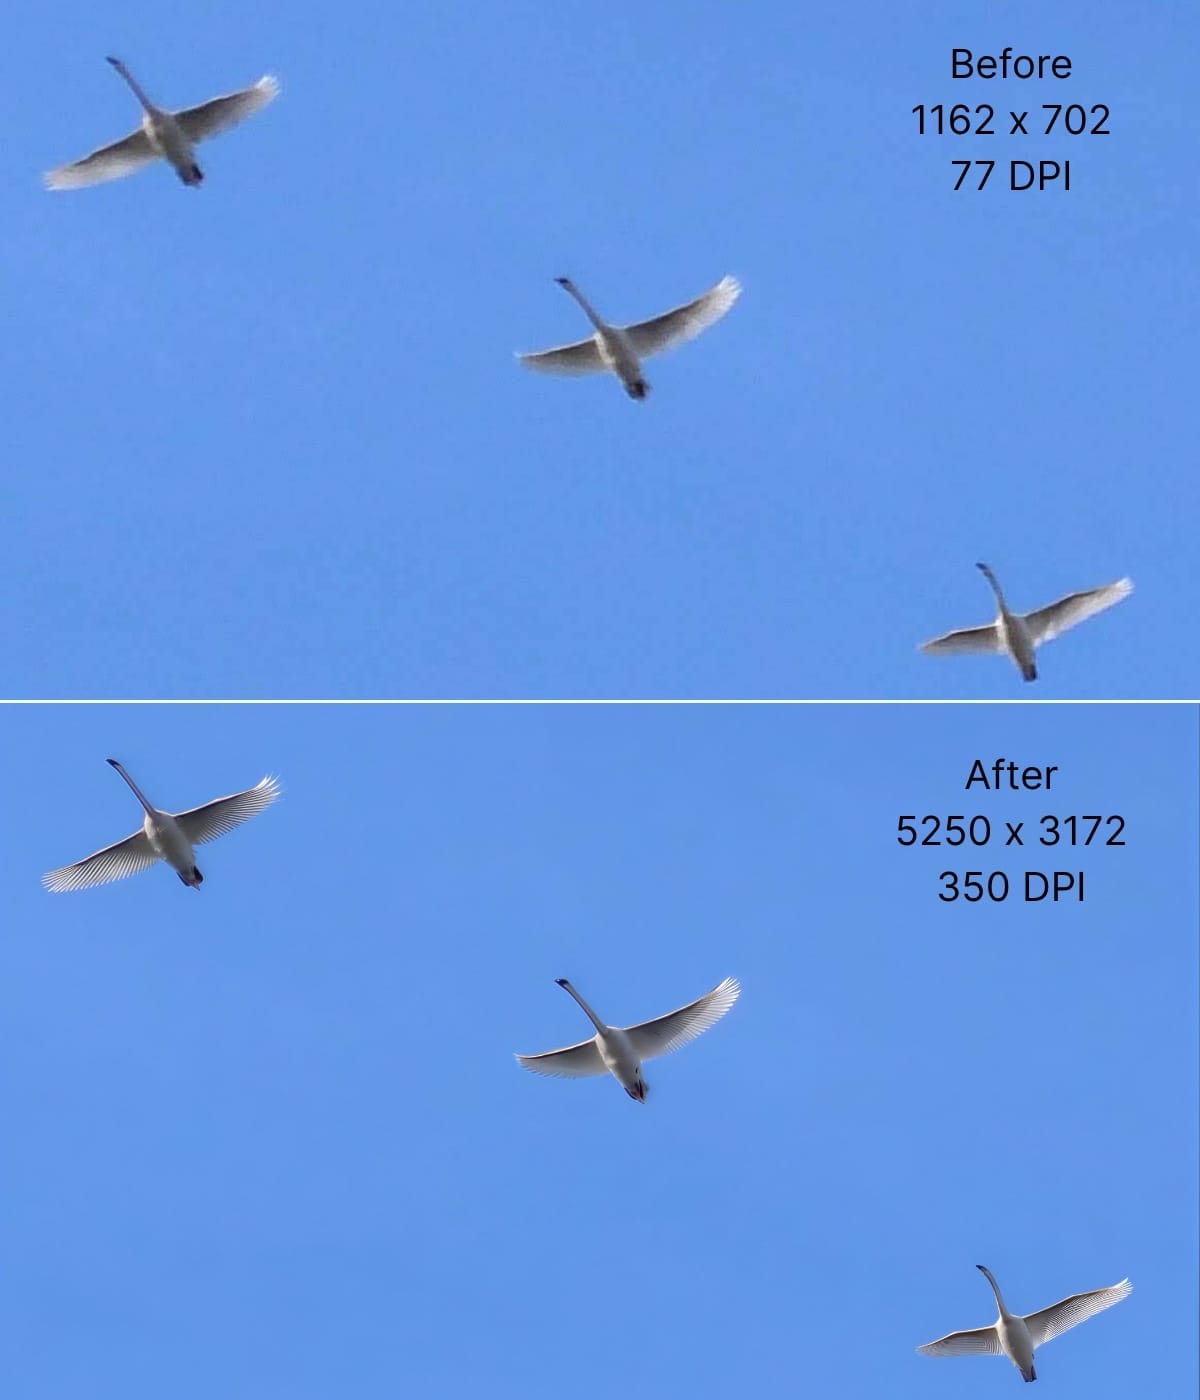
In the example below, we have an 1162 x 702 (0.9 MP) image that was cropped to zoom in the flying swangs.
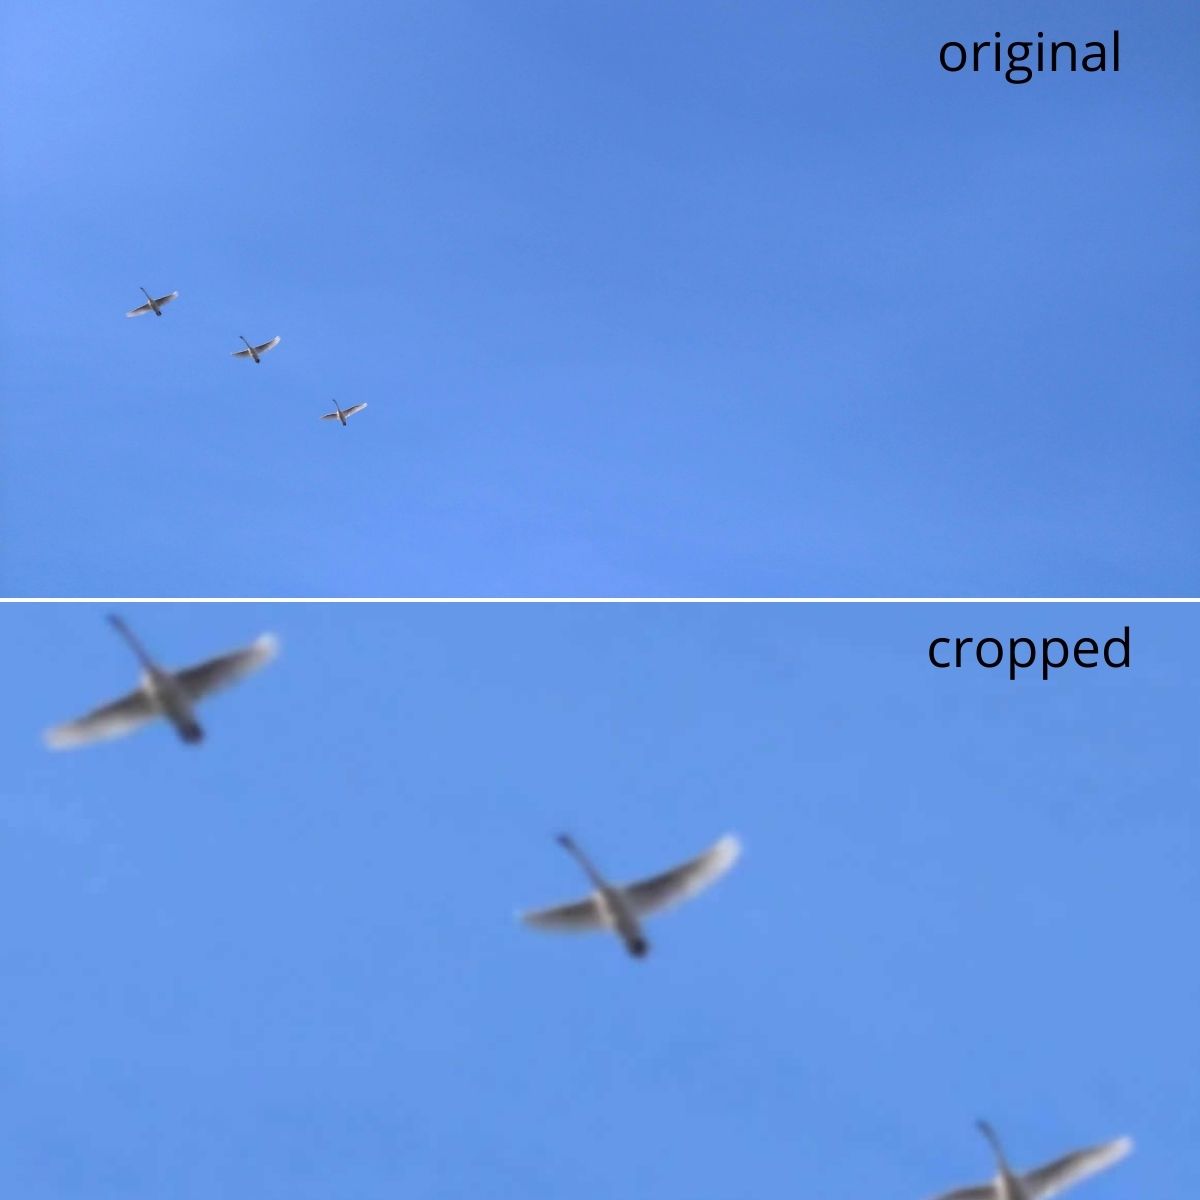
At 300 DPI, the print size of this 1162 x 702 cropped picture would be 3.87 x 2.34 inches.
With LetsEnhance, you can increase the resolution while keeping or increasing pixel density. This will allow you to print larger and crisper photos.
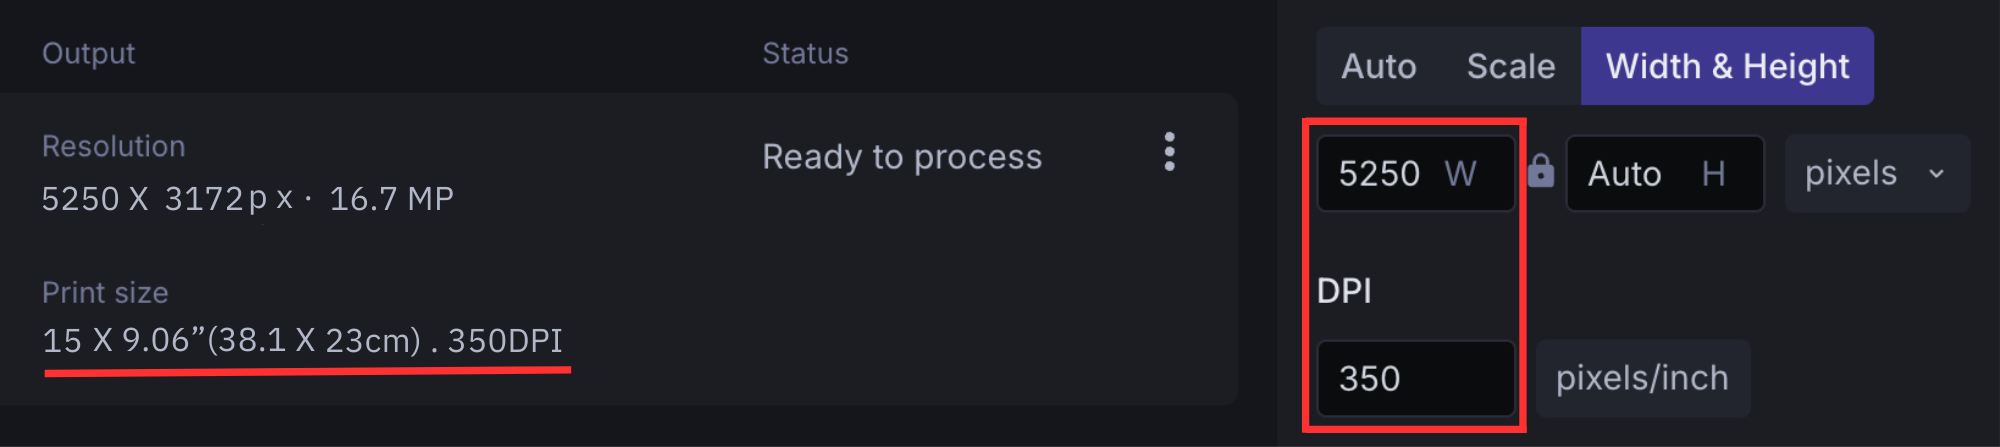
Click on the Width & Height tab on the Size sidebar and set the resolution.
Here, we set the larger side’s resolution to 5250 (the smaller side will be increased proportionally). It will allow us to print a 15 x 9.06” photo at 350 DPI.
Step 4. Start processing
Click the “Enhance” button and wait till the processing ends.

Step 5. Download your enhanced image
When your new file is ready, the thumbnail will turn from blurry to clear, and the download arrow button will appear.
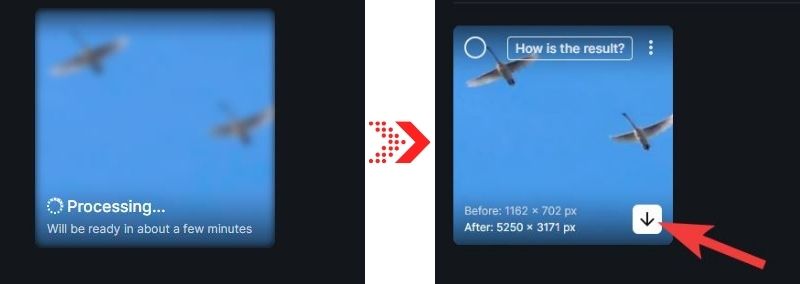
After the processing is finished, you can save the image to your device and check the result.
We’ll also store your enhanced photos on the cloud for 1 month for free, so you can go back to them easily.
Now, you can print that same file as a 15 x 9-inch photo at 350 DPI.
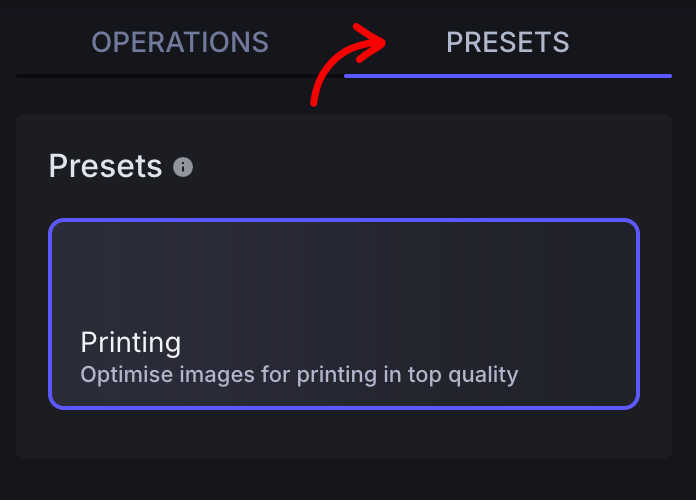
Don’t want to set the DPI and resolution manually? You can easily use our preset for printing.
Printing Presets
We have various ready-made presets for printing.
You can choose from popular standards for posters, photos, and international paper sizes from A5 to A0.
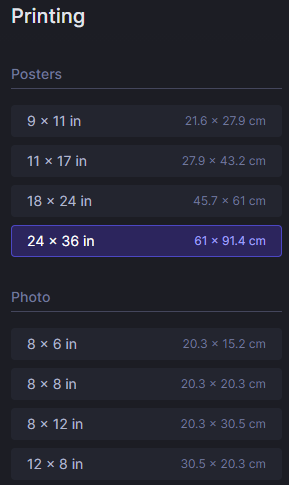
Our app will calculate and set the right resolution for the preset you choose at 300 DPI.
E. g., you want to print the file from the example above on an A4 paper. LetsEnhance will set the resolution to 5806 x 3508 and upscale your image to meet A4 dimensions.
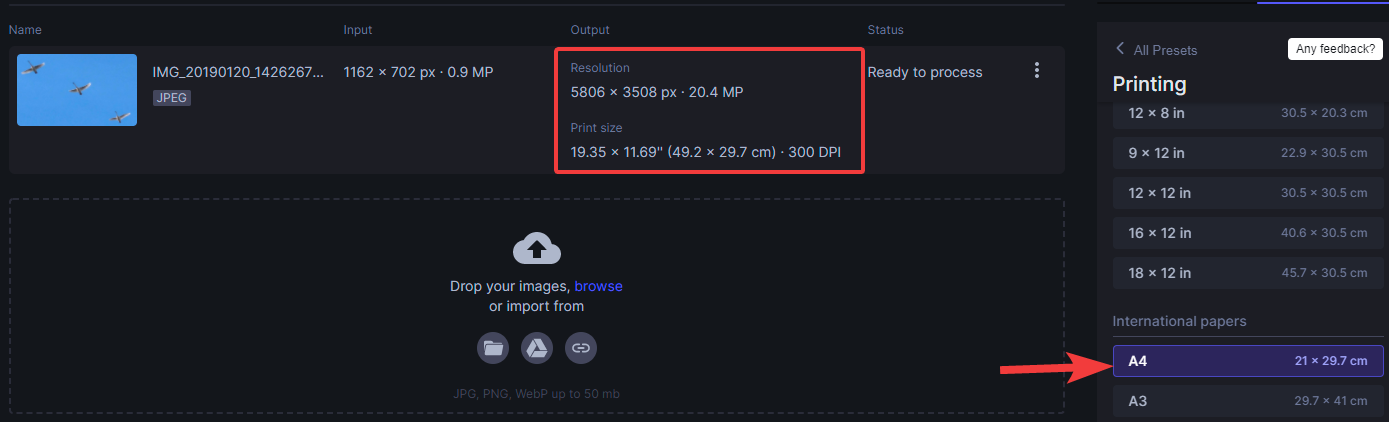
Image DPI metadata vs pixel density: What to increase?
DPI vs PPI vs image resolution:
- DPI (Dots er Inch): This refers to the number of ink dots a printer places within one inch of an image for print output.
- PPI (Pixels Per Inch): This relates to the pixel density of a digital image or screen display.
- Image resolution: This is the total number of pixels in an image, typically expressed as width x height (e.g., 1920 x 1080).
Note: DPI and PPI are often used interchangeably.
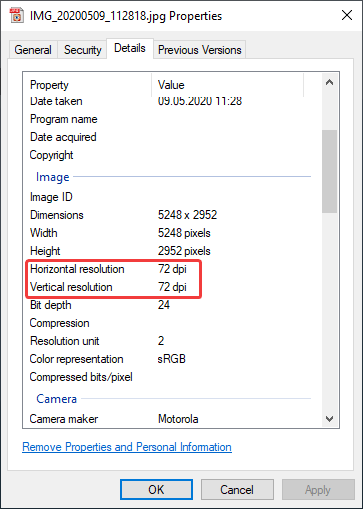
How to check the DPI metadata
You can check DPI by viewing image properties in almost any file manager or photo editor.
Windows 10
- Open File Explorer and go to your image folder.
- Right-click on the file and select Properties > Details.
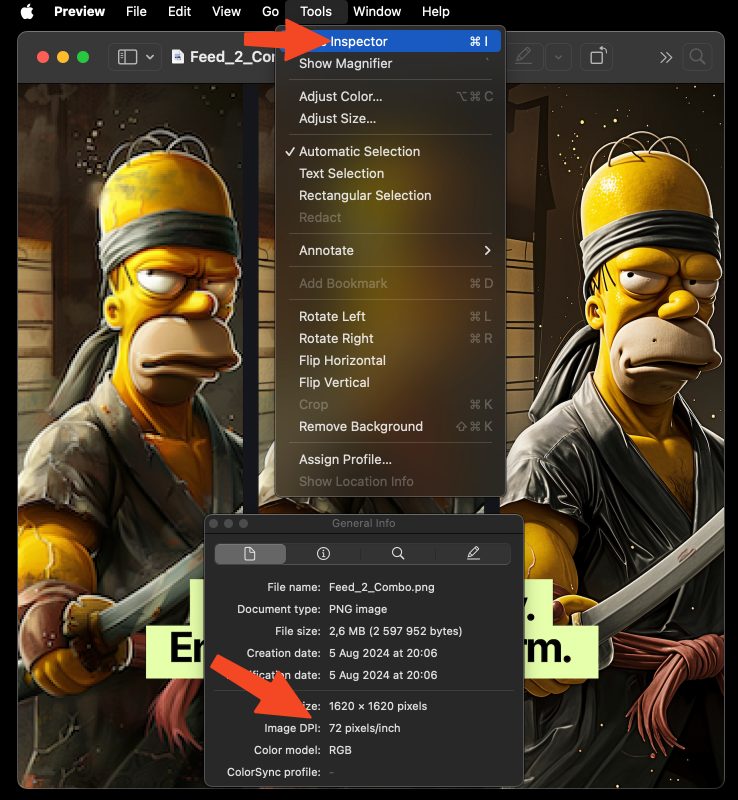
Mac
To check the DPI in macOS:
- Open Finder and go to your image location
- Right-click on the image and select Open with > Preview
- Click Tools > Show Inspector.
Do you need to change the DPI in photo metadata?

In most cases, you don't need to override the DPI metadata. Your printing software will calculate the DPI based on your source file's resolution when you choose the print size.
For example, a 1000 x 800 resolution image printed as a 10 x 8-inch photo will have 100 DPI, regardless of the metadata value. The same file printed as a 6 x 4 inch picture would have 167 DPI.
To increase DPI without reducing print size, you need to increase the image's resolution. For instance, to print a 1000 x 800 file as a 10 x 8 photo at 300 DPI, you'd need to increase the resolution to 3000 x 2400 pixels.
Having higher resolution in your source file allows you to cram more pixels in every inch of your photo. Hence, you’ll have a higher DPI.
Check how the print size changes depending on the resolution and DPI in the table below.
How to change the DPI in metadata
If you want to change the DPI metadata only, you can use almost any photo editing software:
- Free for Windows, Mac, and Linux: GIMP
- Paid for Windows, Mac: Photoshop
- Free online DPI converters
These tools override the DPI value in your file without affecting resolution or print quality.
How to change the DPI in GIMP
GIMP is a free photo editor for Windows, Mac, and Linux.
You can use it to change the DPI in EXIF metadata.
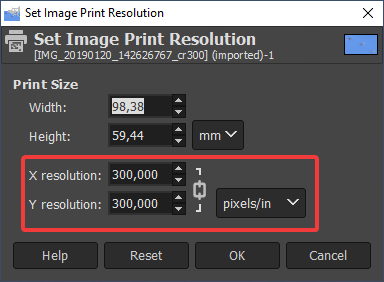
- Go to Image > Print Size
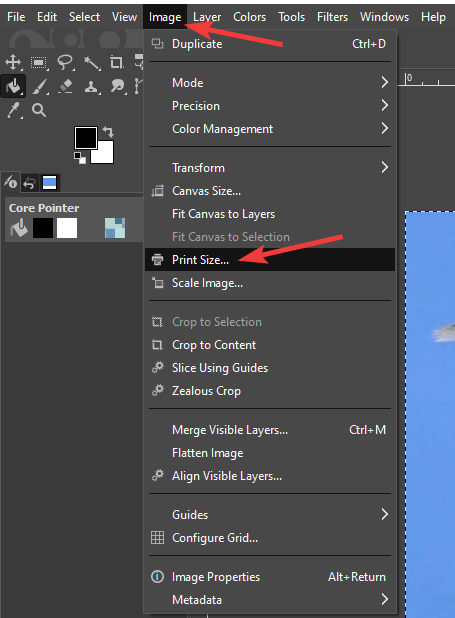
- Set your desired DPI value for X resolution. Y resolution changes automatically if you keep the Chain icon intact.
- Go to File >
- Save — to apply changes to the current file.
- Save As — to change the name of the file.
- Save a Copy — to make a new file.
How to change the DPI in Photoshop
1) Go to Image > Image size
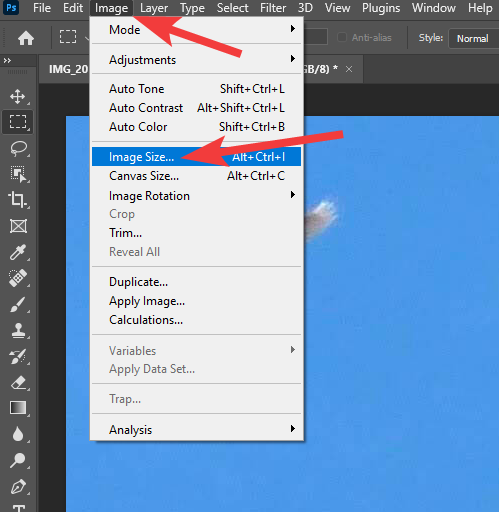
2) In the window that pops up, set the DPI you want in the “Resolution” field. And click OK.
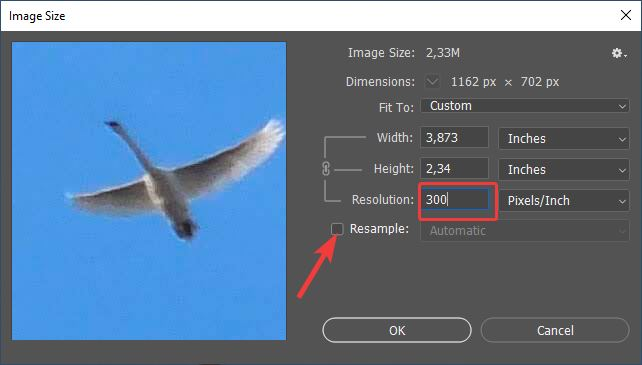
Make sure that
- Units are set to Pixels/Inch
- The resample box is unchecked. Otherwise, Photoshop will stretch your image or shrink it down to the new resolution and make it blurry.
- Go to File >
- Save — to apply changes to the current file.
- Save As — to make a new file in your preferred format.
Adobe introduced a better upscaling option called “Super Resolution”. We tested it side-by-side with LetsEnhance. Check out the results here.
How to change the DPI online for free
Note: this method overrides DPI property only and doesn’t improve image quality.
1) Go to https://convert.town/image-dpi
You can use any other similar website. They all work more or less in the same way.
2) Choose the desired DPI value.
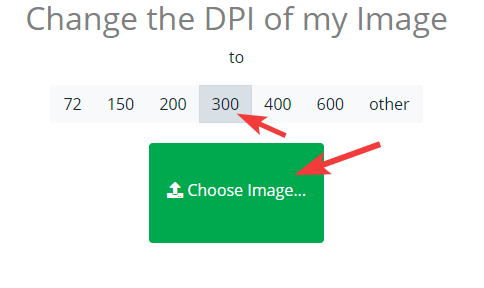
3) Click the "choose image" button.
4) Pick an image from your device.
This DPI converter supports JPEG, PNG, BMP, TIFF, and ICO.
5) The image with the new DPI value will be downloaded to your device in a few seconds.
You can also use this website to change the DPI on your iPhone or Android smartphone.
What to consider when choosing the DPI for printing
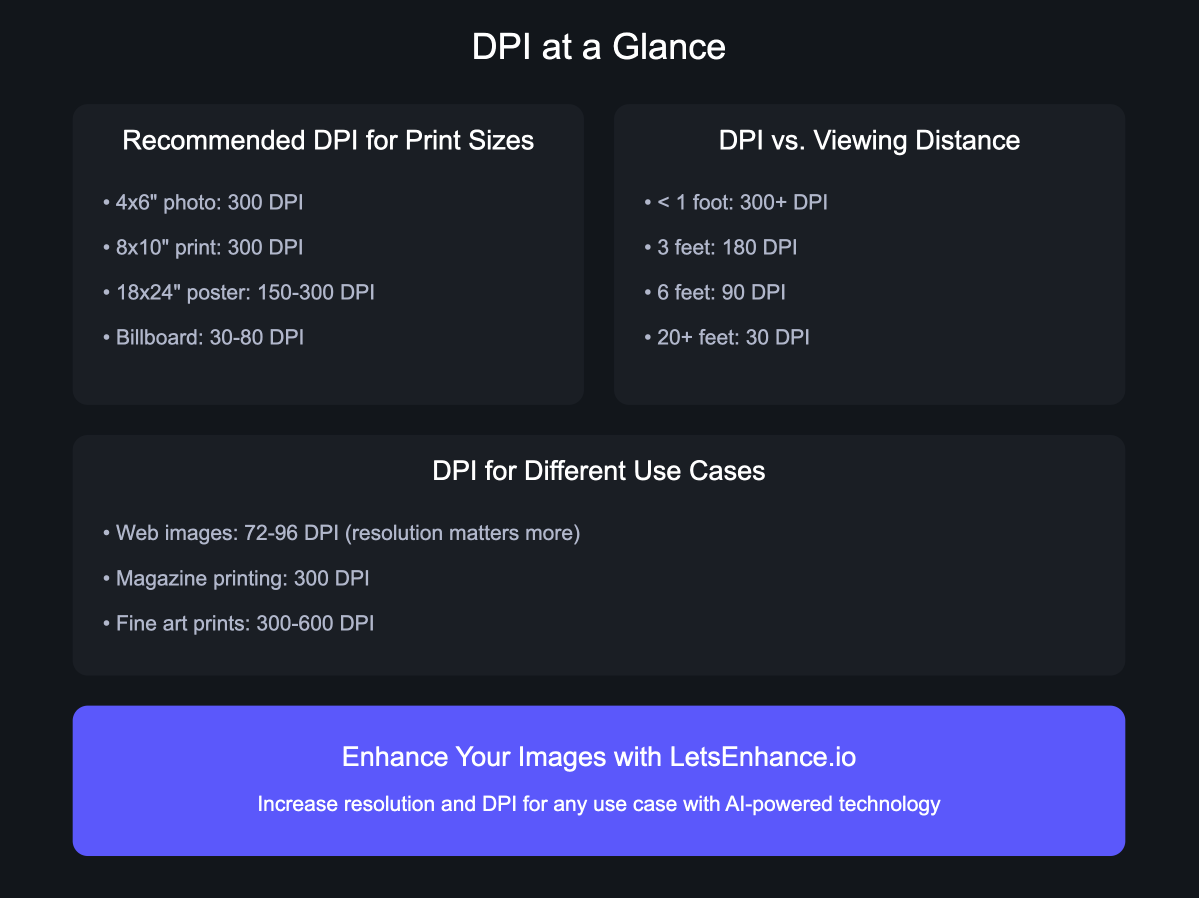
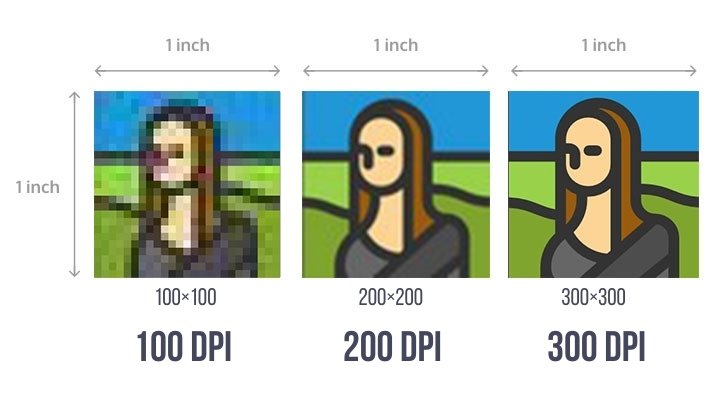
Generally, the higher the DPI, the better. Aim at 300 DPI or more when possible. But sometimes you can get away with smaller pixel density.
To estimate the minimal DPI consider 3 things: viewing distance, subject matter, and printing material.
Viewing distance
Use a cheat sheet below to estimate the minimum DPI based on expected viewing distance:
Viewing Distance and Minimum DPI
| Viewing Distance | Min DPI |
|---|---|
| less than 0.6m / 2ft | 300+ |
| 0.6m / 2ft | 300 |
| 1m / 3.3ft | 180 |
| 2m / 6.5ft | 90 |
| 5m / 16ft | 35 |
| 15m / 50ft | 12 |
| 50m / 160ft | 4 |
| 200m / 650ft | 1 |
The closer people will look at your photo, the more DPI you need to make it look crisp.
300–400 DPI is a good ballpark for photo books, flyers, brochures or other printed materials that people will look at closely.
But for posters or placards, even 100–200 DPI might be enough if viewers would look at them from a couple of feet away.
Yes, even 1 DPI can sometimes be OK. Think of a billboard that hangs a block away.
Subject matter
What’s depicted in your photo is also a factor. The more little detail your main object has, the higher DPI you need. For instance, trees can require more pixel density than skin.
Paper coating
The high-quality paper holds the ink better and allows for more detail. That’s why you can safely set the DPI to 300 or more for coated glossy paper.
And as for uncoated paper, there is no point in opting for more than 200–250 DPI.
FAQ
What is the difference between DPI and PPI?
The words DPI (Dots Per Inch) and PPI (Pixels Per Inch) are often used interchangeably. There is a technical difference, however.
PPI value shows how many pixels there’s on every inch of your screen OR in your source digital picture for print. DPI shows how many dots of ink the printer puts on one inch of paper.
Can I upscale multiple images at once with LetsEnhance?
Yes. LetsEnhance supports batch processing , so you can upscale and increase the DPI to 300+ for up to 20 images at once. Simply upload your images together and apply the same settings across the batch. This is especially useful for print runs, product catalogs, or any project involving multiple photos.
What is DPI in printers’ settings?
Generally, choosing the higher DPI in the printer settings increases photos’ quality but uses more ink and slows printing speed down.
Depending on the printer’s model, there could be different DPI settings. For instance, many HP printers have 4 DPI modes: Draft, Normal, Best, and MAX DPI.
Some brands allow you to choose the exact DPI, usually from 100 to 1000. But this is a simplified number, and it doesn’t directly correlate with pixels per inch.
The actual amount of dots is calculated by printers’ internal software.
Typical inkjet printers have ink of 4 colors. Digital images consist of pixels that can have at least 256 different colors.
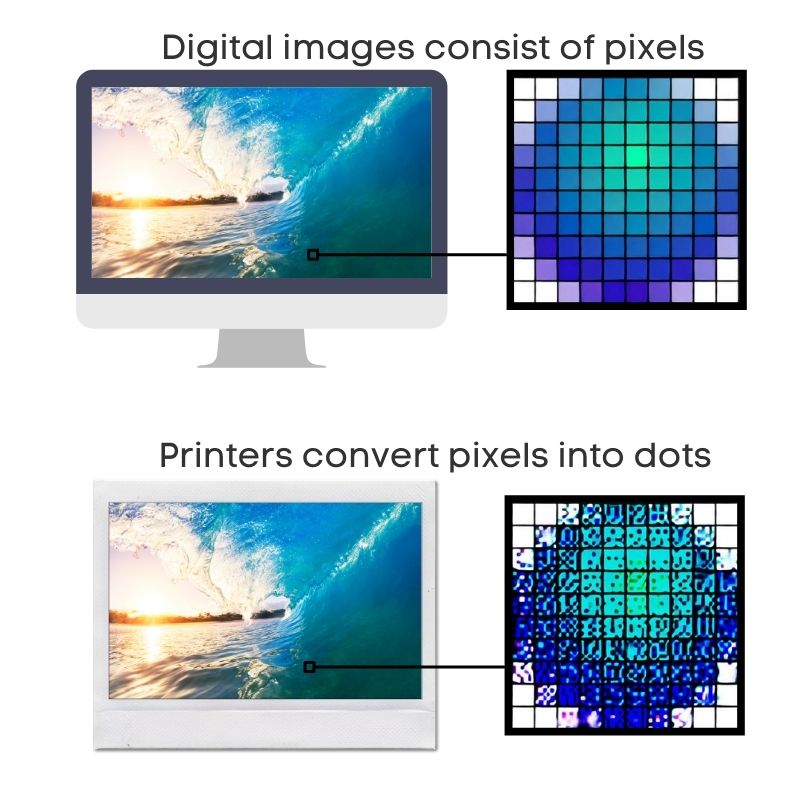
To compensate for the difference in color range, printers spray combinations of multiple dots to simulate how one pixel looks on a screen.
Is 72 DPI a high resolution?
72 and 96 DPI are just legacy numbers passed down from old industry standards. Although those values are often embedded in image files, they don't say anything about image quality. What matters is the total resolution of the image, i.e., its megapixels.
How to change DPI in Paint?
Unfortunately, MS Paint doesn’t have this option. But you can check the DPI in Paint by going to File > Properties.
Can I convert a 72 DPI image to 300 DPI?
Yes, but simply changing the DPI value won't add detail. You'll need to use upscaling tools to increase the actual resolution. For example, LetsEnhance offers 7 AI upscaling models, boosts DPI to 300+, and includes ready-to-use print presets.
Does DPI matter for images on websites?
Not directly. For web display, the pixel dimensions are more important than the DPI value.
How does increasing DPI affect file size?
Increasing DPI along with resolution will increase file size, as you're adding more data to the image.
