f you are reading this, you probably want to move from bulk printing to print on demand (POD). This article covers the steps that matter: picking a fulfillment model, understanding the common print methods, and getting your files to pass print checks.
The major part of all orders is usually about T-shirts and other apparel printing. So let's continue with the types of printing that you can use to suit all the needs.
But before we start, not that in POD, production is rarely the bottleneck. File quality is. A big share of “production issues” are actually low-resolution uploads, wrong sizing, or compressed images that looks fine on screen but fails in print.
The best type of printing for POD (and when to use it)
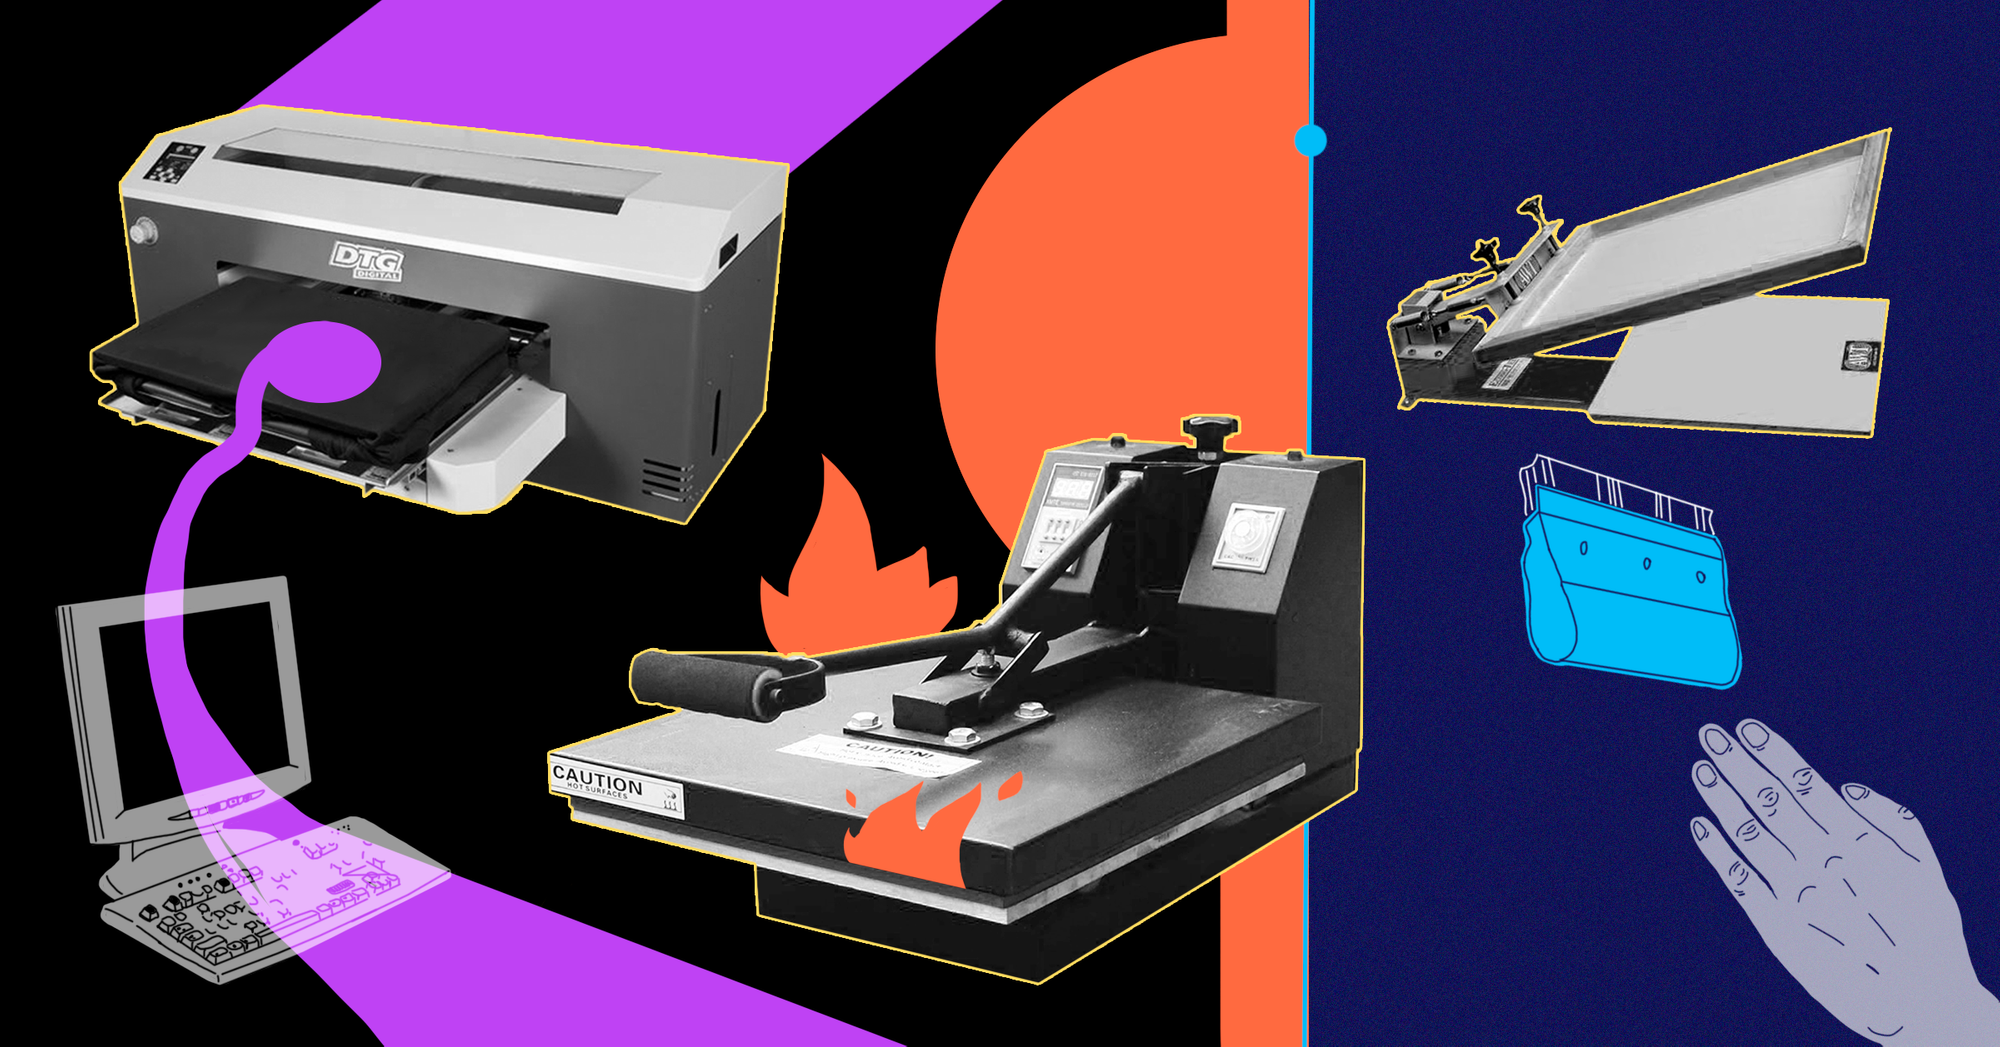
1. Direct-to-garment (DTG)
This is a technology that started back in 2005. A print head is applying water-based inks directly to a textile (the same as you do at home but on the paper).
Since it's a so-called digital printing, the print itself is sharper. Such technology gives you high quality and an ability to use any colour you want. It's also pretty fast and the whole process of prepping and printing take minutes. Comparing to the classic screen-printing where it takes hours and hours, you can get better speed on a small number of printed items and the whole variety of colours (since the screen-printing can offer you only 12).
The only one but huge disadvantage is a cost. The price of a machine starts from as low as $15'000 and might be as high as $80'000 for some top-level models. Ink's cartridges are also expensive, near $200 per one. From the other hand, you have awesome quality and speed.
P.S. “Printful” uses only this type of printing. And other big companies as well.
2. Heat printing
Using this technique the design is transferred by pressing vinyl stickers or ink onto the fabric with the help of heat. As you might think (and you're right), with this type is much easier to work with a few colours. In turn, you can produce a more complex design.
Heat printing is a good option because of its cost. Only for $150-300, you can get a really great machine. With that in mind, it has a few cons you need to be aware of. Colours will fade pretty fast, the design itself will crack after washing machine and you can't use textiles which is heat sensitive.
3. Screen-printing
Screen printing is an old but gold way to get the things done. Released in 1911, it's now one of the most popular ways to transfer a design into a textile. Because of the ink getting deep in a fabric, the design lives much longer than one transferred by heat printing.
So, a few good things about screen-printing: inks are cheaper, it is long-lasting, more types of inks. Also costs effectively for larger orders. If you need to print 100 T-shirts, using only two colours, the final price will be around $0.40-0.45.
By the way, for each colour you need a dedicated screen. Therefore it means you need around 15-25 press machines. The price per one is about $700-800. Yet there are some high-level machines like Riley 300 8 Color 6 Station Press with the price tag $6700. The bad thing though is the cost of set-up. To start you need to buy at least a few machines which lead to higher costs.
Whatever option you choose, don't forget about the washing test. It’s almost only the one way to test your inks or prints. Drop them into the washing machine for 30-45 minutes and repeat it 2-3 times in a row. If it’s still alive, you did a great job!
4) Direct-to-film (DTF)
DTF grew fast because it closes a gap: it handles more fabric types than DTG tends to like, while keeping detail high. The process prints a design onto PET film, applies adhesive powder, cures it, then heat-presses the transfer onto the garment.
It matters for POD because it works across many fabrics, including blends and some “DTG-hostile” materials. Plus, durable, detailed transfers without the “vinyl look." If you work with contract printers, you’ll see DTF offered more often, sometimes alongside DTG in hybrid production flows.

Choose your market and path
(are you all-in-one or a master of a tiny piece)
With all the stuff mentioned above, you are probably thinking to get to the nearest supplier and buy a few machines, right?
Before we continue, don't forget to read about other mistakes you can do launching your POD. Let's do the business properly from the very beginning, right?
It's definitely not the best way to make a business. There are lots of options you firstly need to think about.
- In what amount and where will you stock all your stuff?
- Have you already chosen what exactly apparel will you produce?
- Size? Colours?
So slow your roll.
Firstly, you face a dilemma to purchase equipment or to arrange a deal with an already established printer who will print on behalf. We highly recommend you to go with the on-demand fulfilment program over buying all the stuff. It will give you an opportunity to explore your niche and to concentrate solely on marketing strategy (what a perfect option for beginner to start with).
For example, dropshipping is the biggest driver of the printing industry these days. Due to the Forester Research near 34% of items sold by Amazon were done with the help of it. And the number of dropshipping customers is growing. Printful as one of the market's leaders reported they got 275'000 new users with $30 as an average order value at the begging of 2018. And we didn't even mention the number of orders they completed.
There are a lot of companies which can help you to test and confirm your ideas by providing the same printing on-demand things. So yes, it means you will be a broker. But it's just for a short-term run. As far as you will see the demand in your niche, you can jump to the next steps.
By the way, companies like Printful and Printify give you 5-10% commission fee for the next 9-12 months. And it's a good deal. Here is why - the market is crowded. There a lot of companies trying to catch the wave. So building another one with a multi-purpose ‘to do everything for everyone’ is not the optimal way. Instead of that, think about the tiny market.
Let’s take a look at the difference between providing all-in-one services and being focused on something not big. For example, you're a surfer from California who wants to print some branded stuff for his school, which one will you choose?
- ‘We can print everything’
Or
- ‘We can print the best-branded t-shirts for extreme sports’
I bet the second one will bring you more money at the end of the day. It’s all about your choice to become the best company in the specific industry or just another "fortune-500000" player.
The hardest part is to select the perfect market. Another hard part is to be quick and flexible enough to react to market trends. If there is a growing demand from drop shippers side, so there is a need in someone from the suppliers' side. The best strategy to launch your new product and to be the ONE, right?
And also don’t forget about the sweet specific adding to your strategy. Your secret sauce, a piece of magic. What about these two?
Go digital!
Can you build a better website, with a clear design and awesome user experience? Just take a look around. Almost 90% of all printing companies don't know how to work in the digital era. And it might your turn to show them how the best digital presence looks like.
“Go digital” also means “reduce manual file issues.” If customers can upload anything, they will. Your upload flow needs guardrails: recommended sizes, file checks, and a path to fix low-quality images before they hit production. You can use AI tools like LetsEnhance, to upscale and enhance low-quality files up to 16x.
Service is the new black
– Do you have some extra services you can offer?
The best delivery? Working 24/7? Offering free test samples? Imagine how the big company with 15'000 employees will compete you in the 24/7 mode? How much money they need to burn. Exactly, they can't do it. It's my favourite path because none of the biggest companies in the world can't provide the same service as a smaller one.
Print file quality: the quiet limiter in POD
Most POD sellers eventually learn this: your conversion rate and refund rate are tied to file quality. Here is the simple math behind “300 DPI”:
- DPI is “dots per inch” at print size.
- To print cleanly, you need enough pixels for the size you sell.
- Example: if your print area is 12 x 16 inches and you want 300 DPI, you need 3600 x 4800 pixels.
Common problems:
- Customers upload a 1000 px wide screenshot and expect a back print.
- Logos get pulled from social media and are heavily compressed.
- The file metadata says “300 DPI,” but the pixel dimensions are still too small.
What equipments do I need to start a POD?
Are you still on the path of buying all the stuff by yourself? Ok, brave human being, so there is a list you should buy. Of course, it depends on the selected printing technique, but there are tools in common you are for sure need.
Here you are:
- Manual press (I believe you have one already).
- Wide format printer for dark transparency
- Waterproof film
- inks (plastisol or water base)
- A couple of squeegees
- Plane items (bags, t-shirts, coups, etc)
- Dryer machine
- Flash dryer machine for under base works
- Screens (at least 6 items)
The software side of PODs
A perfect way to finish is by mentioning some integrations you need to support and software you would better use.
With software the deal is done. We gathered for you here all TOP-software that will make your journey into printing much easier. Just click here to check:
But what about integrations?
You will go to the digital world.
You're going to work with tech-savvy people.
Where they will sell their goods? The answer is easy: Amazon, eBay, Pinterest, own stores powered by Shopify, WooCommerce, and BigCommerce.
It doesn't mean you need to support all of them from the very first day.
But take a look at Printful again. The main goal of them isn't just printing. They are helping people to get started as soon as possible and let them focus on marketing and sales while Printful takes all the "dirty work" by printing, shipment and so on.
In this case, integrations might be a short-term winning strategy to get customers.
Moreover, there are some strong communities around each of these platforms and the chance you will get the word-of-mouth effect is pretty high. Adding these platforms one-by-one will give an opportunity to run co-marketing campaigns which will, again, help you in winning your loyal customers.
Why AI enhancement matters for POD
The advantages of AI enhancement for POD go beyond making artwork “fancier.” It is about reducing avoidable failure such as fewer rejected uploads, fewer manual edits and fewer refunds tied to blurry prints.
AI enhancement tools like LetsEnhance are useful when a customer design is almost usable, but not print-ready. Typical use cases:
- Upscale small images so they can be printed at realistic sizes (not by changing metadata, but by increasing actual resolution).
- Clean compression artifacts and sharpen edges so prints look less “muddy.”
- Prepare assets for print targets like 300 DPI by generating outputs with enough pixels for the final dimensions.
If you run POD at scale, this can be built into the upload flow. You can use LetsEnhance on-demand (manual) or via API for automation, depending on your setup.
FAQ
What resolution do I need for print on demand (is 300 DPI required)?
Most POD platforms recommend 300 DPI for PNG/JPEG uploads, but some large-format products accept 120–150 DPI because the print area is bigger and viewed from farther away. Always check the product’s specific print area requirements.
How many pixels do I need for a t-shirt design?
Use this rule: pixels = inches × DPI. If your print area is 12 × 16 in and you target 300 DPI, you need 3600 × 4800 px. If you scale a smaller image up in a design tool, your effective DPI drops and the print gets soft.
Why does my file say “300 DPI” but still fails a POD quality check?
Because DPI metadata does not create detail. POD quality is driven by the actual pixels and the original pixel quality (sharp edges, low compression, clean source). Platforms explicitly warn that “300 DPI” alone does not guarantee quality.
What’s the best file format for print on demand (PNG vs JPG vs SVG)?
For apparel prints, PNG is the default because it supports transparent backgrounds and preserves edges better than typical JPEG exports. JPEG is fine for photos, but it is not ideal for logos, text, or transparency. Some platforms also accept SVG with file size limits.
Do I need a transparent background for POD designs?
If your design is text, a logo, or any cut-out shape, yes. A non-transparent background often prints as a solid box. That is why most POD workflows push PNG for apparel graphics.
Should I design in RGB or CMYK for POD printing?
Most POD upload flows are built around RGB files (often sRGB). The printer or fulfillment partner handles conversion in production. The practical move is to export clean artwork, avoid extreme neon colors, and order test prints for any color-critical products. [added]
What is “bleed” and do I need it for POD?
Bleed is extra image area beyond the final cut edge, used to avoid white borders after trimming. It matters more for posters, stickers, and paper products than for standard DTG t-shirts. If your product template shows a bleed zone, fill it.
DTG vs DTF vs screen printing: which is best for POD sellers?
- DTG is strong for detailed, full-color artwork and true on-demand runs with minimal setup.
- DTF is popular because it works across more fabric types and behaves like a transfer.
- Screen printing wins on unit cost at higher volumes with limited spot colors.
How do I fix a low-resolution image for print on demand?
Best option is always to find a higher-quality source. If that’s not possible, you can either print smaller (to increase effective DPI) or use an AI upscaler like LetsEnhance to create a higher-resolution working file. Printful explicitly frames these as the typical options when a file is too small.
