Upscaling a low-resolution photo with AI can transform it, adding detail, sharpness, and clarity that weren’t visible before. But with so many tools claiming “magic” super resolution, which one is the best AI image upscaler for your needs?
We tested 4 major portrait upscaling solutions side by side on two images: LetsEnhance, Magnific AI, Adobe Photoshop Generative Upscale, and Lightroom Super Resolution.
Enlarging a high-resolution image
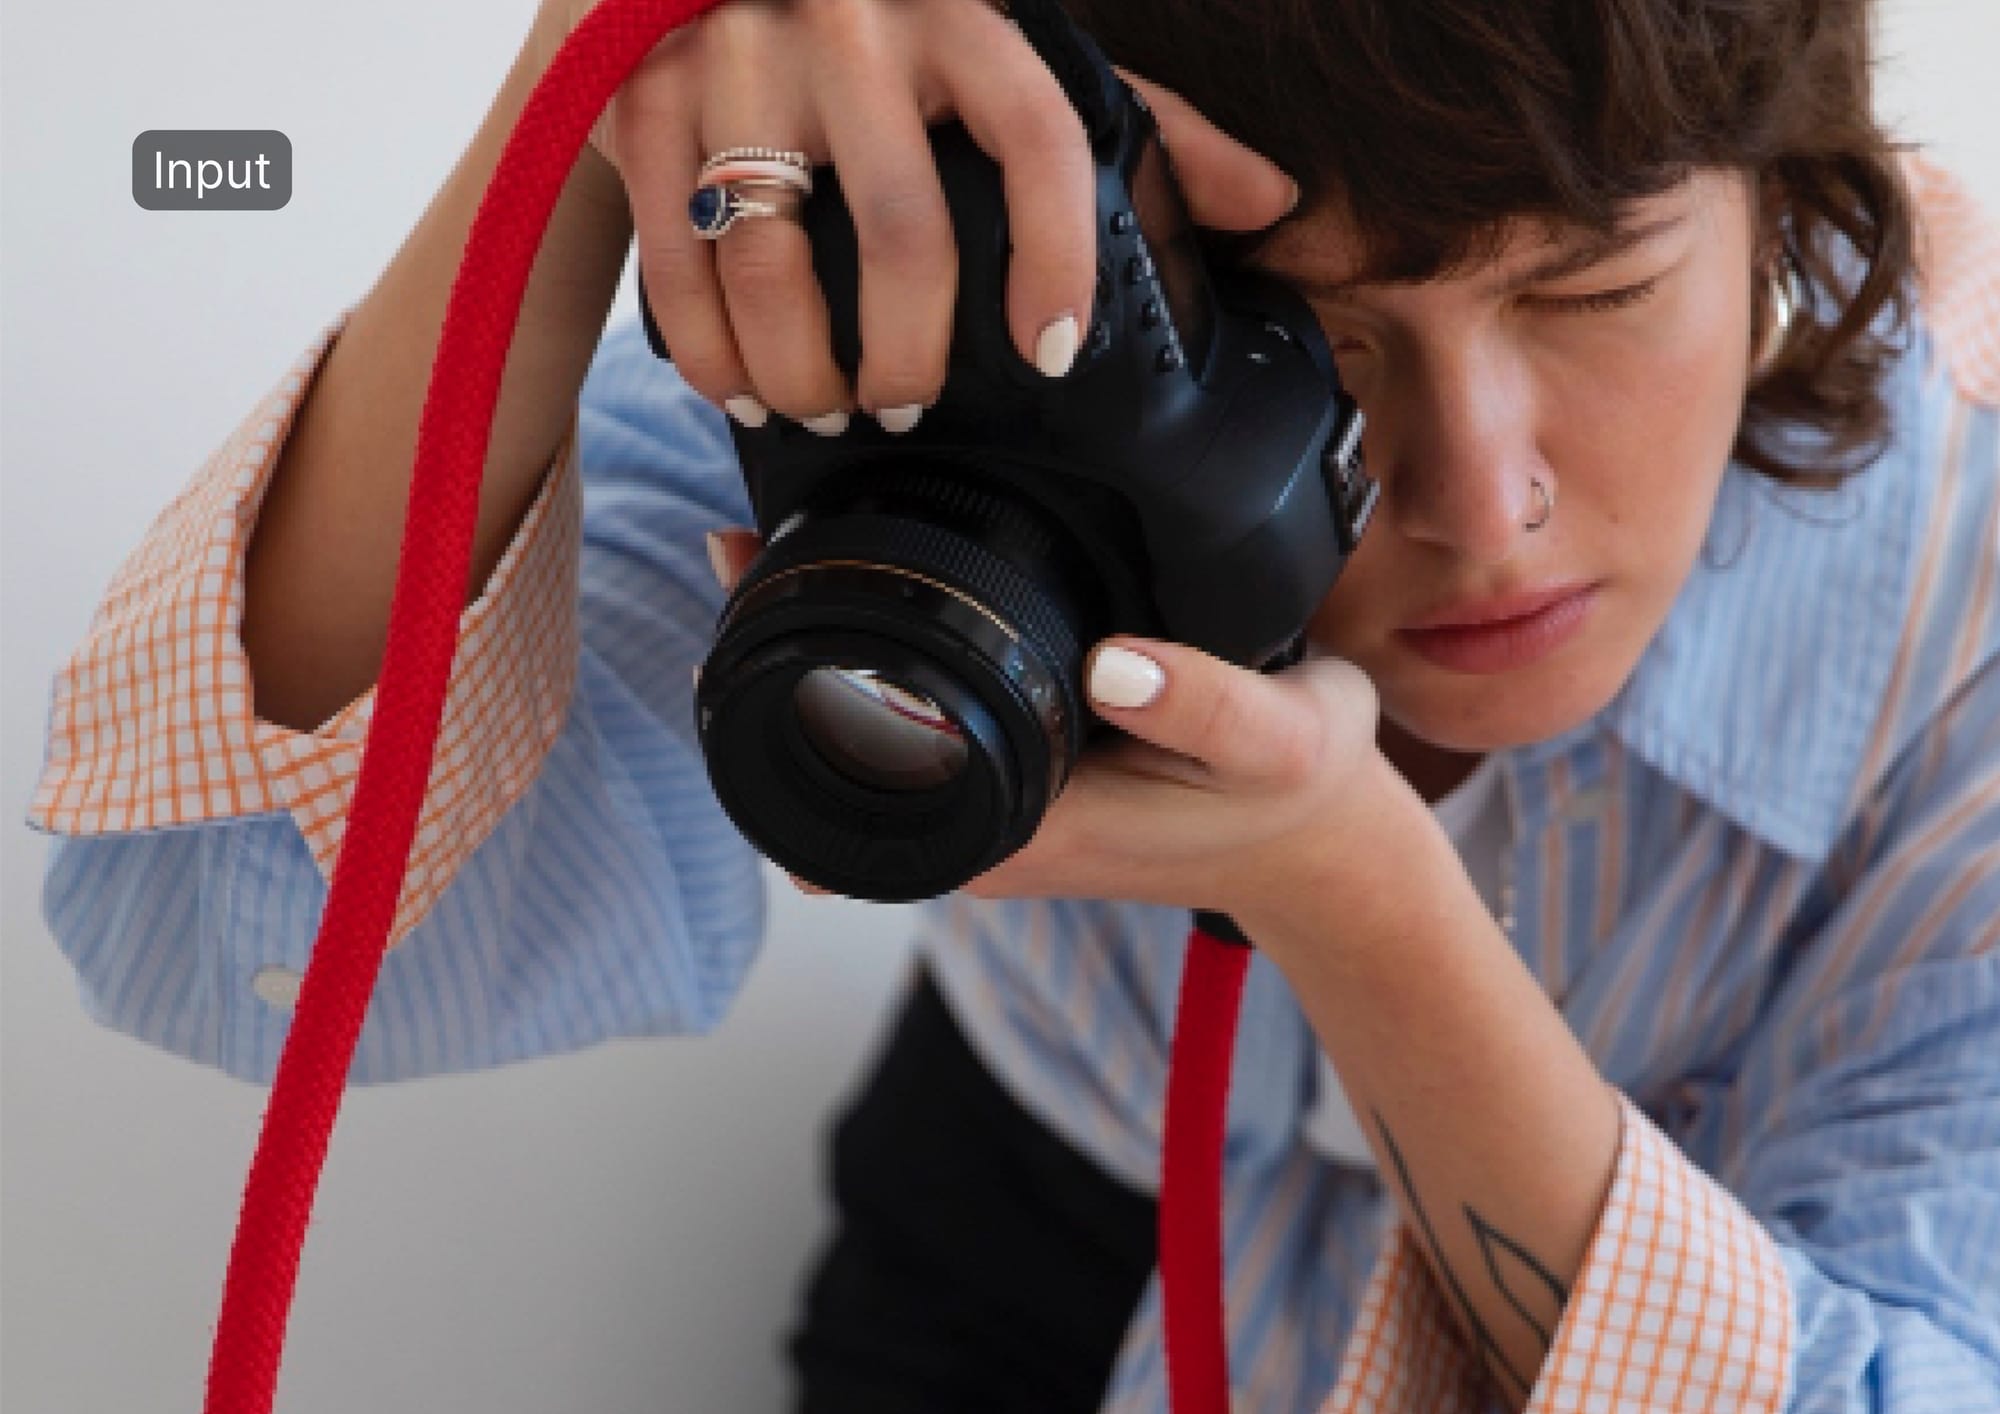
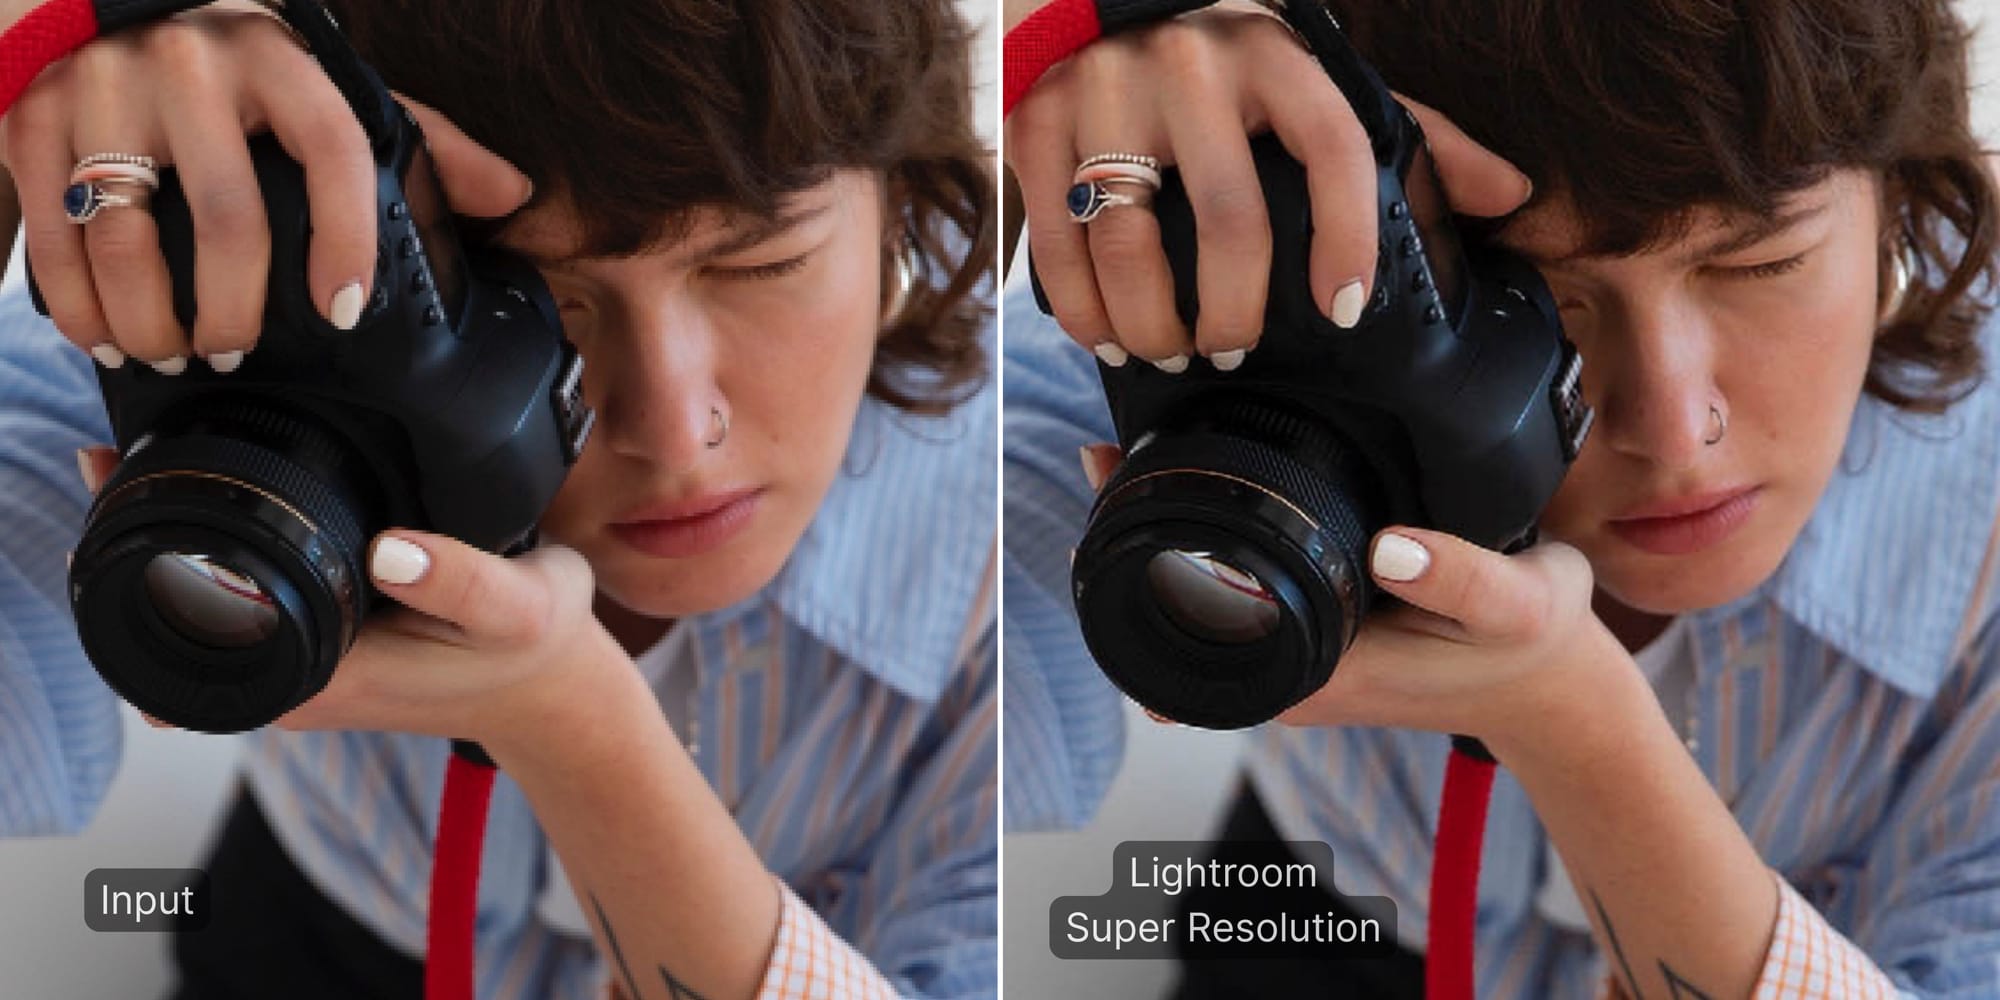
Our first test image is a portrait of a person holding a camera, containing many fine details, such as fabric texture, jewelry, facial features, and camera gear. Even though it’s up to 5000px, the original photo appears soft and slightly pixelated at 100% view: the shirt’s subtle pattern and the textural details on the camera and jewelry are blurred. This provides a challenging low-detail baseline to evaluate how each AI upscaler can add clarity.
These elements let us evaluate each tool’s quality boost, exploring added sharpness and detail, and fidelity to the original, discussing faithfulness to the source without artifacts or distortion. Now, let’s dive into the side-by-side comparisons.
LetsEnhance
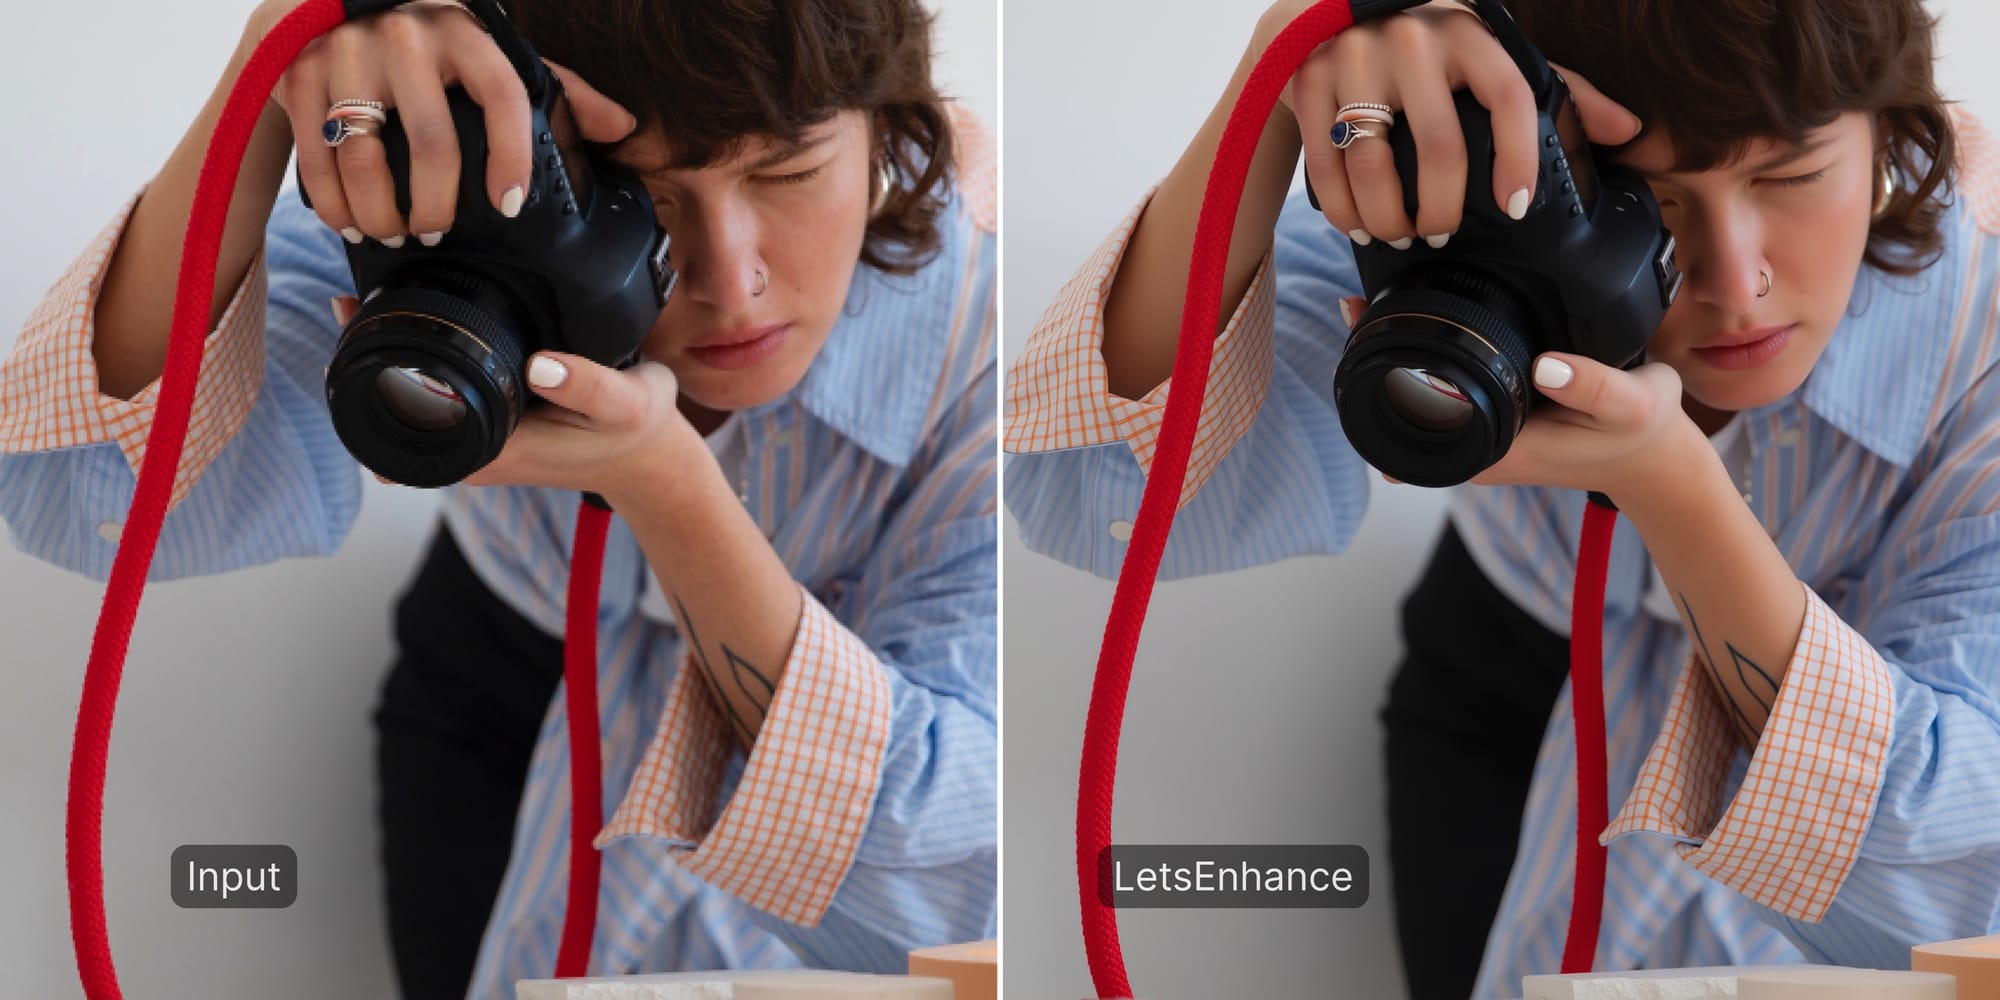
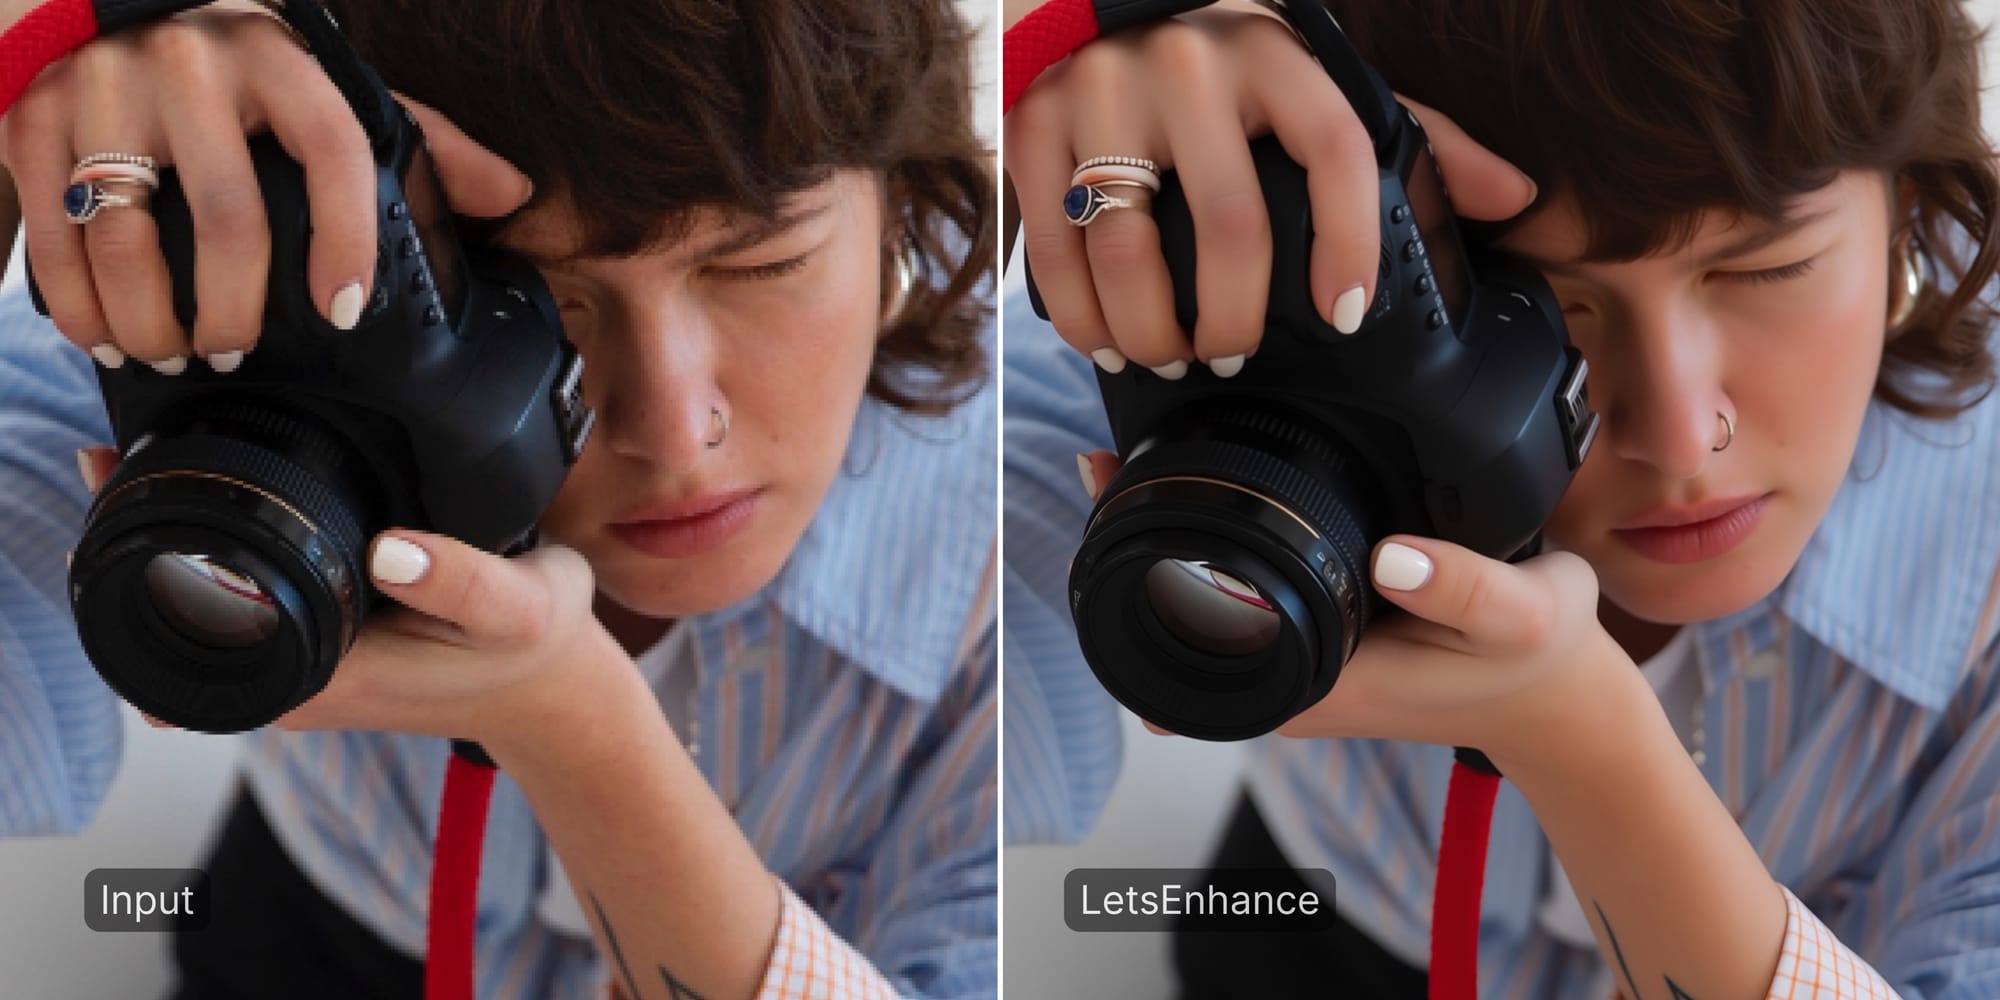
LetsEnhance adds a noticeable and very natural jump in clarity. Fine textures snap into focus: individual hair strands separate cleanly, the shirt’s weave reads crisply, and the camera grip shows believable texture. The whole image feels as if it were shot at a higher resolution, without the harsh halos or crunchy oversharpening you sometimes see elsewhere. In our photo, the checkered cuff and the ring’s gemstone have clean, well-defined edges, and small highlights (like eye catchlights) look refined rather than exaggerated.
LetsEnhance’s Ultra model clearly “fills in” missing micro-detail intelligently, so the upgrade feels significant yet lifelike. In fact, in a similar comparison test, LetsEnhance produced the most detail in a portrait, with crisp hair and facial features that surpassed other results in fine texture recovery.
Just as important, the upscale stays true to the source. Facial features, skin tone, and expression are unchanged, only clearer. There are no odd artifacts or AI quirks: eyes, nose, and mouth keep their character; skin retains realistic pores and fine lines (no waxy look); colors and fabric patterns remain accurate, only sharper. Noise reduction is handled with a light touch, cleaning up grain without erasing real detail, and the model doesn’t invent objects or stray hairs that weren’t there.
Bottom line: this photo comes out high-resolution, polished, and still unmistakably genuine. If you want maximum detail with minimal artifacts, LetsEnhance delivers one of the strongest high-fidelity boosts we’ve seen.
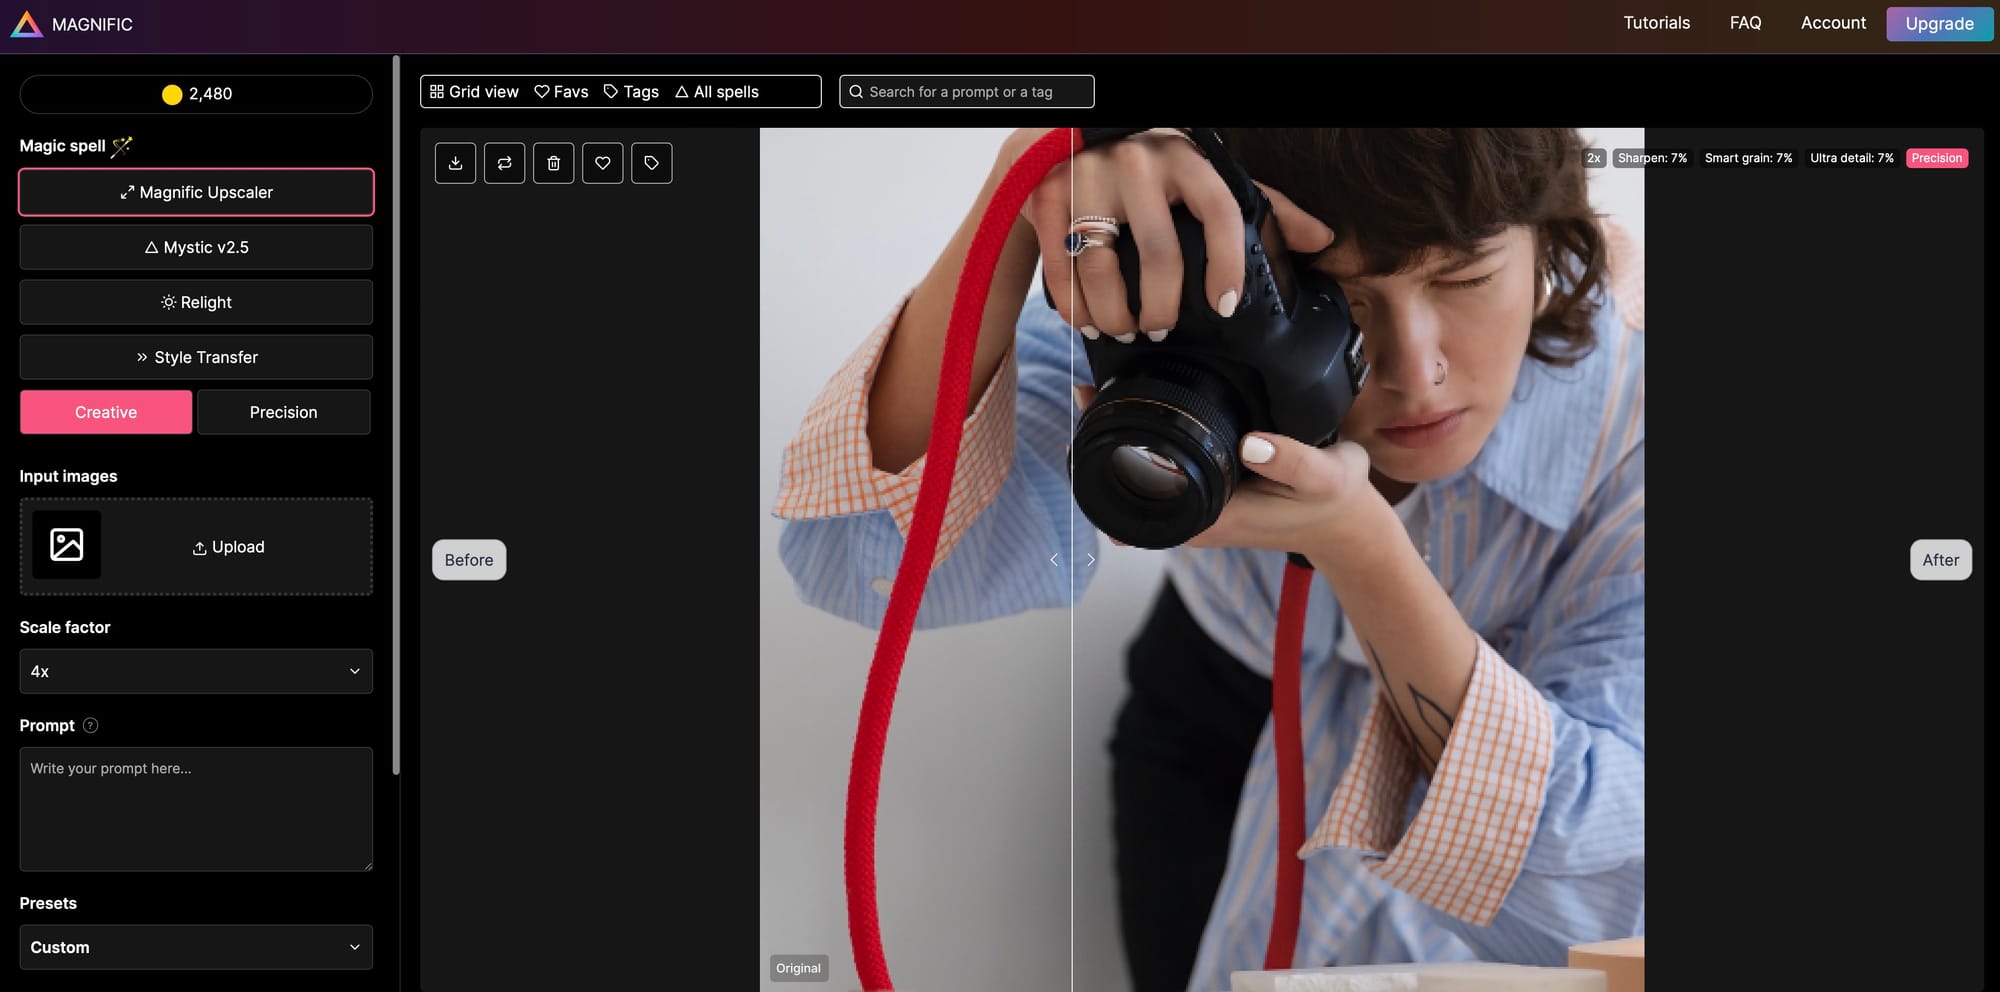
Magnific AI
Magnific AI gives this photo a clear lift in clarity. Soft edges snap into focus: the red camera strap and the ring look clean and well-defined, and micro-textures come forward. You can see the weave in the blue shirt and the checkered cuff more clearly, and individual hair strands separate instead of clumping. Even small elements like the lens rim and fingernails gain definition. Crucially, the tool enhances real detail rather than just cranking up sharpening across the whole frame.
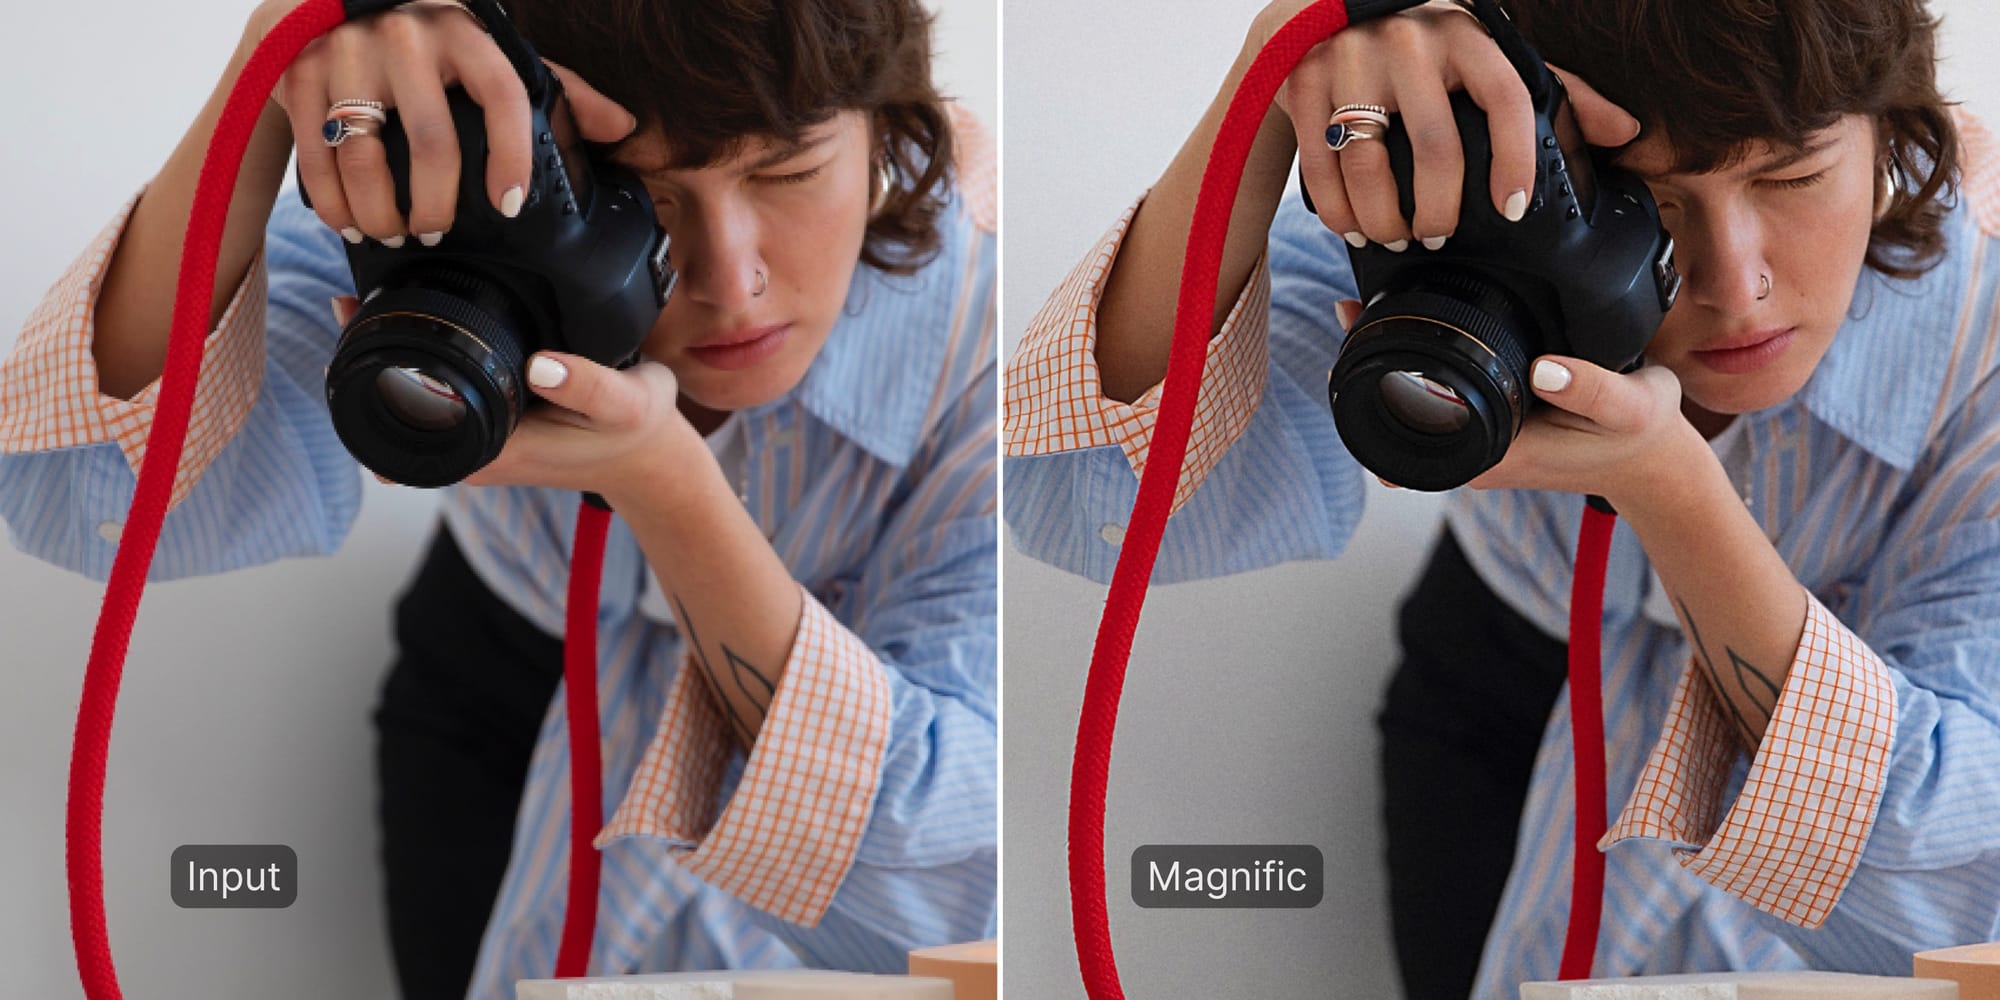
The upscale stays true to the source. The subject’s face, pose, and accessories are unchanged, just rendered with finer detail. We don’t see invented objects or AI oddities; the nose piercing, tattoo, and rings match the original, only clearer. Color and lighting remain consistent as well, so skin tones, fabric hues, and the bright red strap feel accurate. In short, Magnific refines what’s there without introducing artifacts or distortions.
The final image still looks like a genuine photograph, not a painted or plastic version of one. Skin retains a natural texture, hair detail feels plausible, and the fabric reads as real cloth. Depth of field is respected: background and foreground blur aren’t aggressively sharpened, so the image keeps its original optical character.
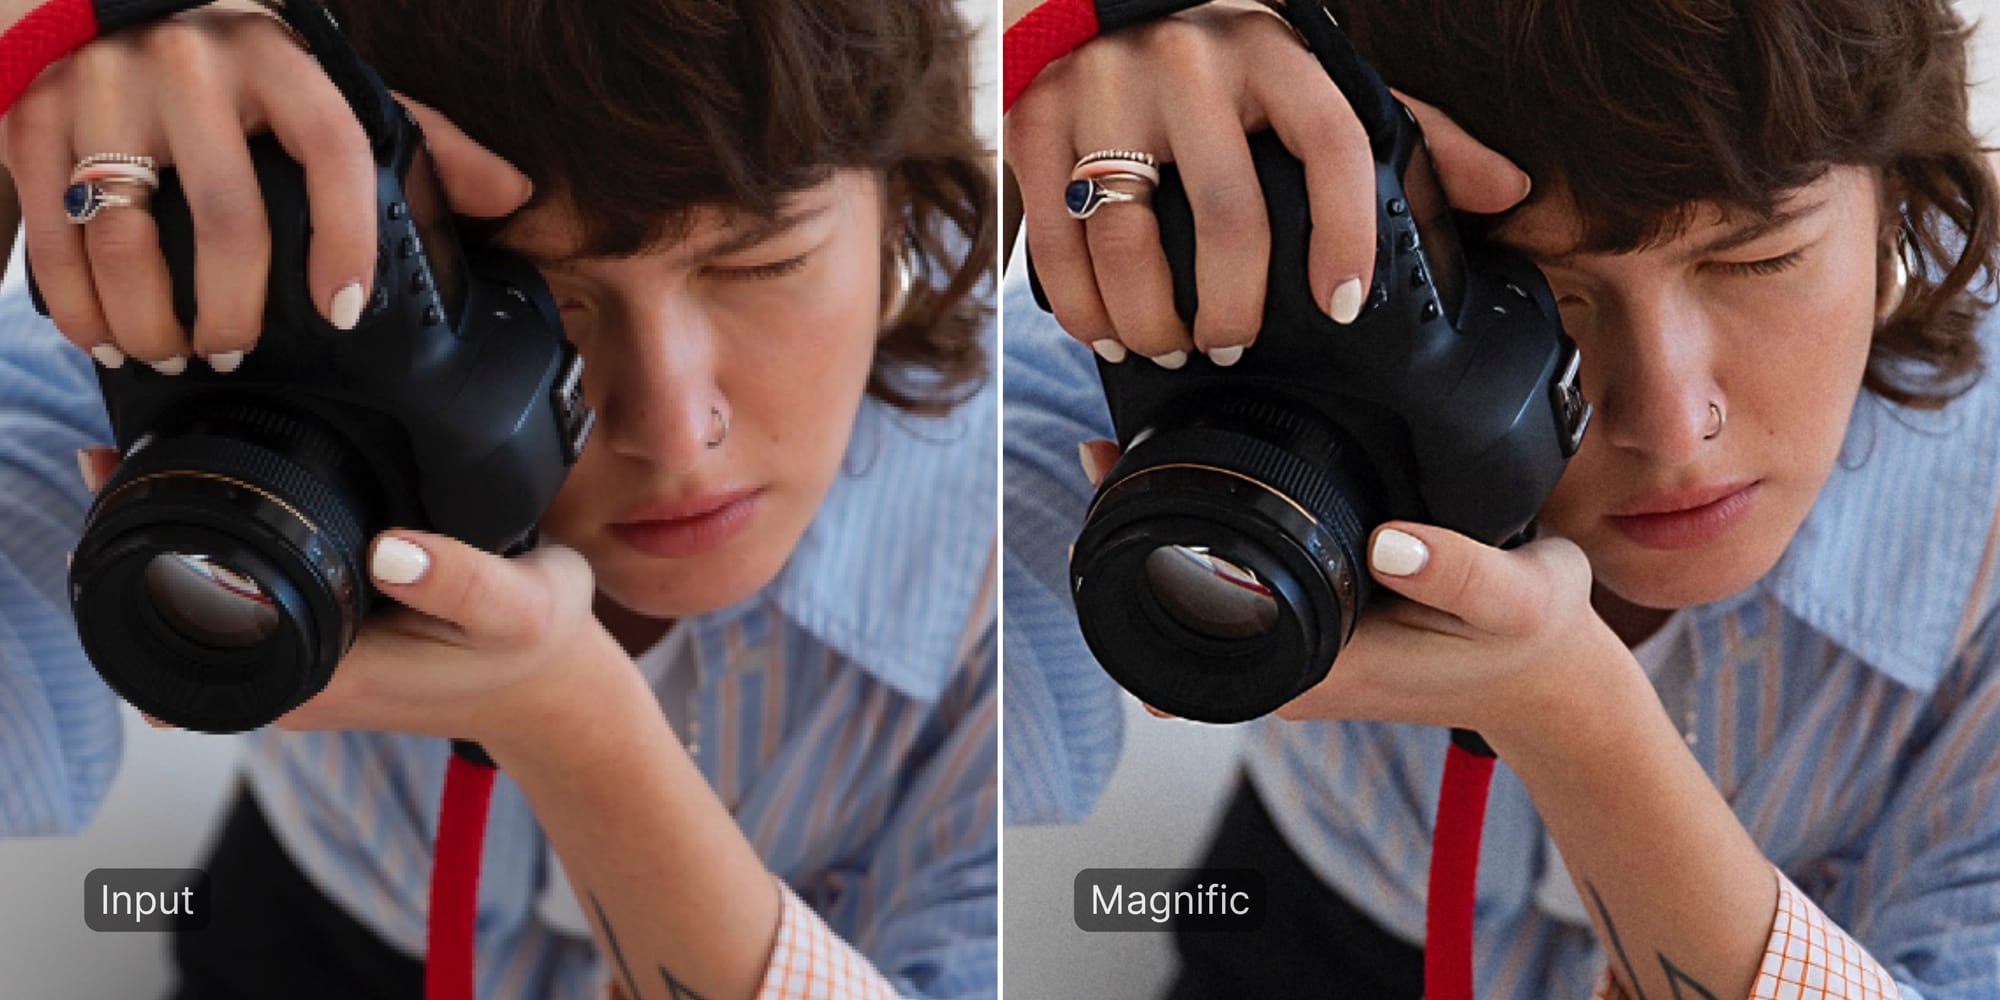
We didn’t spot halos or strange artifacts; although there’s a touch of fine grain in flat areas, which can actually add a film-like feel. The net effect is a sharper image that still looks authentic.
Bottom line: For portrait work, Magnific AI delivers a crisp, faithful enhancement: more sharpness and texture without changing the subject’s appearance or mood. The main limitation is that its Precision mode currently caps at 2× enlargement, so hitting very high resolutions may require multiple passes or the more creative (and riskier) settings. For moderate upscales, though, it’s a dependable way to boost detail without surprises.
Adobe Photoshop Generative Upscale
Photoshop’s Generative Upscale does make the image cleaner and a bit sharper, but it’s the gentlest lift in this set. Broad soft areas tighten up, yet the fine stuff stays relatively mild: the shirt pattern is only slightly clearer, individual hair strands still blend together, and small labels or engraved details on the camera remain softer than what we see from LetsEnhance or Magnific. The result looks smooth and natural with light sharpening, free of halos and distracting noise, but it also leaves some high-frequency detail on the table. In short, it scales up nicely and improves clarity a touch, just not as dramatically as the dedicated upscalers.

On the plus side, the output feels true to the source. The subject’s face, pose, colors, and lighting stay consistent; skin avoids that plasticky sheen, and nothing odd gets invented. Because it’s generative, Photoshop may subtly “fill in” tiny bits: think gentle catchlights or slightly cleaner jewelry highlights, which usually look natural but are, technically, AI guesses.
The bigger fidelity gap is what’s not recovered: ultra-fine textures (micro hair detail, precise fabric weave) that other tools pulled back still look a bit blurred here. Overall, it’s a safe, natural-looking upscale, great for avoiding artifacts, just conservative if you’re chasing every last pixel of detail.
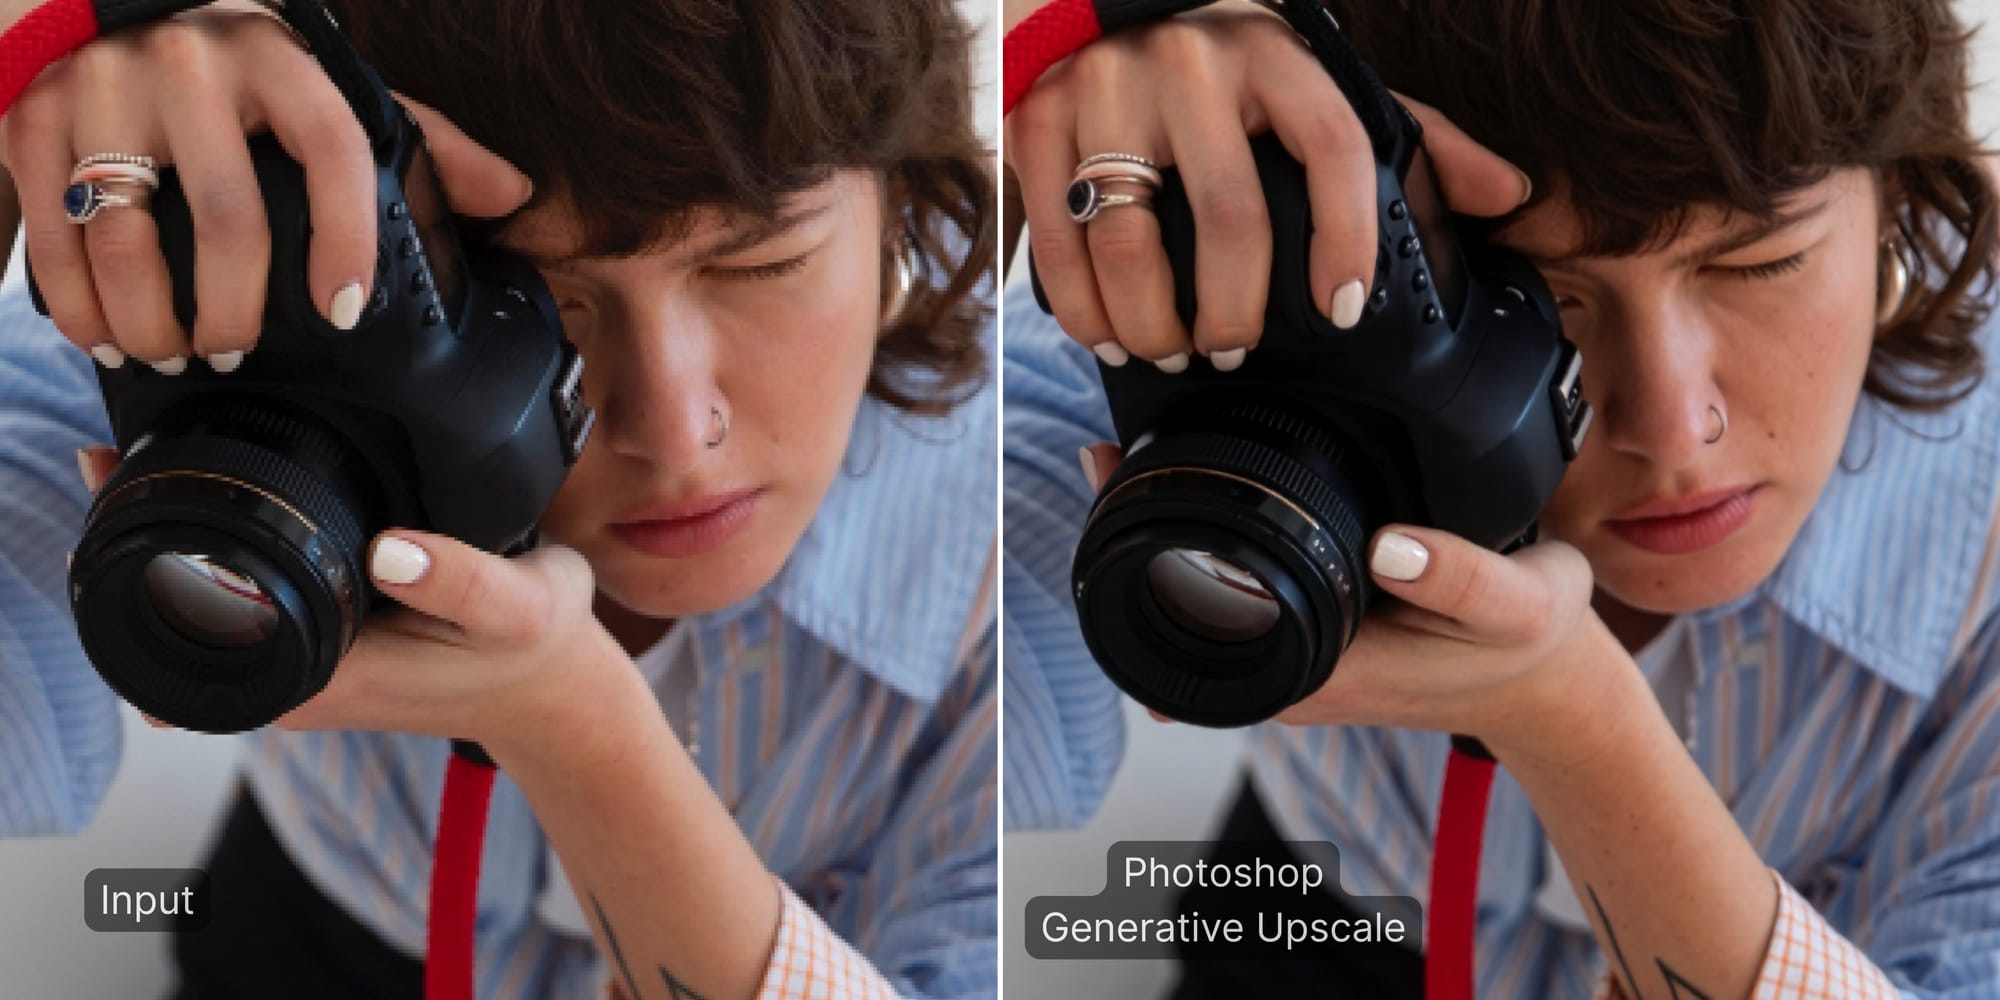
We also noticed a small color deviation on metallics and gems: the ring’s blue stone rendered marginally darker. This kind of shift can occur with generative enhancements that adjust noise and micro-contrast.
Bottom line: Photoshop’s Generative Upscale delivers a clean, natural-looking result with minimal artifacts, but it’s conservative on fine detail and can subtly invent plausible nuances. It’s a safe pick when you want an image that feels true-to-life without halos or noise, yet it’s less reliable if you need maximum detail recovery.
Lightroom Super Resolution
Lightroom’s Super Resolution gives this image a modest, clean lift. Because it’s limited to a 2× enlargement per pass, you’ll see crisper edges, like the transition between face and background, and small labels or logos become a touch more readable. Fabric and jewelry details are clearer than the original, but not as razor-sharp as what we saw from LetsEnhance or Magnific.
Crucially, Lightroom doesn’t invent detail; it simply makes what’s already there bigger and a bit tidier. The image keeps a gentle softness, hair and skin look smoother rather than dramatically more textured, and there are no halos or harsh artifacts. Side by side, it reads as a faithful, high-quality enlargement rather than a transformative upgrade.
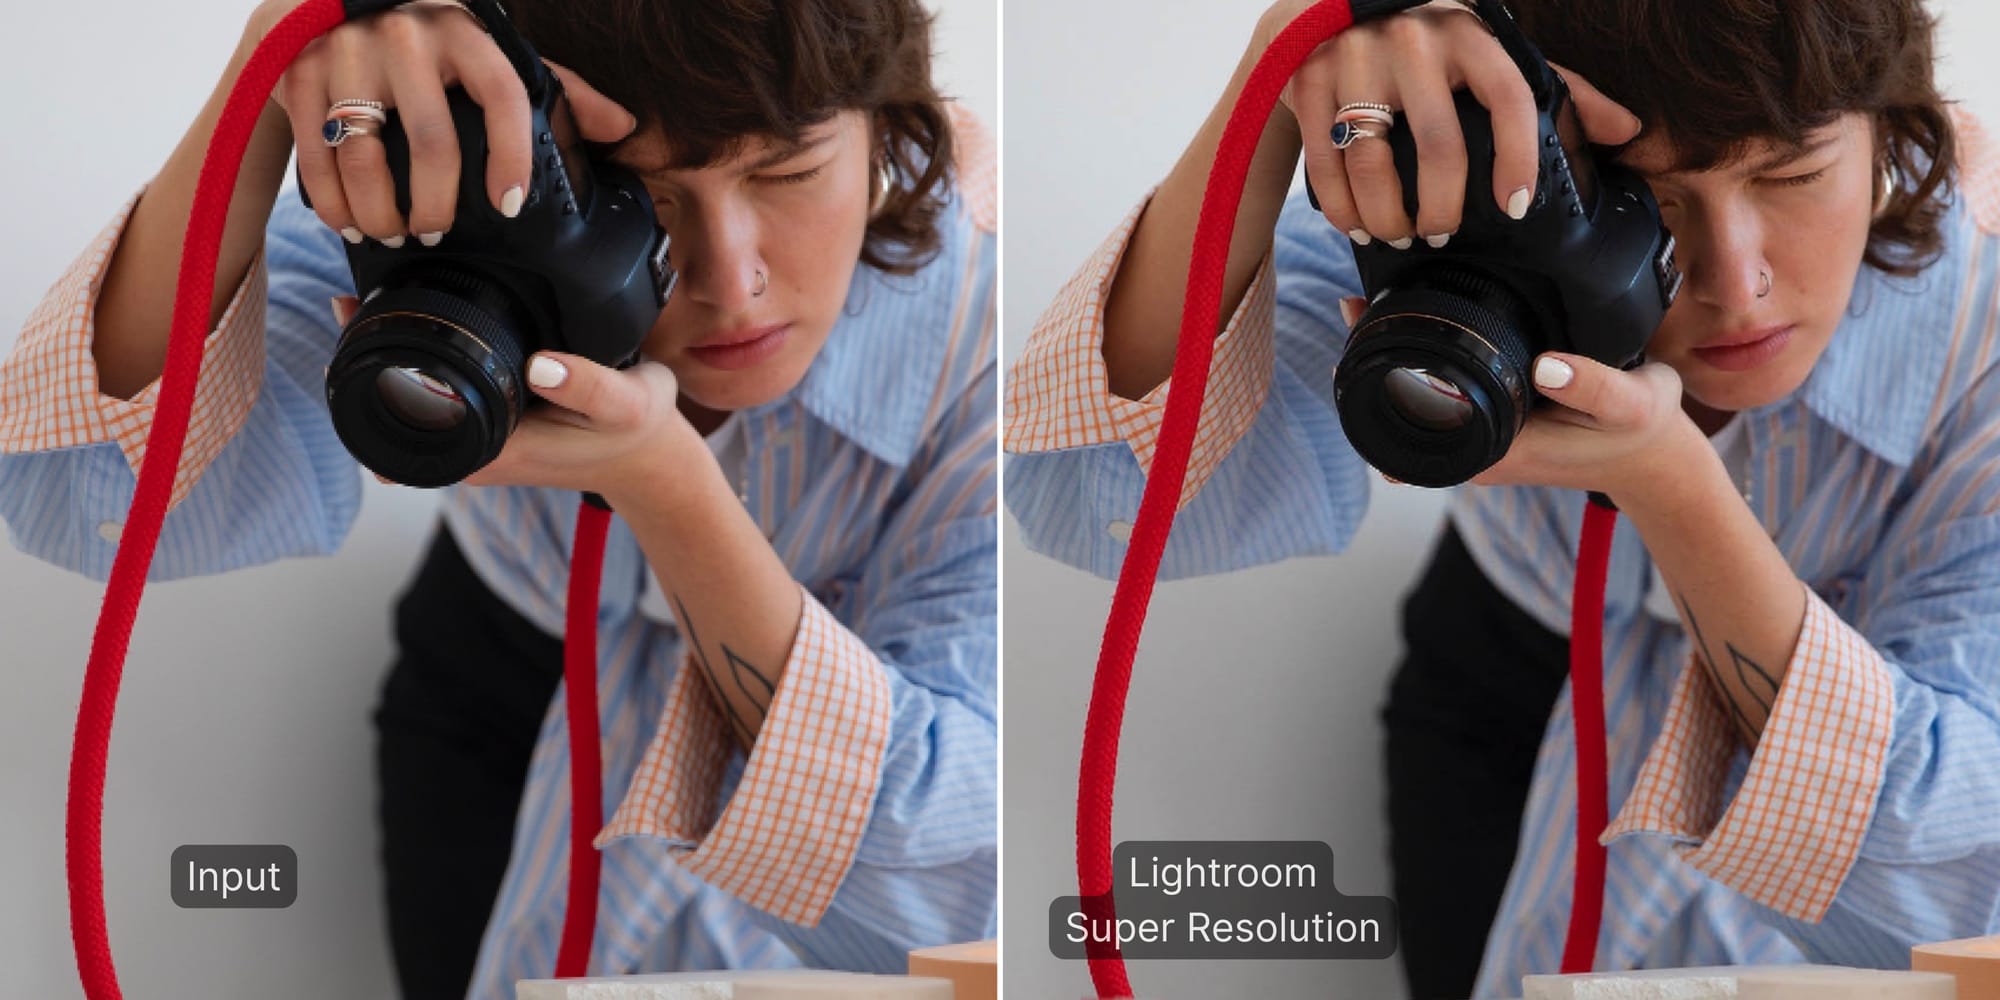
The fidelity to the original is where Lightroom excels. The upscale stays extremely true to the source: features, colors, and textures remain intact, with no AI quirks or hallucinations. Freckles, the camera grip, the nose ring, everything is in the same place and shape, just at a higher resolution.
The trade-off is that Lightroom preserves softness too; very fine textures (skin pores, micro-weave in fabric) remain mostly as they were. The result can feel understated next to more dedicated AI upscalers, but it’s also predictable and artifact-free. If you want a truly crisp, high-definition look from a small original, you may still add a touch of sharpening or additional editing.
Bottom line: Lightroom’s Super Resolution result was smaller and still soft: a safe, artifact-free enlargement, but not a true step up in fine detail. It’s best when you need a conservative 2× boost with zero surprises, not when you’re chasing maximum clarity.
Upscaling a low-resolution image: 4 tools compared
Our second test is a tiny portrait: under 300 px. Each tool’s performance is evaluated in terms of detail recovery and visual realism.
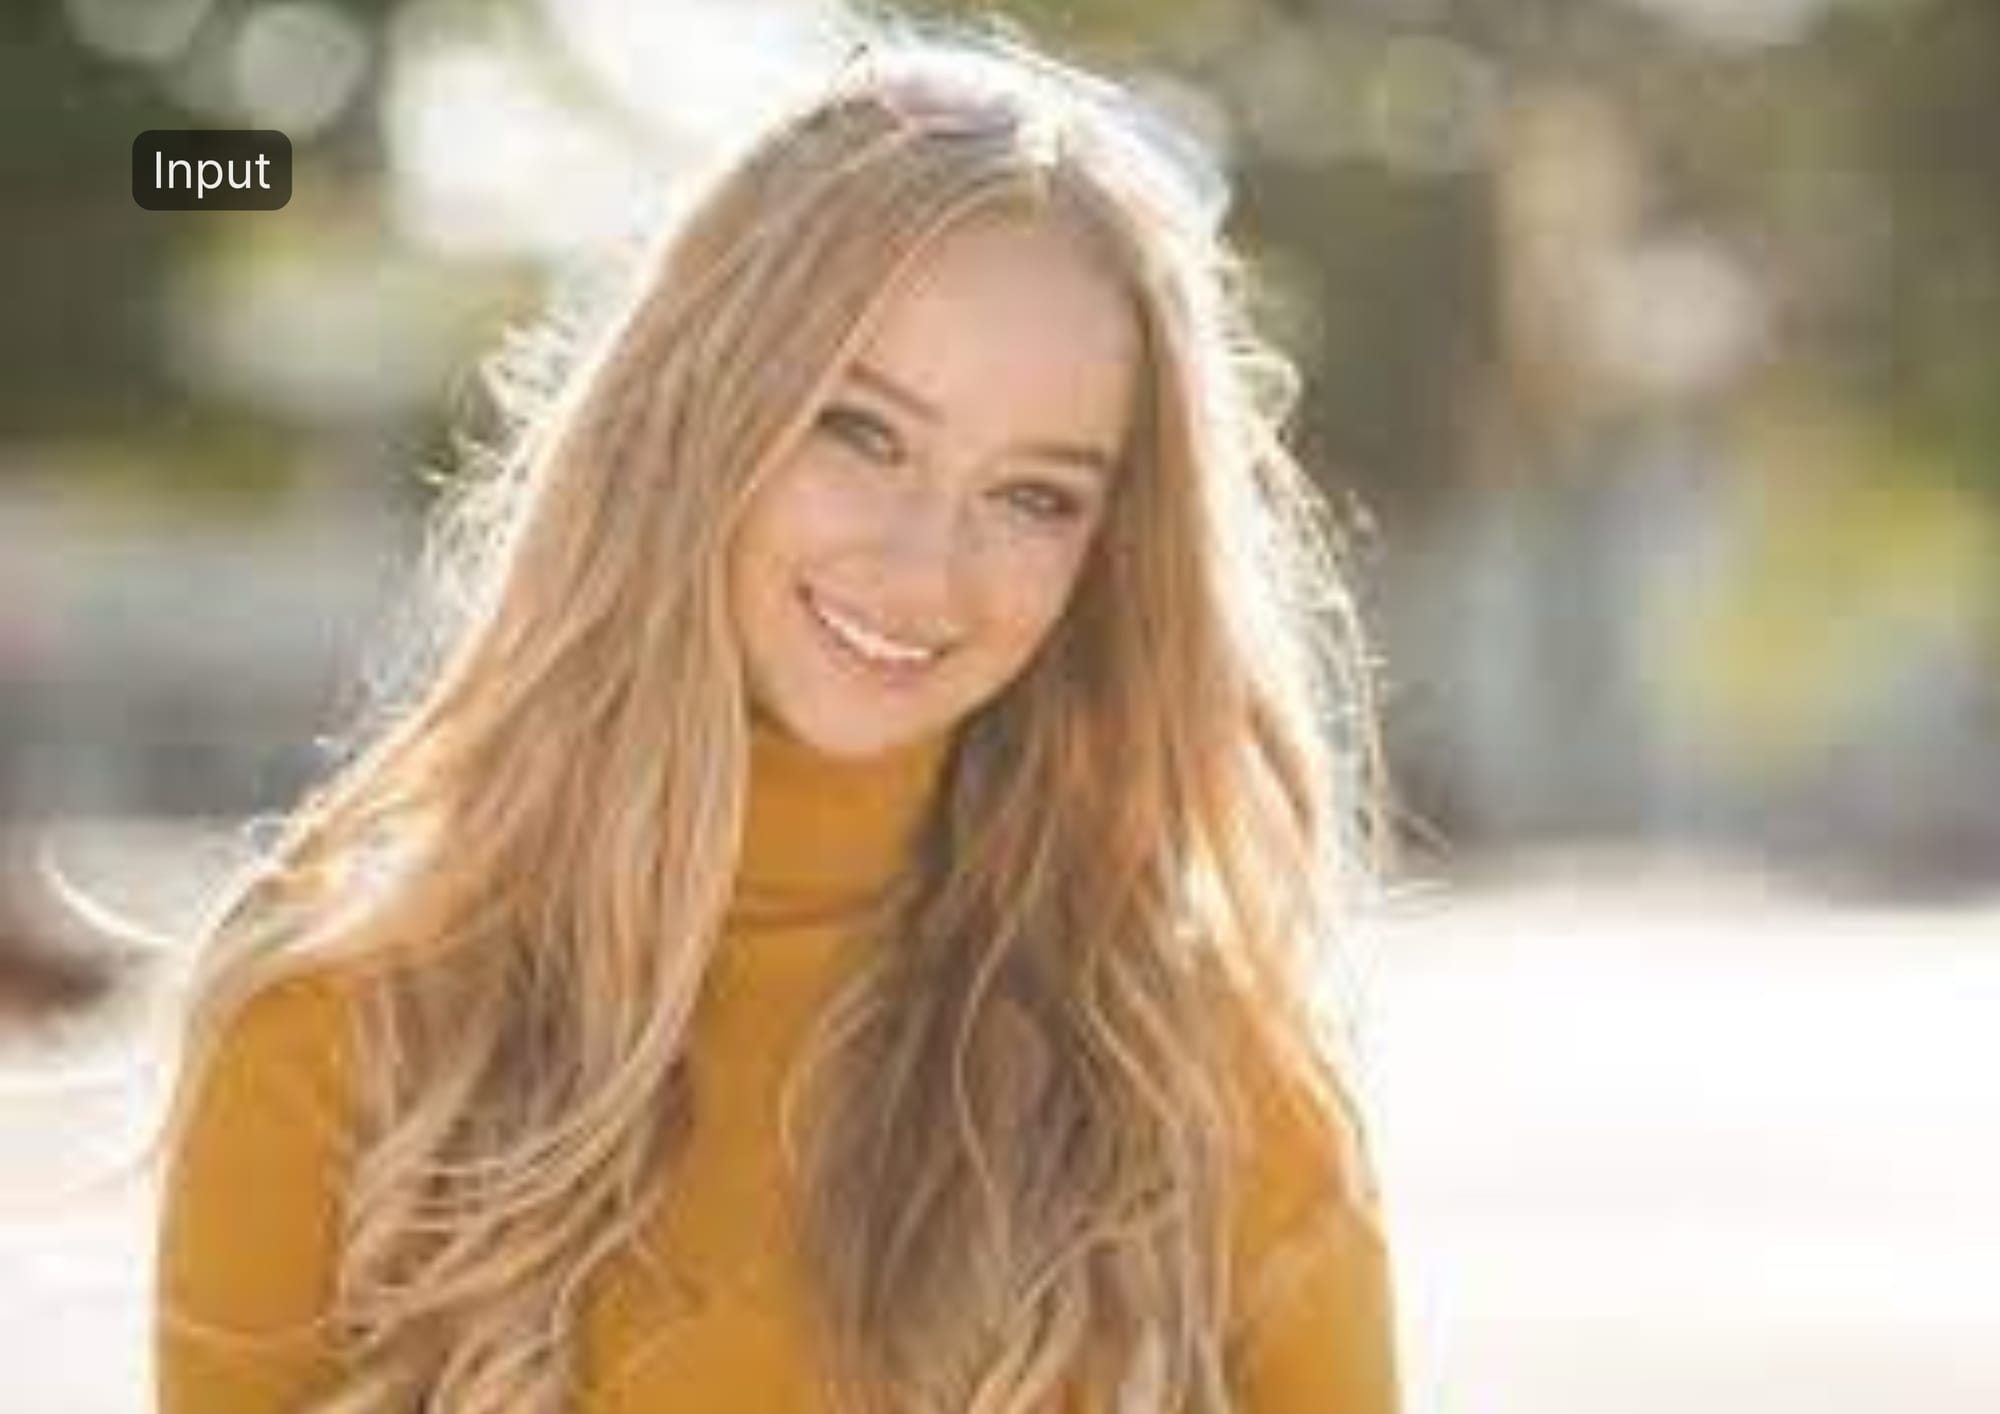
Below, we describe how each upscaler handled the extreme enlargement and give a brief verdict on its impact.

LetsEnhance
Delivers a balanced clean-up: edges tighten, textures read better, and the image keeps its original character. Ultra-fine elements are still limited by the tiny source, but there are no obvious artifacts or plastic smoothing.
Verdict: A dependable, faithful-yet-sharper result, strong all-rounder for very small inputs.
Magnific AI
Takes an aggressive generative tack, adding lots of apparent texture and edge contrast. Looks striking at a glance, but some of that “detail” is invented (e.g., embellished strokes) and can chip away at realism.
Verdict: Sharpest-looking result from afar, yet trades accuracy for impact, best for creative use, not strict fidelity.
Photoshop Generative Upscale
Improves size and tidiness but adds little new detail. It keeps the photo true to the source with no odd inventions, yet tiny features remain blurry and undefined.
Verdict: Conservative and clean, but underwhelming for recovering detail from a very small file.
Lightroom Super Resolution
A smooth, artifact-free enlargement with subtle sharpening and accurate color. As a 2× method (even applied in steps), it can only do so much with a 275 px start, so perceived detail remains modest.
Verdict: Safe and neutral, no distortions, but the least dramatic improvement of the group.
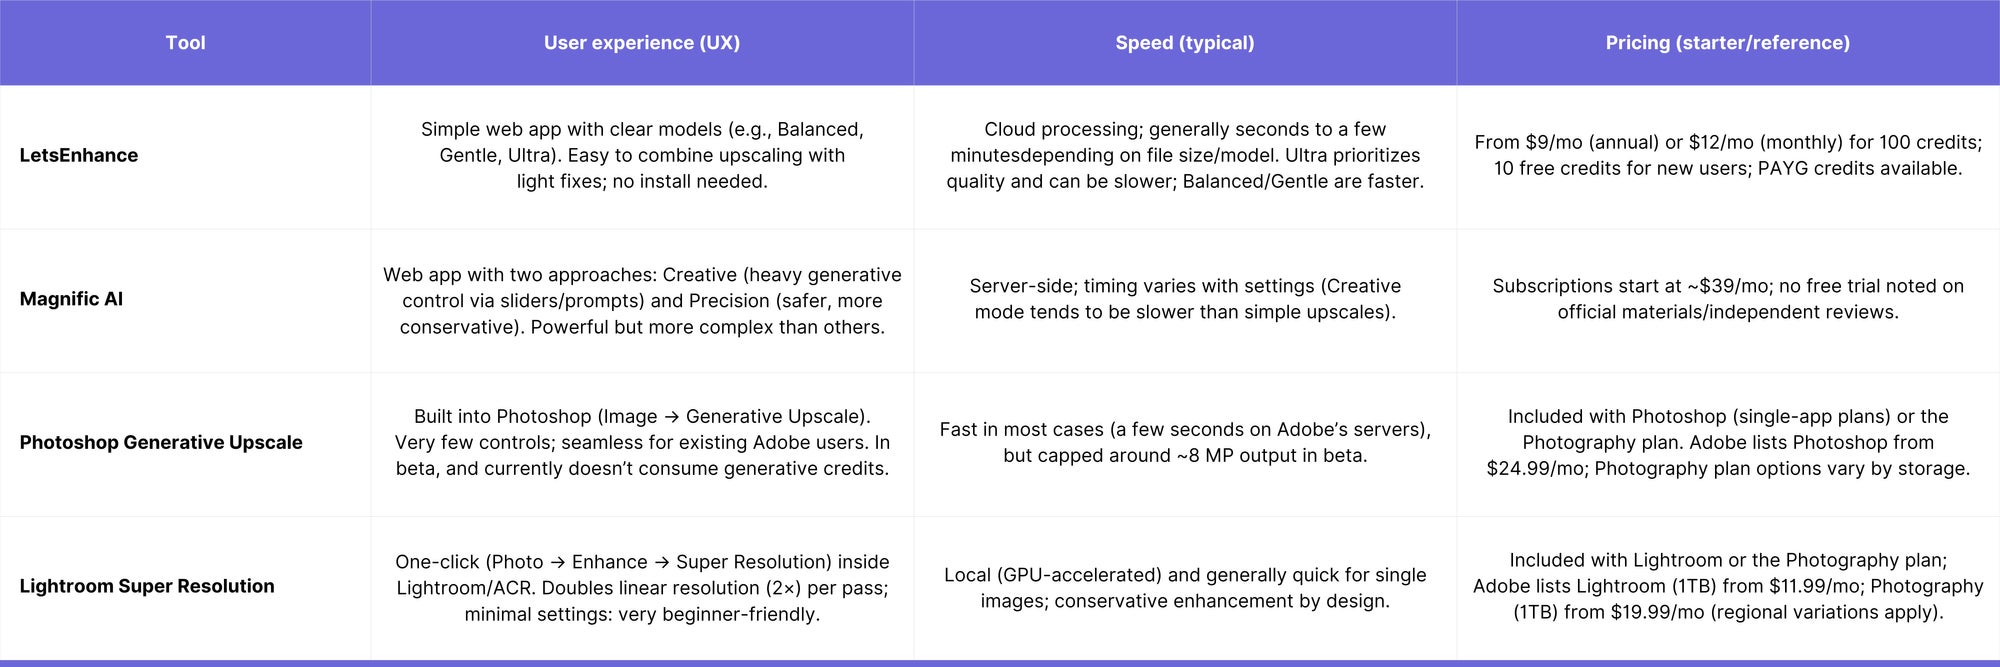
User experience, speed & pricing
LetsEnhance workflow
Let’s Enhance is a web-based upscaler that aims to keep your image looking authentic while fixing common issues. You upload a file, pick a model, such as Gentle, Balanced, Ultra, Digital Art, Old Photo, or the automatic “Try all” option, and let it do the heavy lifting. The interface is intentionally simple: a few intuitive sliders for lighting, removing background, tone, color, and sharpening. If you want the AI to add a hint of new detail, the Ultra model introduces controlled “creativity,” with an Intensity and Size of Changes sliders so you decide how far it goes.
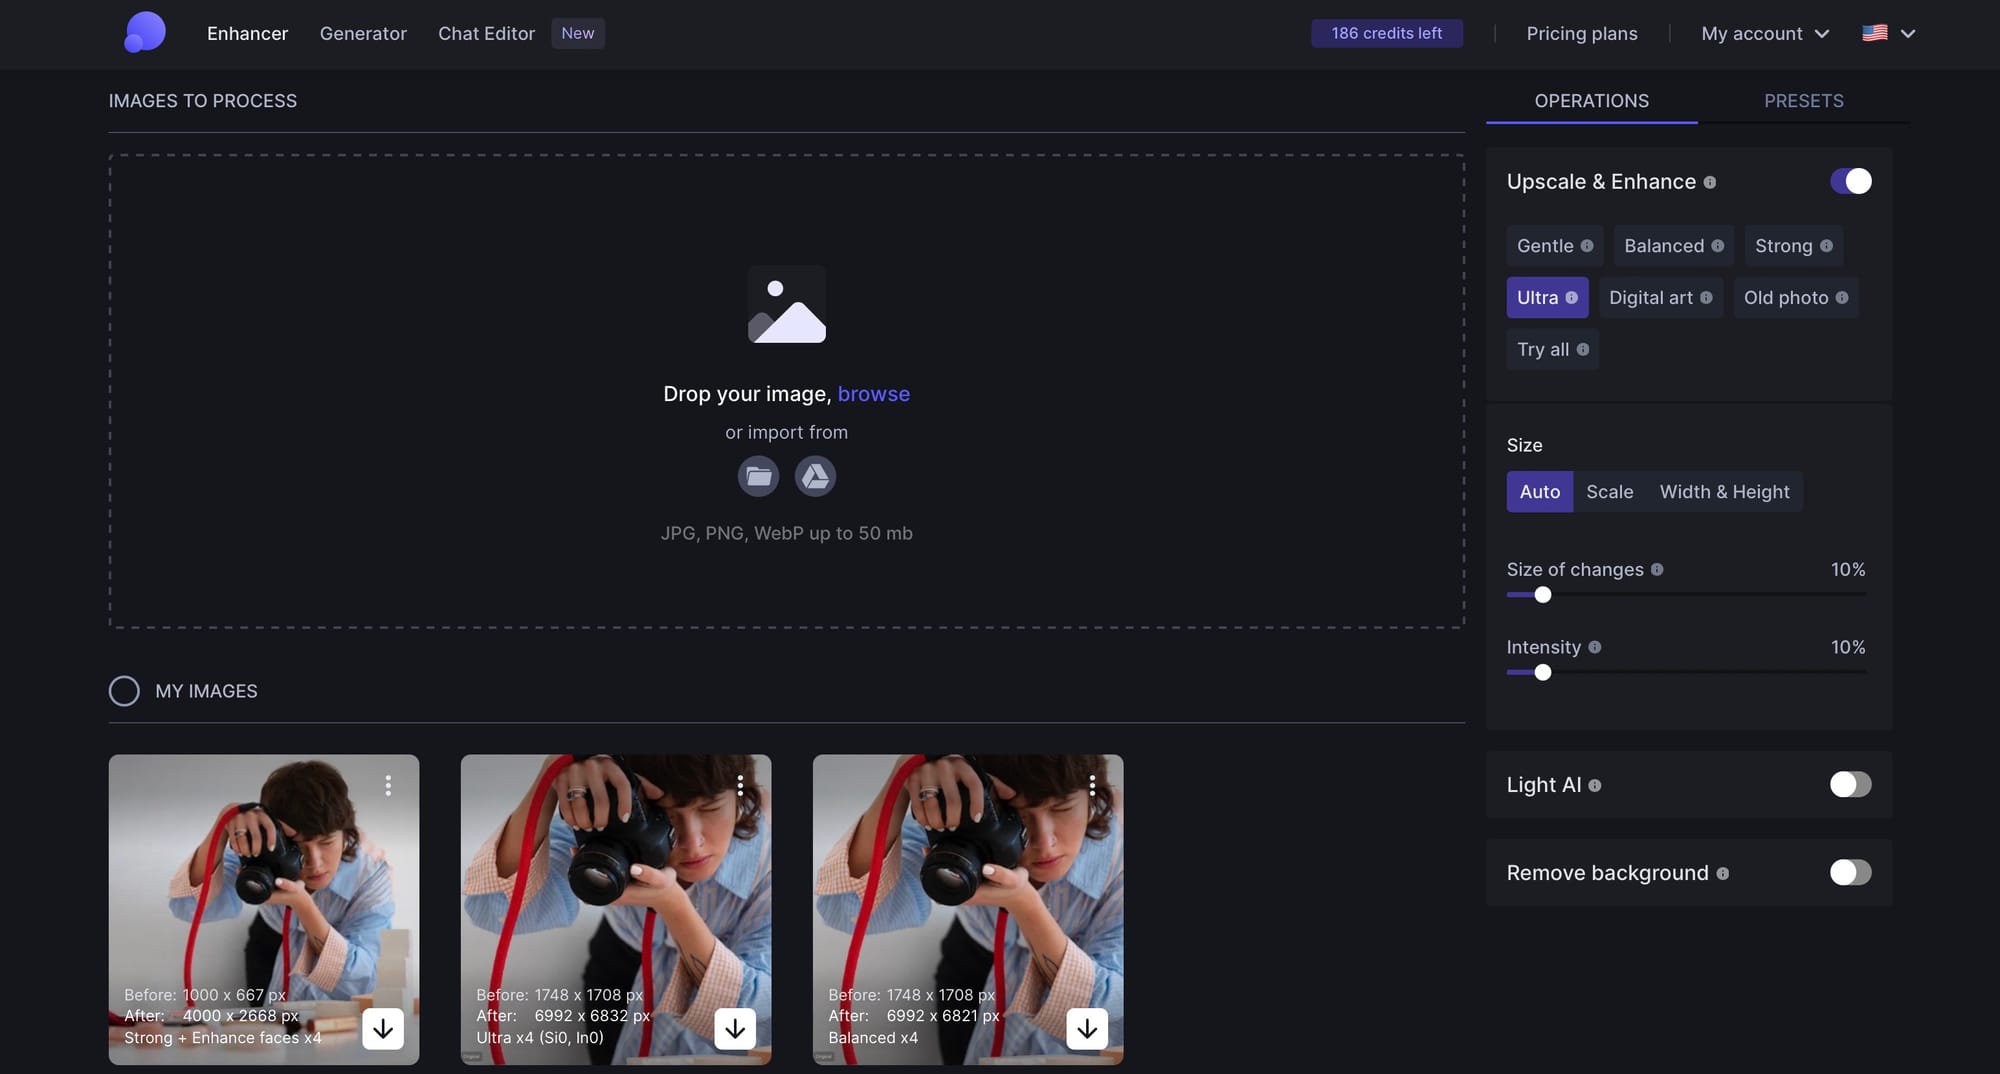
The overall experience is straightforward and beginner-friendly. You can combine tasks (for example, upscale and fix lighting in one pass), the defaults are sensible for most photos, and helpful tooltips explain what each control does. Because it runs in the browser, there’s nothing to install; just note that images are processed in the cloud.
In short, Let’s Enhance focuses on enhancing what you already have, minimizing complexity, and avoiding overlapping settings, which makes it an approachable choice for casual users and busy creators alike.
Magnific AI workflow
Magnific AI is a newer upscaler that leans fully into generative enhancement. Rather than only sharpening what’s there, it can reimagine parts of an image as it enlarges: great for dramatic, high-impact results. It runs in the browser (with a handy Photoshop plugin), and gives you far more creative control than most tools.
At its core are two modes:
- Creative: The headline act. You guide the AI with sliders and optional text prompts, and it can add hyper-realistic or stylized detail on top of the original. Think “make this look cinematic” or “add ultra-fine texture,” all in a controlled way.
- Precision: A safer, photo-focused mode that aims to upscale without hallucinating new content. It’s currently limited to 2×, but it’s designed to keep things clean and true.
The control panel is deep: Creativity (how much the AI invents), Resemblance (how closely it sticks to the source), plus options like Detail, HDR, and Fractality, and even different “engines” tuned for photos vs. illustrations. Power users will love experimenting; you can dial in exactly how bold or conservative you want the result to be.
That flexibility comes with a learning curve. Some controls overlap in feel, and finding the sweet spot may take a few tries. There’s also no free preview; testing settings consumes credits, so trial-and-error isn’t as carefree as with other tools. Because it’s cloud-based, you’ll upload images (large files can be slower; sensitive content may raise privacy questions). There’s no full desktop app at the moment; the Photoshop plugin sends jobs to the cloud and returns the result. Batch processing isn’t a headline feature, so expect a one-image-at-a-time flow.
Adobe Photoshop Generative Upscale workflow
Photoshop’s Generative Upscale is Adobe’s newest take on enlargement, built on Firefly generative AI. Instead of only sharpening what’s already there, it can reconstruct missing detail as it scales, more like a smart redraw than a simple resample. You can choose 2×, 3×, or 4×; the result is often a cleaner, more detailed image, though, because it’s generative, you may see subtle aesthetic shifts in fine textures, metals, or text. Think: great for rescuing soft images, but it can nudge the original “feel” if pushed too far.
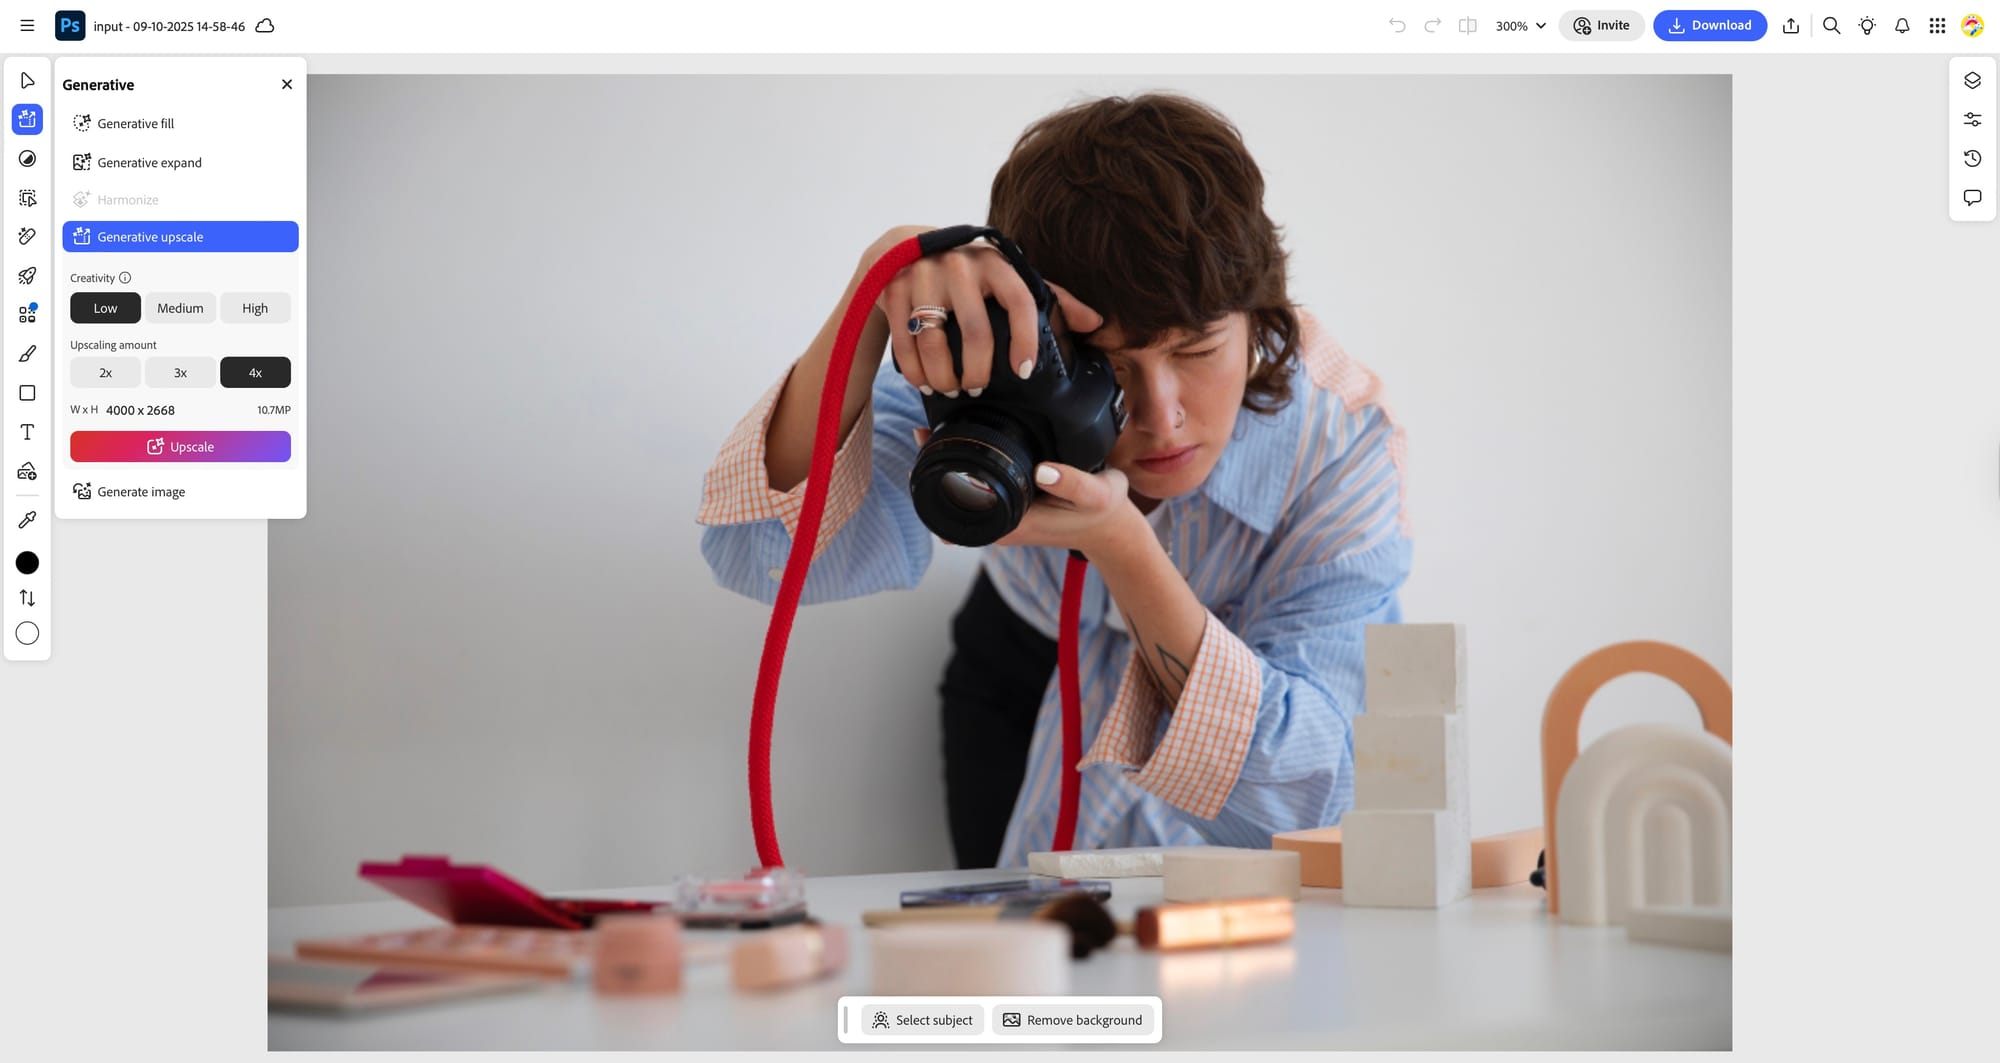
Using it is straightforward if you’re already in Photoshop: open your image, go to Image, then Generative Upscale, pick the scale, and adjust the detail/creativity slider, then run it. Processing happens on Adobe’s cloud and returns as a new layer, so you can mask or blend with the original. During beta, it hasn’t counted against Firefly credits; post-beta, it likely will.
The upside is seamless workflow: no extra apps, quick setup, and the option to pair with Generative Fill for canvas extensions. The trade-offs: you need a Photoshop subscription and an internet connection, and while the tool favors clean, artifact-free results, it’s deliberately conservative compared with dedicated upscalers on ultra-fine detail.
Lightroom Super Resolution workflow
Lightroom Super Resolution (in Lightroom, Lightroom Classic, and Adobe Camera Raw) takes a traditional, yet still AI-assisted approach to upscaling. It doubles the image’s linear resolution (2× width and height, 4× total pixels), using a model trained on millions of photos. Unlike generative tools, it doesn’t invent new content; it focuses on preserving edges and real detail while intelligently filling gaps. The result is a clean, faithful 2× enlargement that’s great for turning, for example, a 12-MP file into a print-ready 48-MP image, or for cropping in and then recovering resolution.
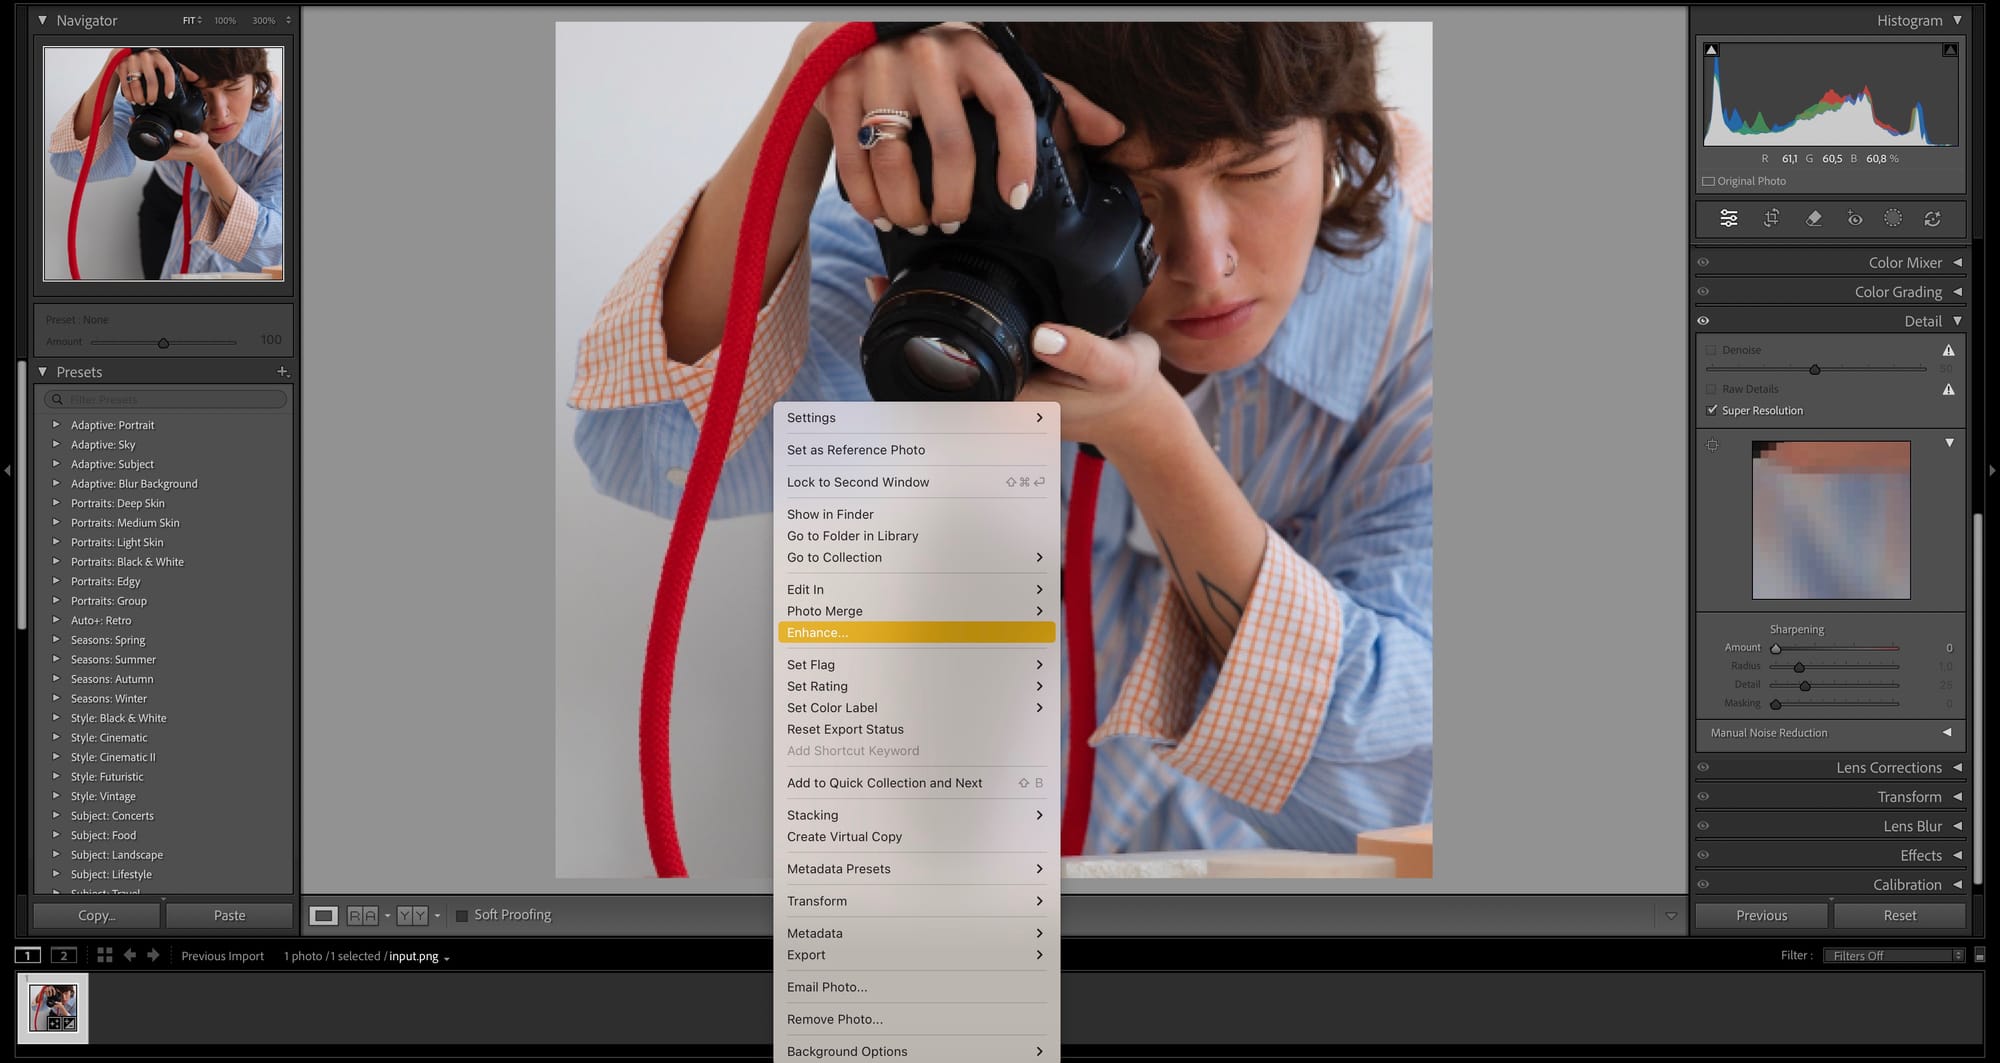
Using it is as simple as it gets. In Lightroom Classic, right-click your photo, Enhance, check Super Resolution (add Raw Details for raws), then click OK. Lightroom (CC) and Camera Raw offer the same Enhance option. There are no models or sliders to tweak: you’ll see the new dimensions and a small preview, then Lightroom generates a new DNG (for raws) or a new file (for JPEGs). The main limitation is the fixed 2× step; you can run it twice for 4×, but the returns diminish.
Because it’s built into Lightroom/ACR, you can batch process multiple images without leaving your library, and there’s no cloud upload; everything stays local. In short: right-click, enhance, done. It’s ideal if you want a reliable, artifact-free upscale without fiddling with complex settings.
Summary: picking the right upscaler for the job
Across 4 strong contenders, the bottom lines converge on a simple truth: the “best” AI upscaler depends on what you need more: maximum detail, strict fidelity, creative enhancement, or sheer convenience.
- LetsEnhance emerged as the most balanced choice for everyday work. It consistently delivers a big, natural-looking detail boost without introducing artifacts, and its presets make great results easy. If you’re upscaling portraits, products, or mixed content for web and print, it’s the safest high-quality default.
- Magnific AI is the creative specialist. When you want stylized, generative enhancement, especially for AI art or concept visuals, it can produce striking, high-impact detail. Use it deliberately (lower creativity for fidelity) and budget for its premium pricing and slower runs.
- Photoshop Generative Upscale wins on workflow convenience and a clean, artifact-free look inside Photoshop. It’s great for quick, natural enlargements and canvas extensions, but it’s more conservative on ultra-fine texture and can subtly shift or invent tiny details. Choose it when seamless integration beats absolute sharpness.
- Lightroom Super Resolution is the most faithful 2×: one click, no surprises, no artifacts. It preserves the image you have, just bigger, so it’s perfect for modest-sized bumps and batch work. Don’t expect dramatic new detail; add a touch of sharpening if you need more bite.
Bottom line: If you need a dependable, high-quality upgrade that respects your original, start with LetsEnhance. When the brief calls for bold, stylized transformation, Magnific AI is your creative lever. And for fast, integrated workflows, Photoshop Generative Upscale and Lightroom Super Resolution are the pragmatic picks, Photoshop for clean convenience, Lightroom for faithful 2×.
FAQ
Are there any free AI image upscalers, like Upscayl or Real-ESRGAN?Yes, if you’re on a tight budget or prefer open-source solutions, there are a couple of options. Upscayl (desktop) and Real-ESRGAN (open source) are solid free options: great for anime, game textures, and general photos if you’re okay with a light setup. If you want free trials/daily credits with higher consistency, try LetsEnhance (sign-up credits). You can also test desktop trials, for example, Topaz Gigapixel, or use Adobe’s trial period to compare quality before paying.
How do I choose the best AI upscaler for my needs?It depends on what kind of images you have and what you plan to do with them. Here are some guidelines based on our comparison: For faithful detail on portraits and products, LetsEnhance and Topaz Gigapixel lead. For creative or detail-inventing outputs or AI art, Magnific AI stands out. Lightroom Super Resolution is the safest 2× for zero surprises; Photoshop Generative Upscale is the most frictionless if you’re already using Photoshop.
What is the best AI upscaler for anime or illustrations?
For line art and AI artwork, start with LetsEnhance, it adds tasteful texture without turning lines into watercolor mush. If you’re weighing generative-heavy tools or you’re a power user, you can also compare open-source anime models, but our tests showed that the LetsEnhance workflow is simpler and more consistent for non-technical users.
What is the best AI image upscaler for most people in 2026?
There’s no single winner for everyone. For most people who want a fast, reliable result with minimal setup, a cloud upscaler with strong defaults like LetsEnhance is the safest start. Power users who like to tweak may prefer a desktop tool or mobile app with multiple models and additional opportunities, for example, Topaz Gigapixel or Pixelcut. If you already edit in Adobe, the built-in options are convenient but more conservative on micro-detail. Pick based on your workflow: web for simplicity and consistency, desktop/app for maximum control, Adobe for “good enough” inside an existing pipeline.
Which AI upscaler keeps details the best?
If “looks the same, just bigger” is your goal, choose a fidelity-first model or a conservative tool. In this case, Lightroom Super Resolution or VanceAI are the best options. These tools prioritize clean edges, natural texture, and minimal artifacts over aggressive sharpening. Vance AI can look sharp at a glance, but may oversharpen edges or introduce artifacts in challenging images. LetsEnhance (Balanced/Ultra with low intensity) typically preserves texture and color while boosting clarity. Topaz Gigapixel can extract more micro-detail if you tune noise/sharpening and use Face Recovery for portraits, just avoid pushing it into halos. Photoshop Generative Upscale stays clean but usually recovers less high-frequency detail.
What is the best AI upscaler for eCommerce/product photos?
Look for cloud solutions with API access and predictable billing; vendor pages and developer docs outline quotas and image retention policies. Prioritize true color, clean edges, and readable micro-details (stitching, labels, barcodes). LetsEnhance is well-suited for product shots with consistent, web-ready results and minimal artifacts. Another one, Topaz Gigapixel, shines when you need maximum crispness on textures and packaging types.
