
Key Takeaways
Both Adobe Super Resolution and Let’s Enhance can upscale images using AI.
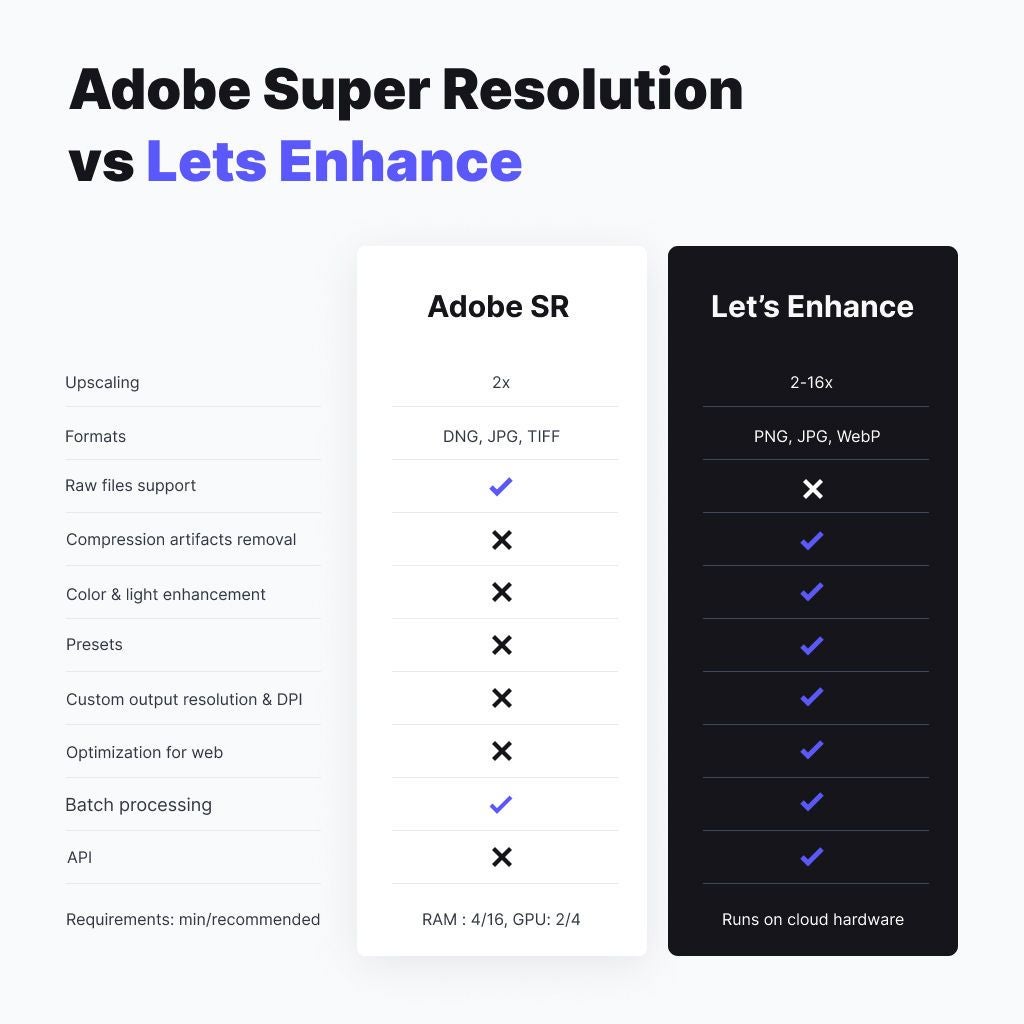
Adobe SR:
- Works best with high-quality raw files
- Does one thing: doubles image size
- Runs on your computer and uses your GPU
Let’s Enhance:
- Improves image quality and removes compression artifacts
- Has customizable upscaling (up to 16x), resolution, and DPI
- Uses cloud hardware
- Provides an API for image optimization at scale
Since the last Adobe Camera Raw plugin update, some of our customers asked us how Let’s Enhance compares to Adobe’s new “Super Resolution” feature.
On the surface, these tools might look similar. Both technologies aim at upscaling images while maintaining or even improving quality. Both are AI-based. But are they really that alike?
We'll cover Photoshop’s Super Resolution and Let’s Enhance pros & cons and make a side-by-side comparison of photos we processed with each app.
Keep reading to find out which one is best for you.
Adobe Super Resolution
Super Resolution (SR) is a new feature in Adobe’s Camera Raw plugin. It works with the latest Photoshop and Bridge editions. SR upscales photos while trying to preserve the details. It doubles the size of each dimension and gives you a 4x total megapixel count.
Pros
- Works with raw file formats
- Part of the Adobe Creative Cloud ecosystem
- No extra cost if you’re already paying for Adobe CC
Cons
- Not designed to handle small & compressed pictures
- Doesn’t support PNG, converts any file to DNG
- Resource intense: requires a high-end PC with an expensive GPU to run fast.
- Not optimized for eCommerce product images and printing
- No API support and no automated end-to-end image processing
- One mode, no upscaling settings
Let’s Enhance
Let’s Enhance is a cloud-based service that allows users to upscale images up to 16 times without losing quality. Let’s Enhance has different algorithms for working with digital art, portraits, and other types of photos. It also provides presets for printing, real estate, and eCommerce, as well as an automated end-to-end API solution.
Pros
- Upscales and improves low-resolution compressed photos
- More upscaling options: 2-16x, custom resolution, and DPI
- Cloud-based. Works on any laptops and mobile devices.
- 6-month free cloud storage
Cons
- No raw formats support
- Free plan limited to 10 photos
Yes, the cons list was much longer for Photoshop SR. But the reality is that SR is still an early-stage technology and has limited applications for now.
But enough words. We’ve run some tests and are ready to show you actual photos enlarged by each tool.
Tests
In the tests below, we compare Photoshop and Let’s Enhance for different use cases: animal and real estate photography, portraits, large photos for print, and product images.
Let’s Enhance is set to Smart Enhance mode and 2x upscaling. Adobe Super Resolution has only one mode with no settings for now.
And since it’s impossible to see the difference between large 50+ MP samples on a web page, we’ll use small to medium size photos and compare original close crops to upscaled ones.
You can find all the photos we tested in this Google Drive folder and inspect them closer.
Animal photography
It’s hard to get a close, high-quality shot of a bird in the wild. Animal photography is one of those genres that can always benefit from lossless upsampling.
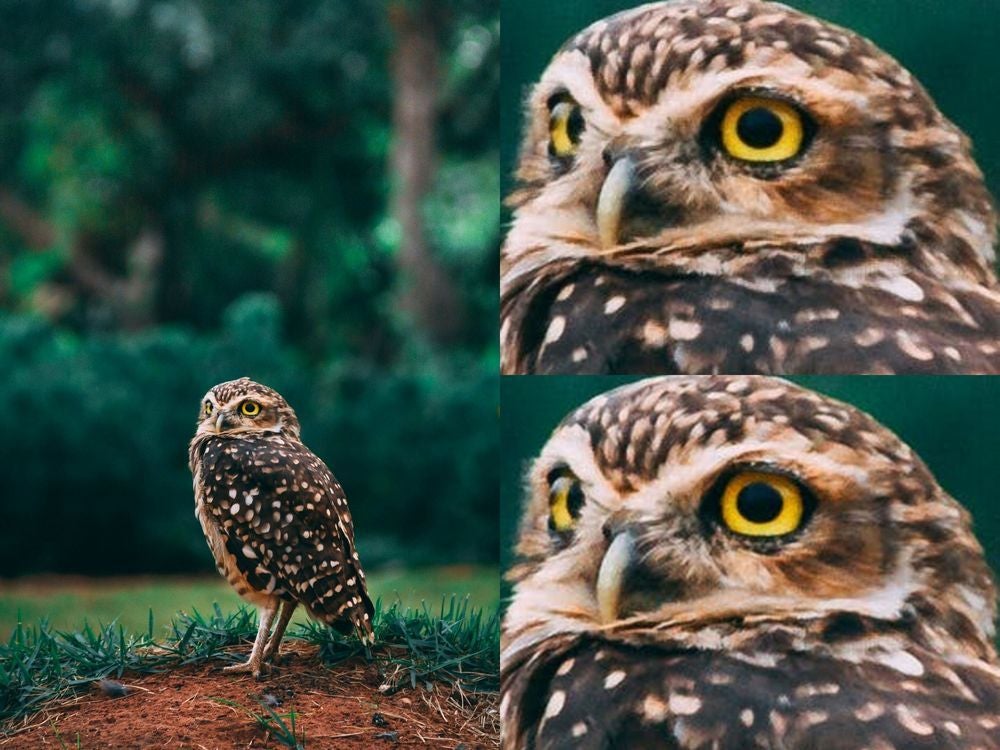
In the first test, Super Resolution produced results roughly comparable to older algorithms, like bicubic interpolation. It was one of the most advanced ways to enlarge the image before machine learning-based upsizing came into play.
Now let’s apply this new ML-based upscaling from Adobe and Let’s Enhance to our image.
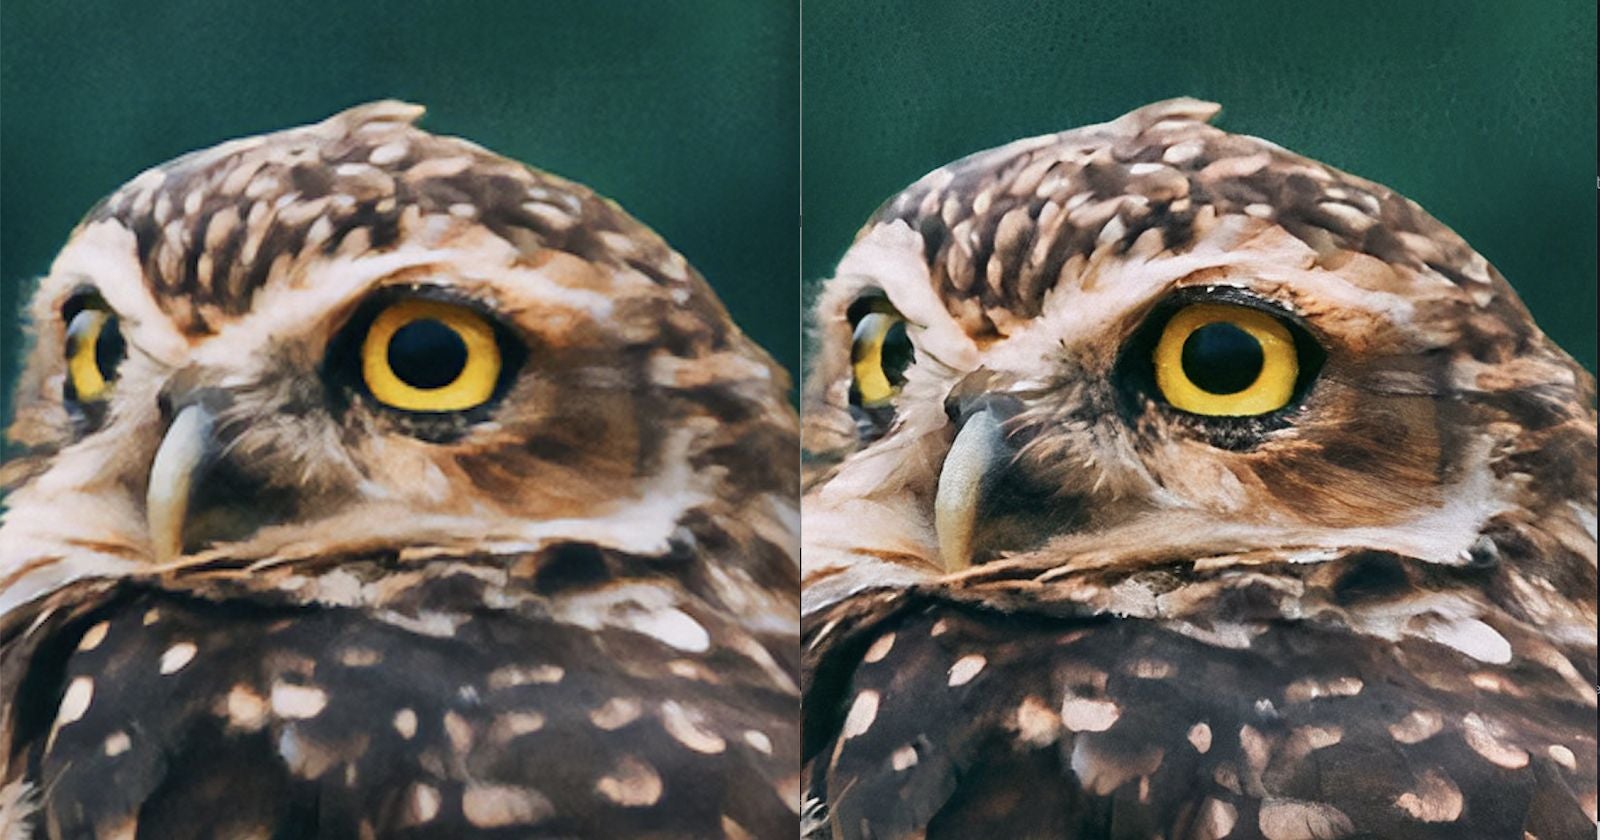
The output becomes more distinct when we zoom in further:
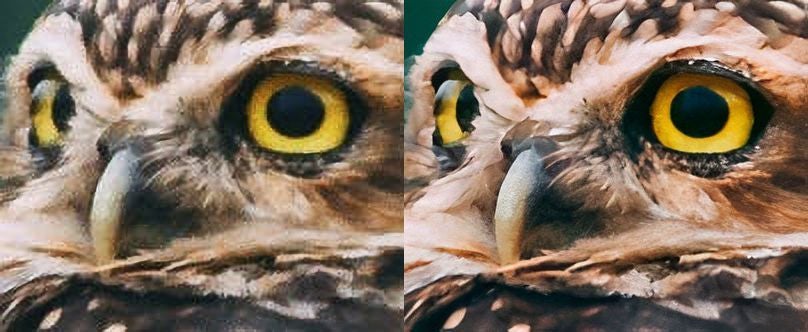
Super Resolution made the image smoother compared to the original crop but didn’t restore the details. Let’s Enhance increased the resolution and made the owl look almost as if it was originally shot from a foot away.
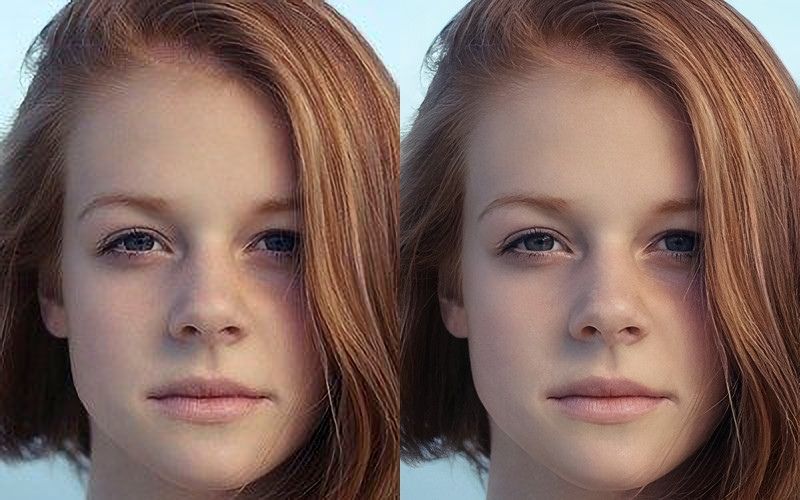
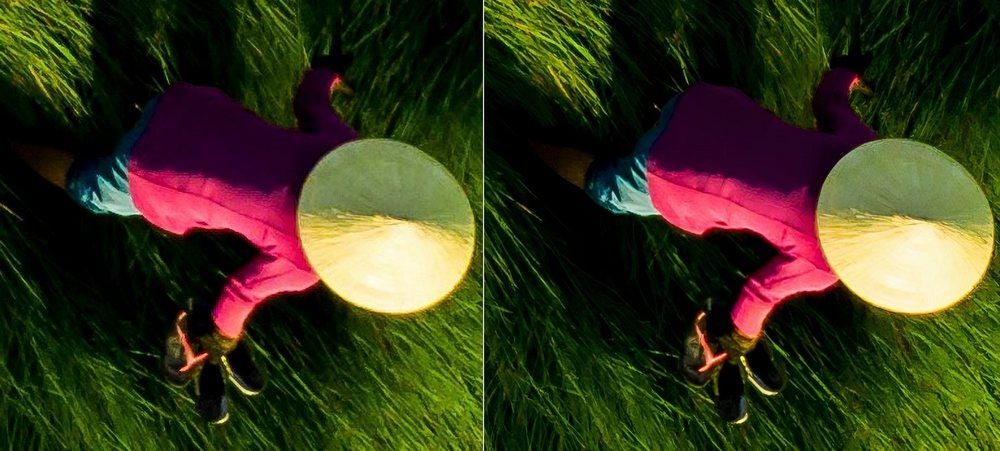
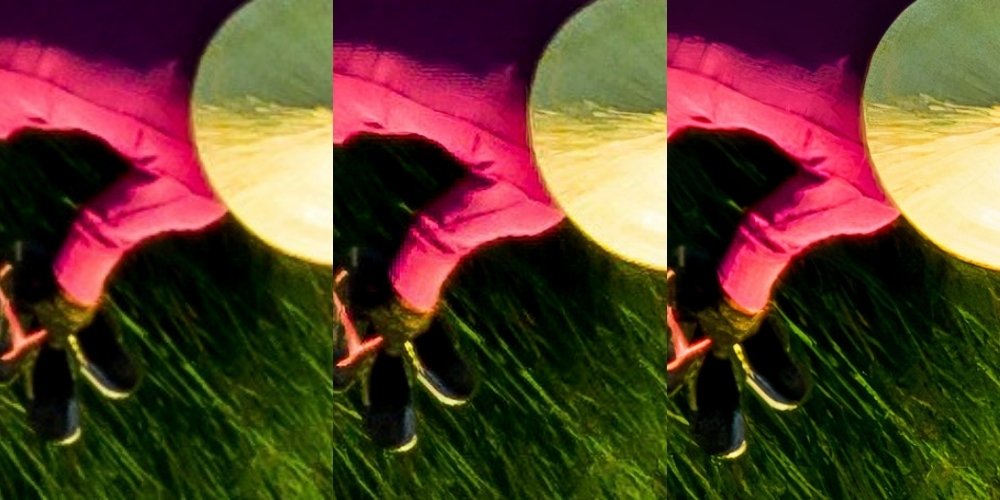
Portrait
Upscaling pictures of human faces is one of the most challenging tasks for neural networks. People evolved to recognize the tiniest facial features. So we can spot right away when the app messes up the portrait even a little bit. To address this issue, Let’s Enhance added to its toolkit a separate network trained on portraits.
The procedure for this test is roughly the same. We take a low-res (640 x 426) picture and enlarge it with Super Resolution and Let’s Enhance.

Like in the previous case, we stacked together close crops to make the difference between samples visible on the screen.
Let’s zoom in all 3 samples:
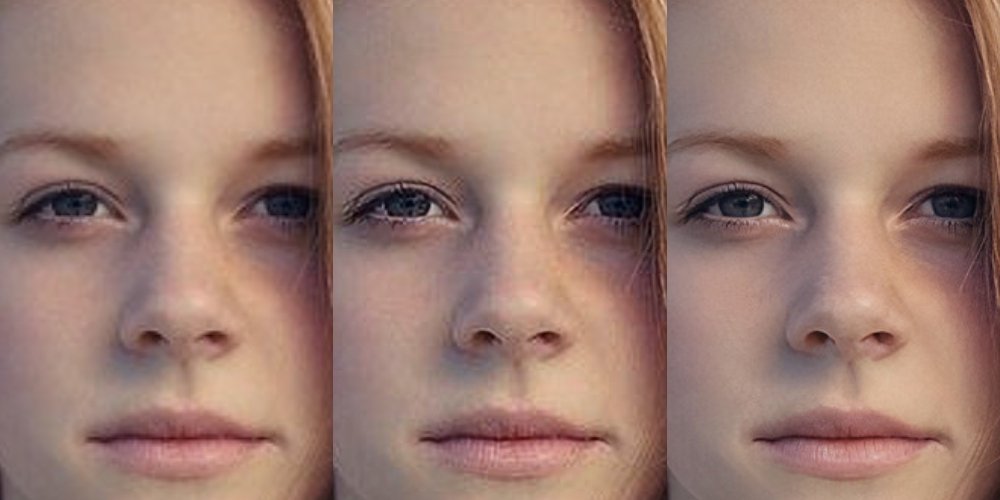
Adobe SR did make the image sharper but also amplified the compression artifacts.
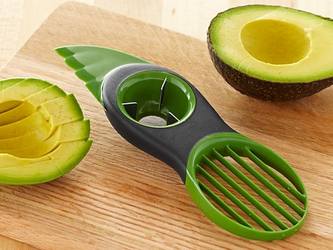
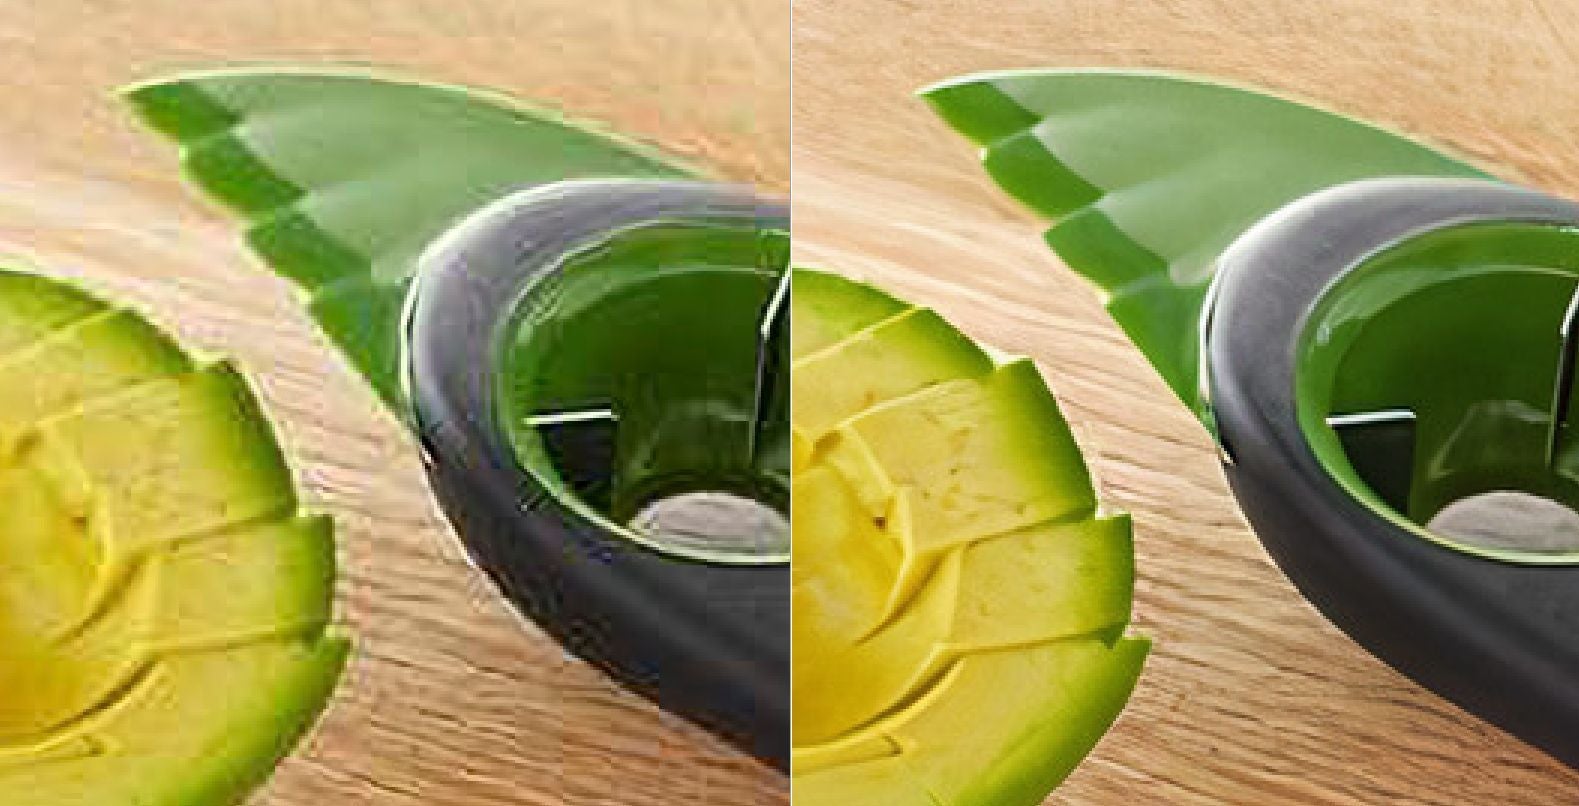
Small product image
Online stores and marketplaces often don’t have high-res photos of the products they sell. And as you know, image size and quality are among the main factors that help people make buying decisions.
So being able to utilize ML-based image enlargement can be a big advantage for eCommerce websites.
Let’s check how Super Resolution and Let’s Enhance coped with upscaling a small, low-quality product photo.
Original:

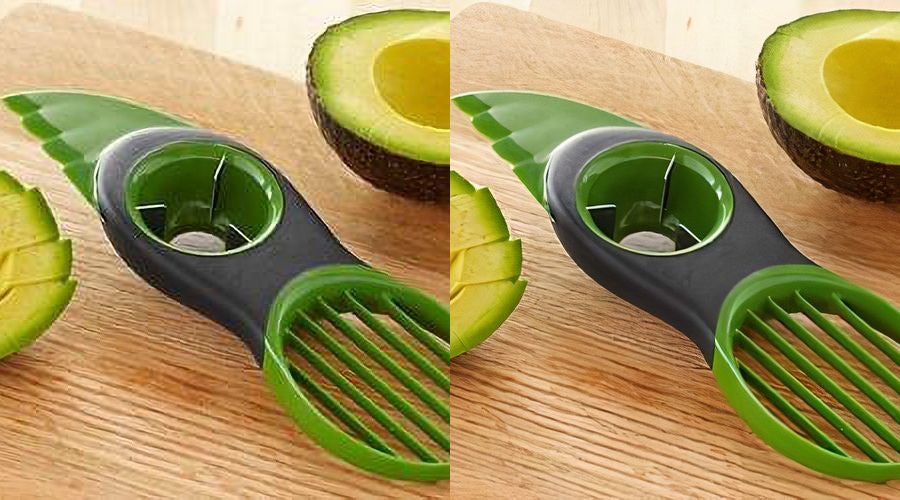
Enlarged:

Whatever that thing is, it doesn’t look good after processing with Super Resolution. Adobe’s tool basically failed in this case. In turn, Let’s Enhance restored textures, removed noise, and produced a fairly good product photo, considering the input quality.
But what if Super Resolution failed in this particular case only. Let’s repeat the test with a similar photo.
The same picture after enlargement with Super Resolution and Let’s Enhance:
Samples at 300% zoom:
This time Super Resolution did a better job. But it’s still not enough to win the round.
When it comes to upscaling tiny extra low-quality images, Adobe’s new feature is of little use at the moment.
Real Estate
Real Estate websites often rely on user-generated content or low-quality photos copied from other websites. Considering how high the stakes are in the industry, real estate sites can win big from AI image enhancement.
Here’s an example of a compressed photo we can find on a typical real estate listing.


The difference might not be that obvious when pictures are zoomed out to fit on a web page. So let’s take a closer look.
200% zoom:
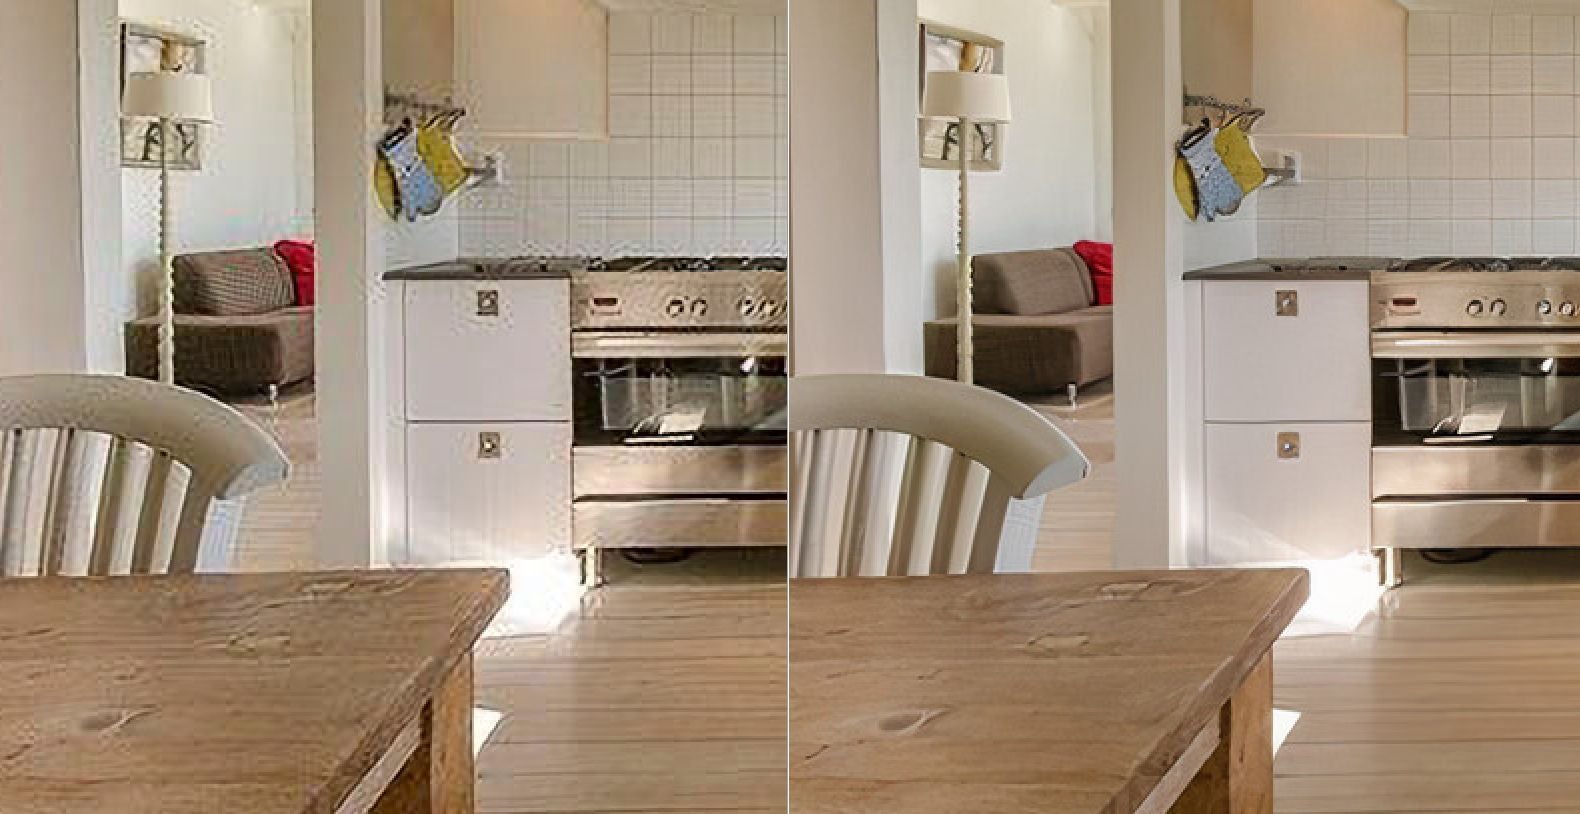
300% zoom:
As you can see, the closer we zoom in, the bigger the difference is.
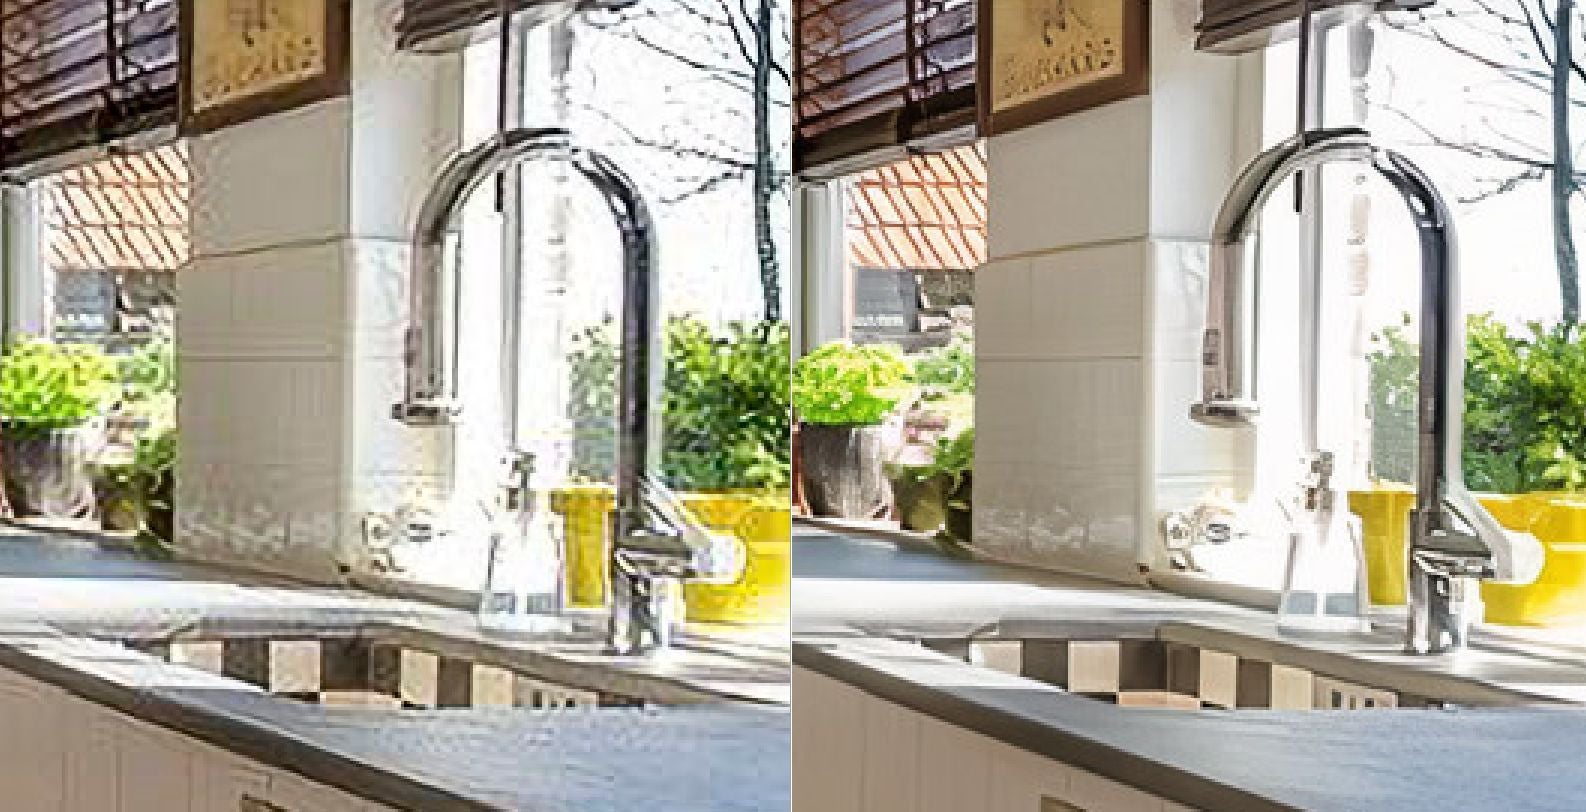
Let’s take one more interior photo.


300% zoom:

400% zoom:
The last few tests proved that “Super Resolution” doesn’t work well with low-res user-generated content, whether it’s real estate or eCommerce product photos.
But maybe it will work better with bigger images? Let’s check.
There’s no such thing as too many megapixels for print. Having a 50-100+ MP source file can really help you print a large, crisp exhibition photo or a poster.
For the next test, we took a 16.7-megapixel photo and blew it up to 67 megapixels. This will allow us to print a 36-inch wide poster at 300 DPI.

Let’s compare upscaled results at 100% zoom.
And now all 3 samples at 200%:
Although neither option is perfect at this level of zooming in, both tools did a decent job of upscaling a medium-size photo for print.
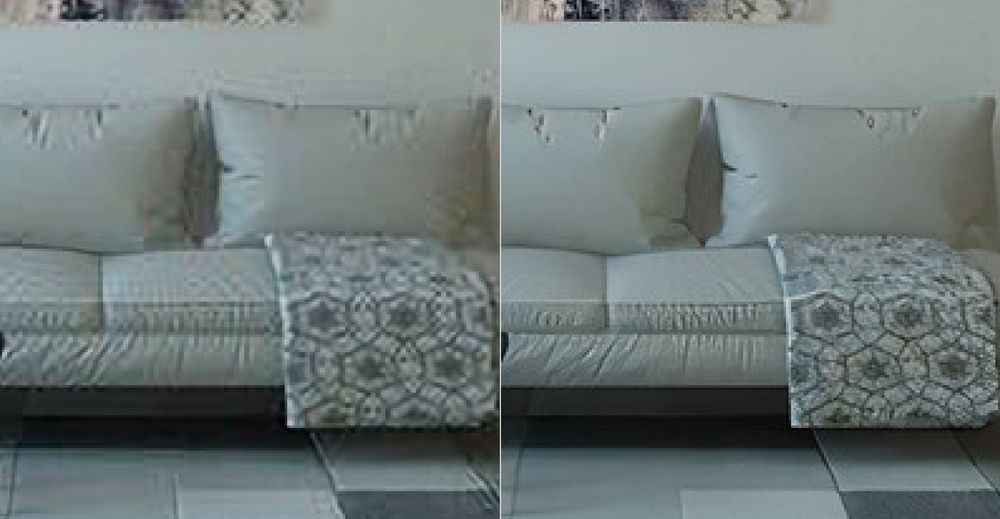
In the example below, we’ll take a 12 MP drone photo and upscale it to 48 MP. It would be enough to make a 26.67 × 20 inch print at 300 DPI density.
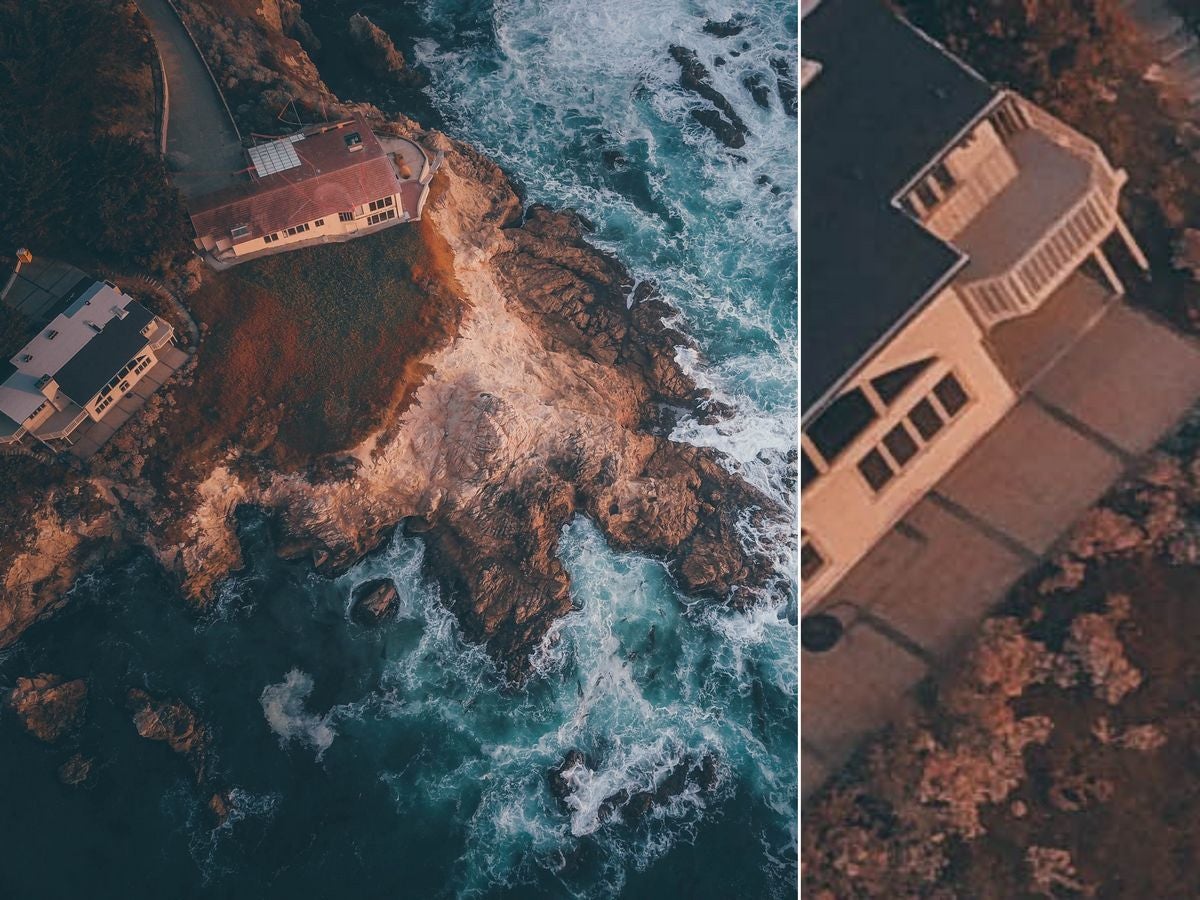
Close crop after upscaling:
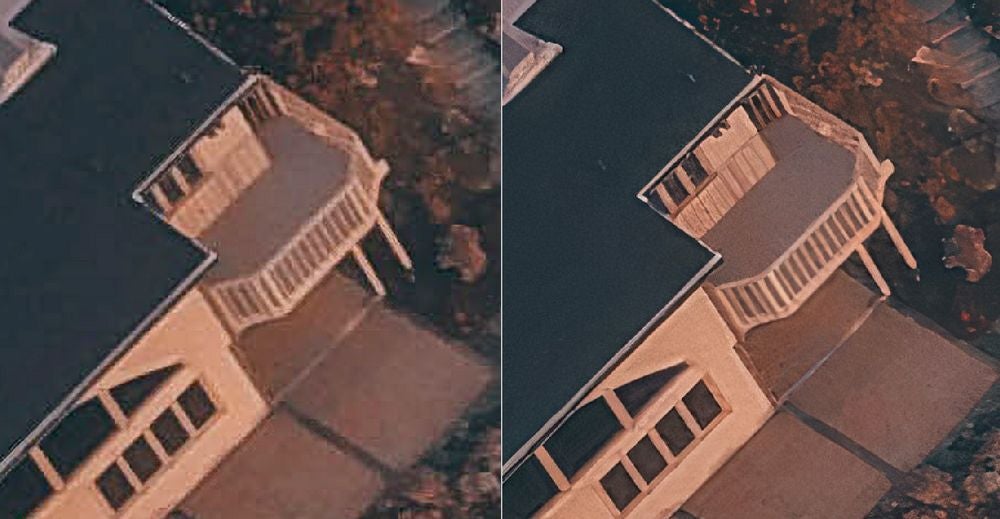
The difference is especially visible on the parts of the image where a level of detail is important. You can see how Super Resolution blurred the fence on the balcony.
On the rest of the image, the difference is less apparent but you would still see it on a large print.

What is the takeaway from our tests? Both tools upsample images better than older algorithms. But which one you should opt for depends on your situation.
Adobe Super Resolution vs. Let’s Enhance: which one should you choose?
Super Resolution is definitely a step forward compared to older upsampling methods in Photoshop. You might find SR useful if you
- Want to sharpen your medium- or high-quality raw photos.
- Already are a Creative Cloud subscriber and don’t want to pay for specialized software.
- Have a powerful computer that can handle upscaling without freezing.
Being a specialized tool, Let’s Enhance works better when it comes to lossless upscaling. It has a lot to offer for printing businesses and online platforms with user-generated content or low-res product images.
Use Let’s Enhance to
- Upscale and restore quality of compressed pictures
- Enlarge your photo up to 16x for large prints
- Enhance images at scale with batch processing or via API
Have any questions left? Don’t hesitate to drop us a line or test our tool for free right now.
