![Turn any sketch into 4K photo and video [LetsEnhance 2026]](/blog/content/images/size/w2000/2026/02/sketch-to-image-cover.jpg)
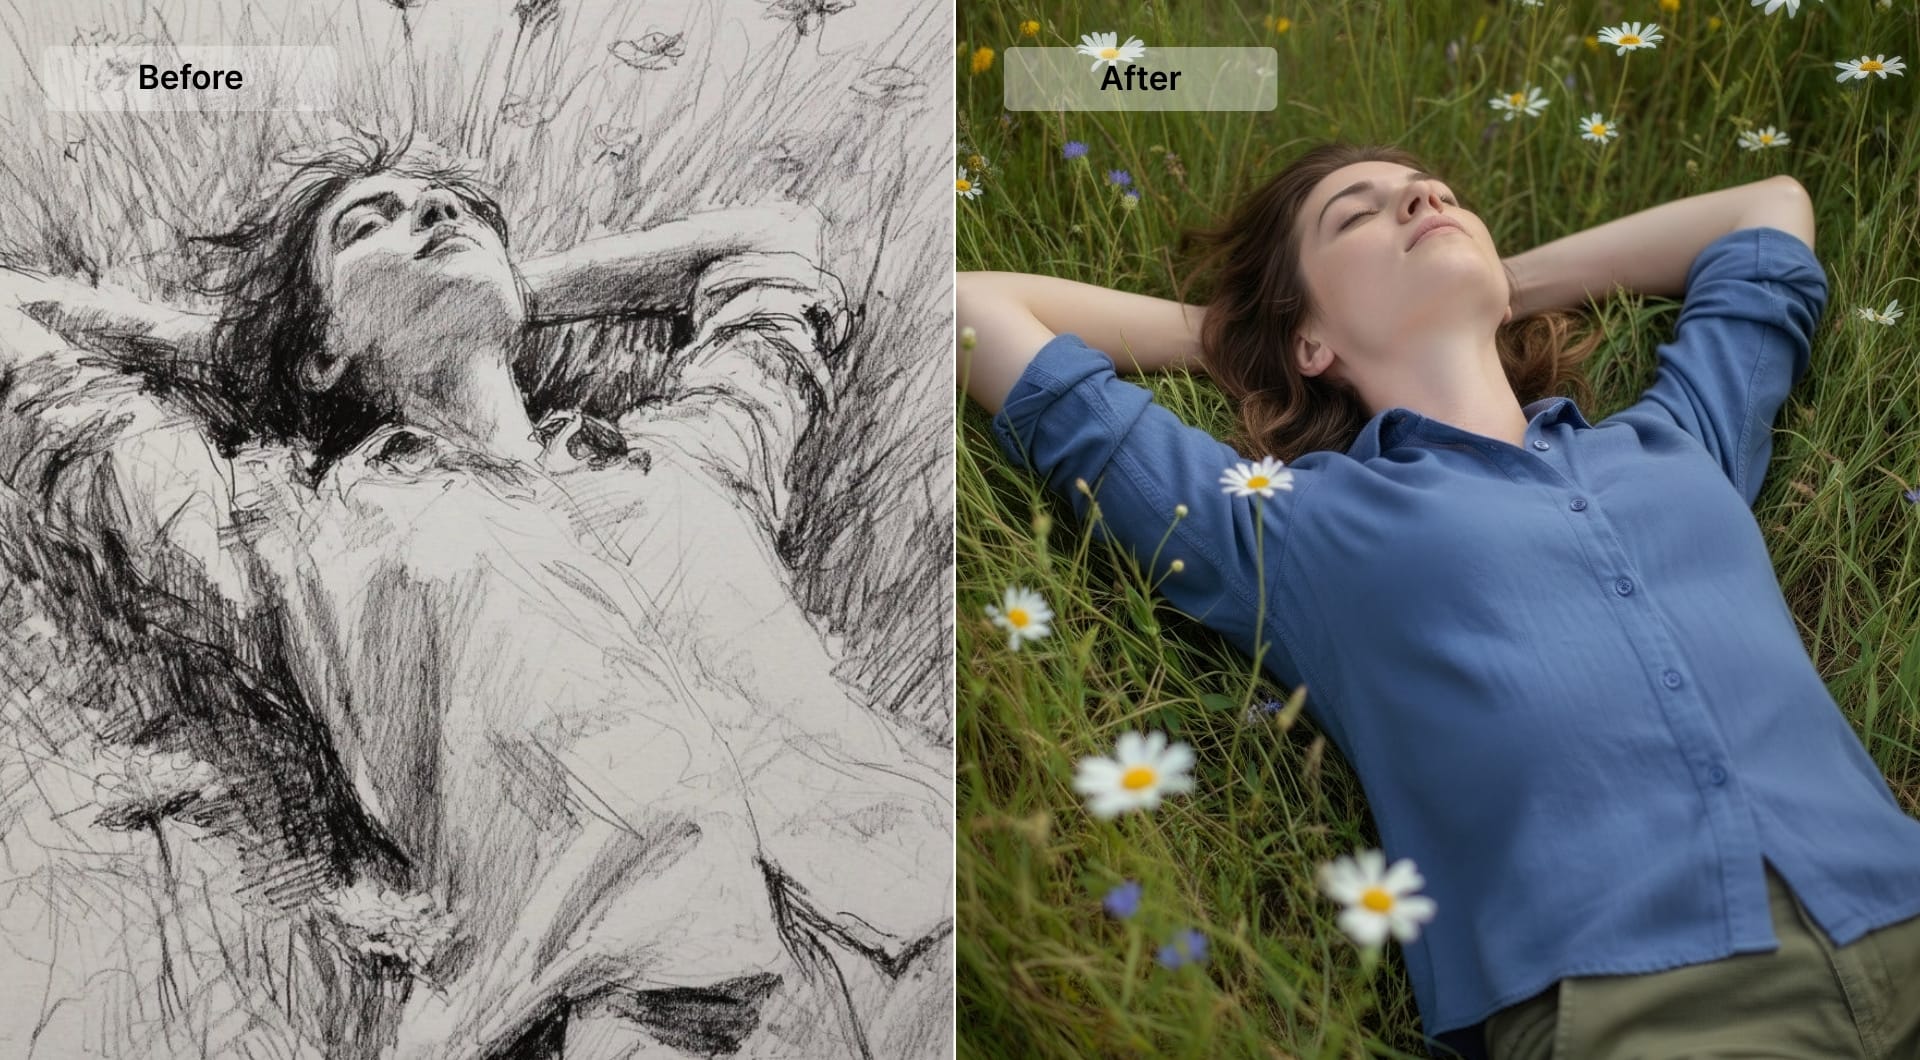
A sketch is how ideas start. A realistic image is how they get approved. Most teams get stuck in the gap between “concept” and “something you can show.”
But what if you can use AI tools like LetsEnhance to close that gap? Read on to learn how to turn linework into a realistic image in Chat Editor, upscale it to 4K (or print-ready sizes), then animate and upscale video when motion helps.
Why sketches still matter, and where they break down
Sketches are fast and flexible, but they're also incomplete by design. A stakeholder sees the same sketch and imagines different colors, materials, proportions, and lighting. That is how review cycles drag out.
A realistic image reduces ambiguity. It makes decisions concrete. Fabric reads as matte or glossy. Plastic looks like plastic. A product’s surface finish becomes obvious. You stop debating the sketch and start evaluating the result.
Step-by-step: turn a sketch into a realistic image
Step 1: upload your sketch to Chat Editor
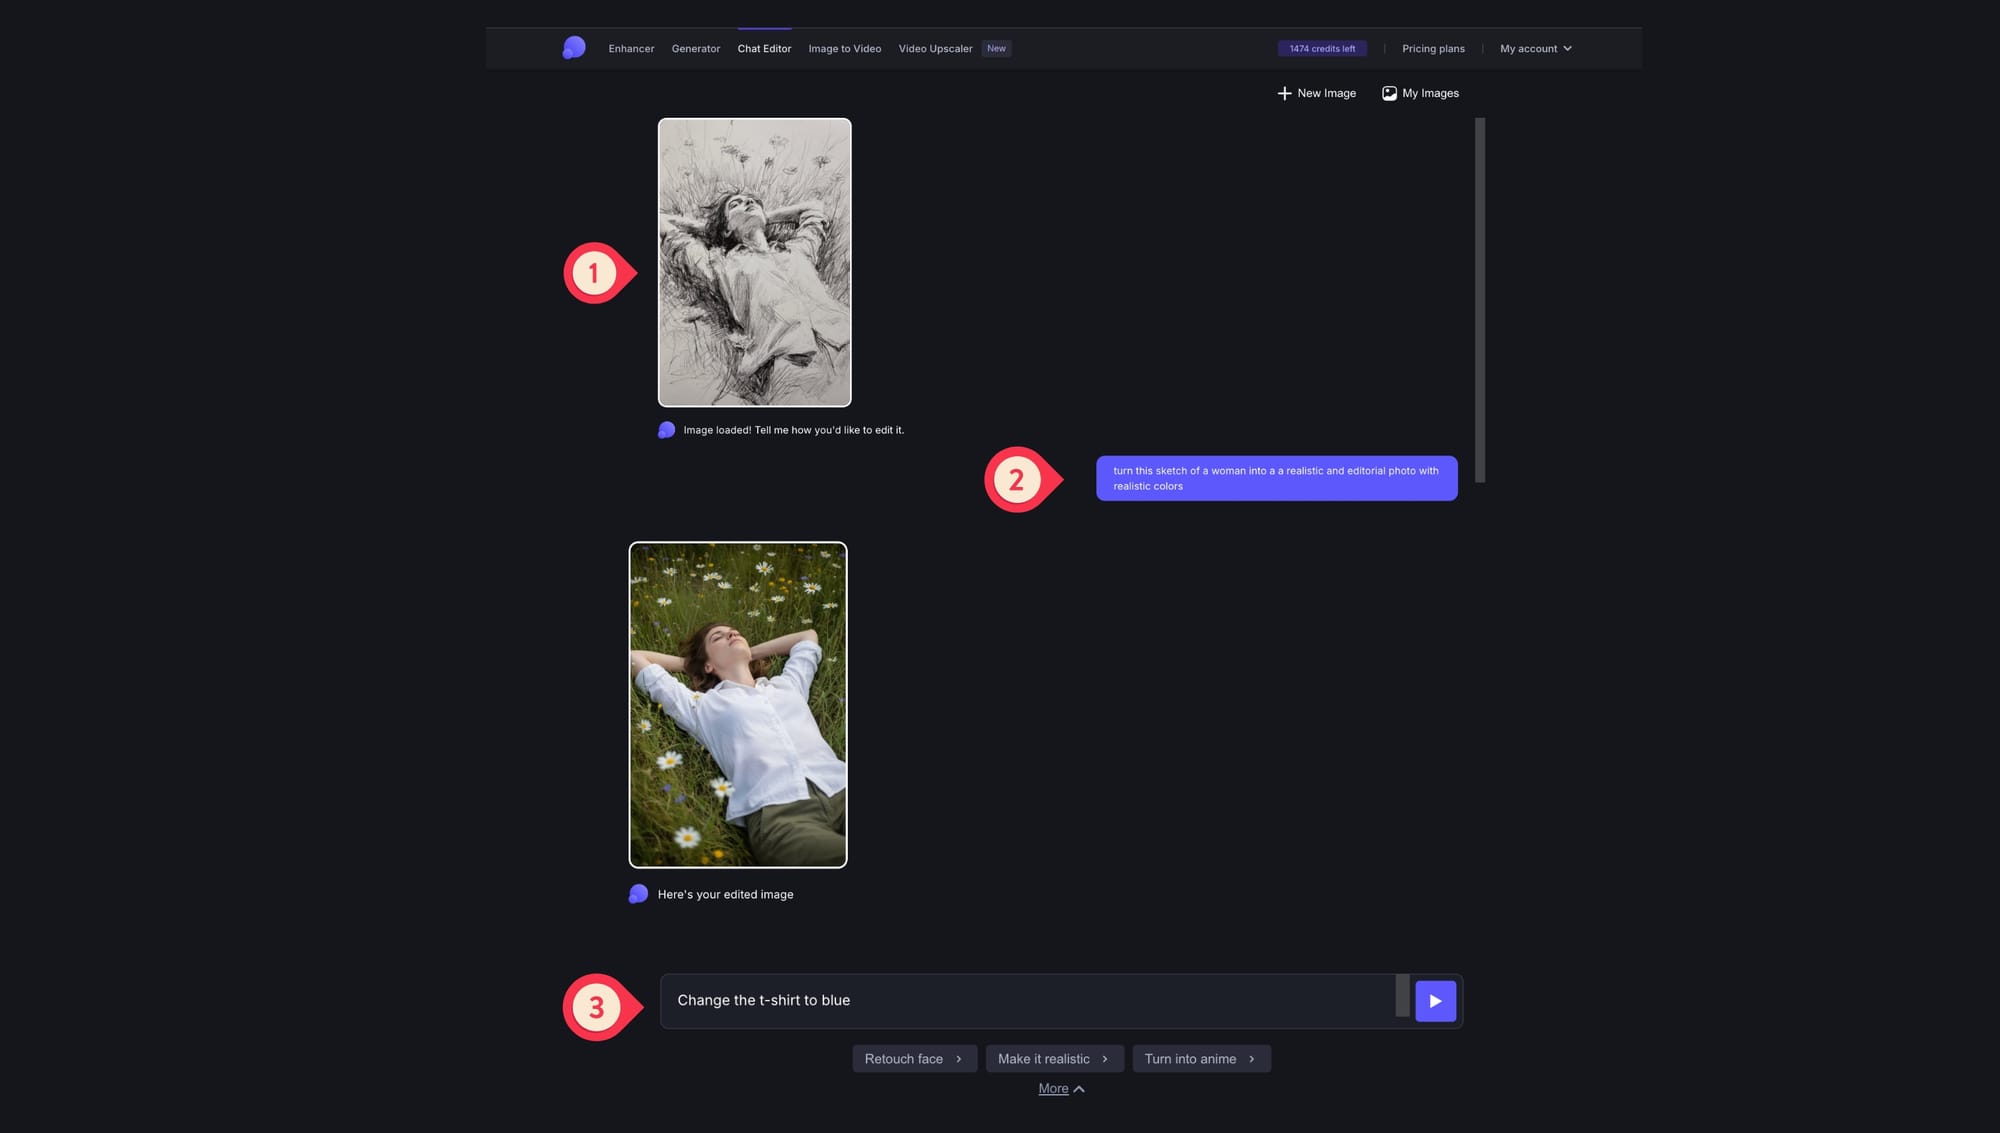
Open Chat Editor and upload your sketch. Take into account that Chat Editor edits an image you provide and it isn't text-to-image generation tool.
If you need to generate a new sketch from scratch, check out AI Image Generation.
Step 2: write a simple prompt and generate
Start with a prompt that defines the output type and the look. Keep it short and remember that you can always refine later.
Here are some prompt examples that you can use in your projects.
"Turn this sketch into a natural editorial photo with realistic colors. Keep proportions and composition."
"Convert this drawing into a photoreal studio product photo. Neutral background, soft light, realistic materials."
"Turn this architectural sketch into a realistic interior photo. Keep layout, add daylight and natural textures."
Step 3: refine with small edits
If the generated result doesn't match your vision, you can make specific changes. Use simple and conversational language such as: "make the jacket deep navy," "change the fabric to satin with visible weave," "add realistic stitching and subtle wrinkles," etc.
Step 4: upscale to 4K when the draft is correct
Chat Editor output is 1 MP and intended for further upscaling. Once you like the generated result, upscale it to your target resolution.
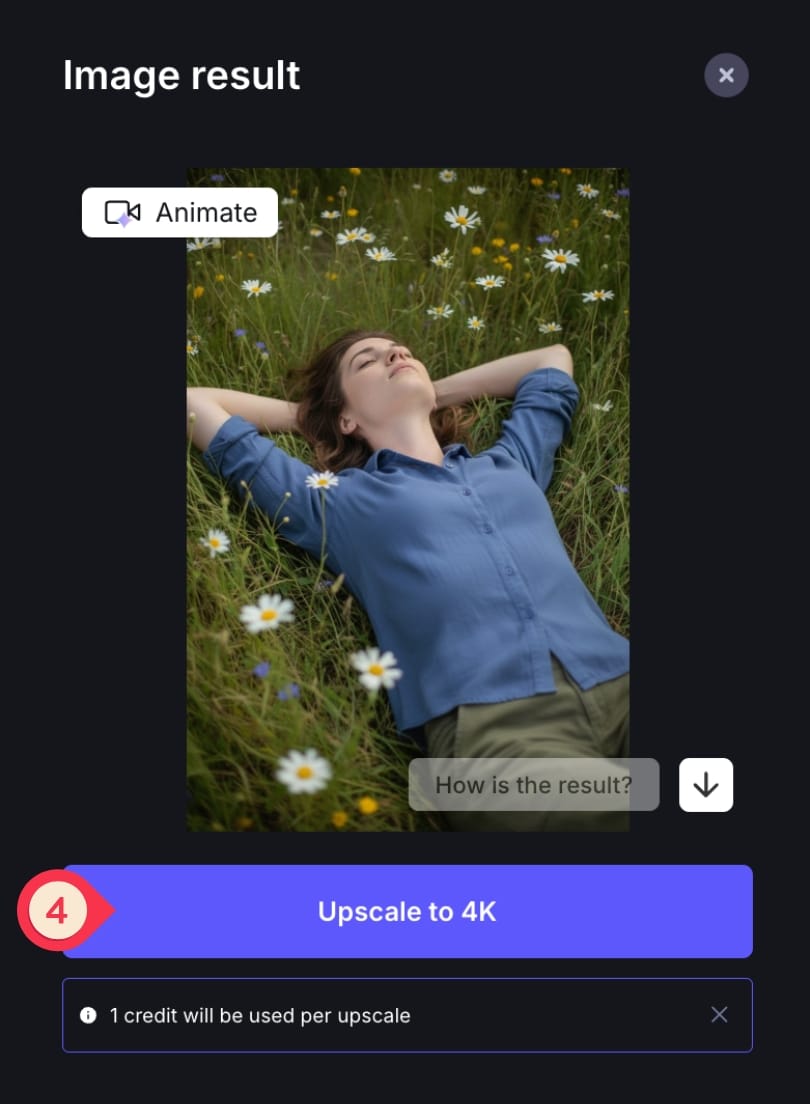
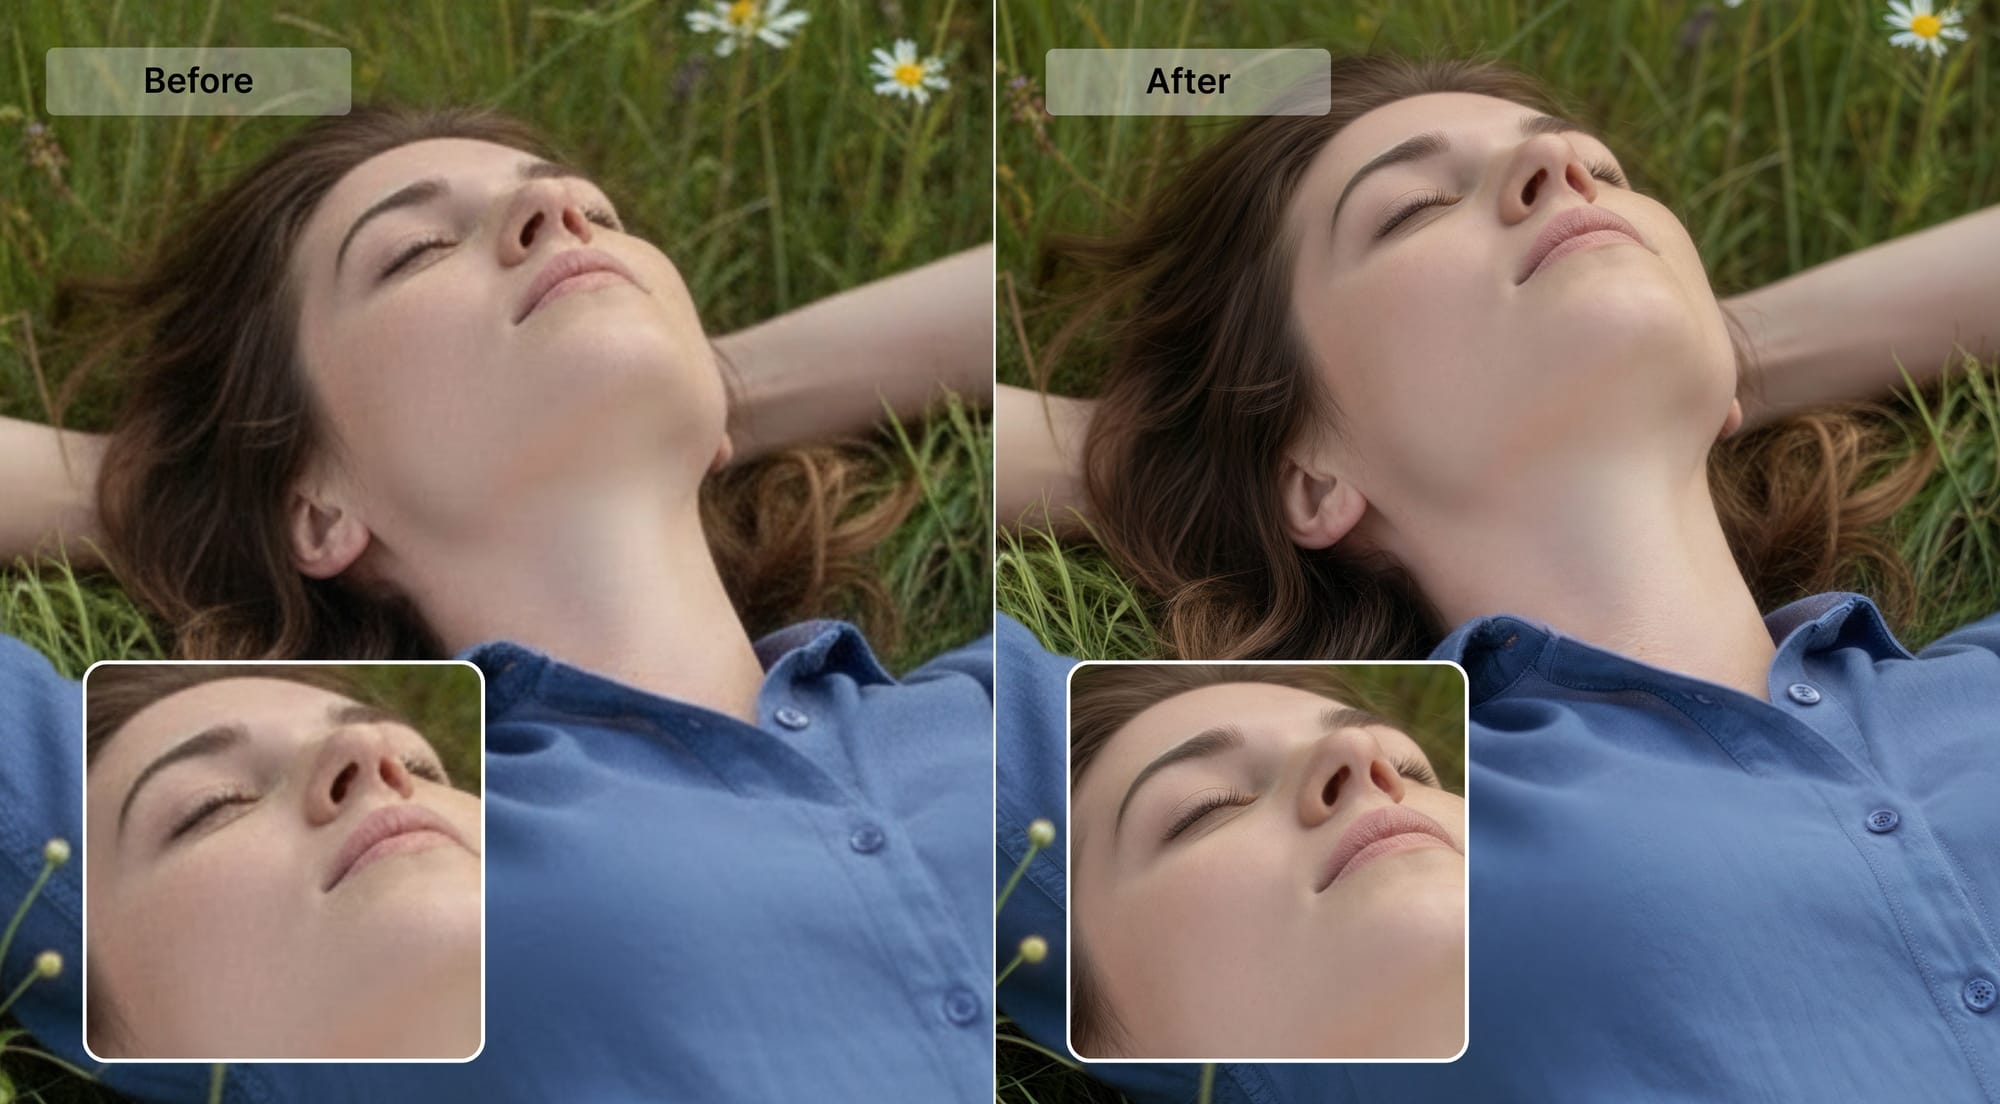
For the cleanest, most natural finish, use the recent Prime upscaler. It's designed to keep fine texture natural, so skin doesn't turn plastic and details like pores, fabric grain, and small surface noise stay believable.
If you are upscaling for print, you can either set the DPI to 300+ or use built-in printing presets for posters, photo and international paper formats. These automatically target print-ready pixel dimensions for those standards.
Turn the generated image into a short 4K video
If you need motion, use LetsEnhance's AI Video. It turns a single image into a 5-second MP4 in 1080p at 24 fps. A typical generation takes around 90 seconds and costs 10 credits per video on paid plans.
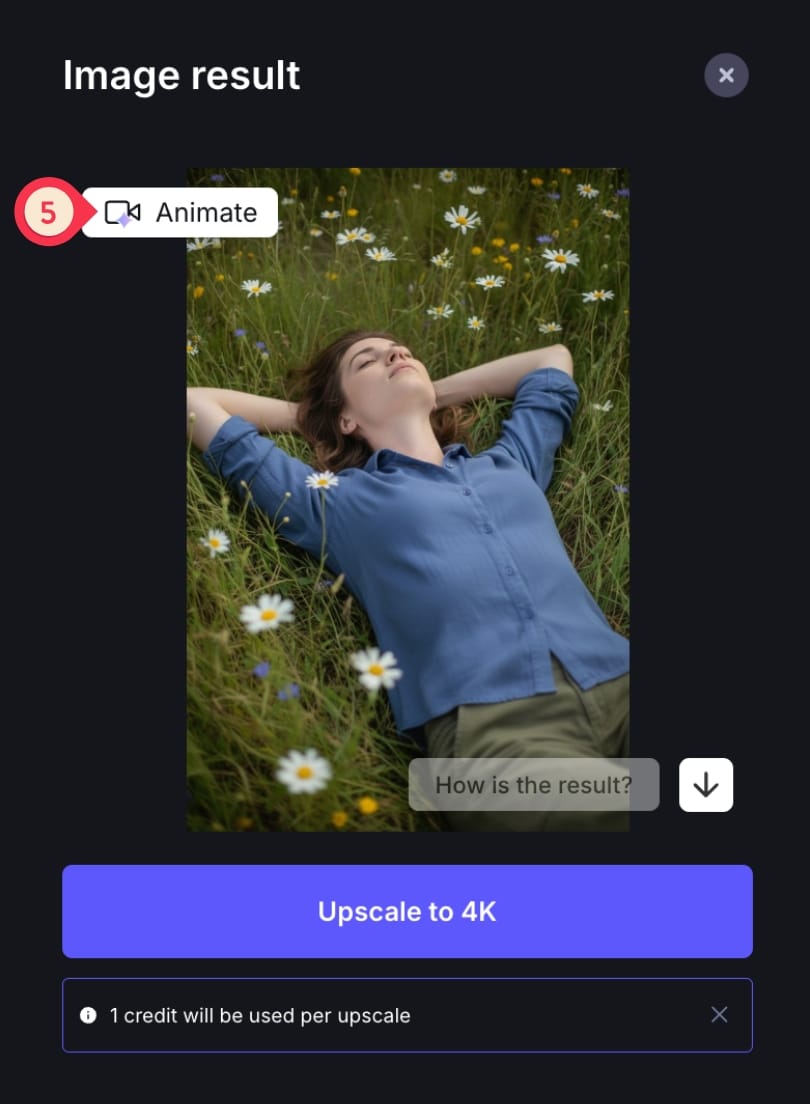
Step 1: click "Animate" to get started
From the result card, click "Animate" to open the image-to-video workspace.
Step 2: adjust the settings
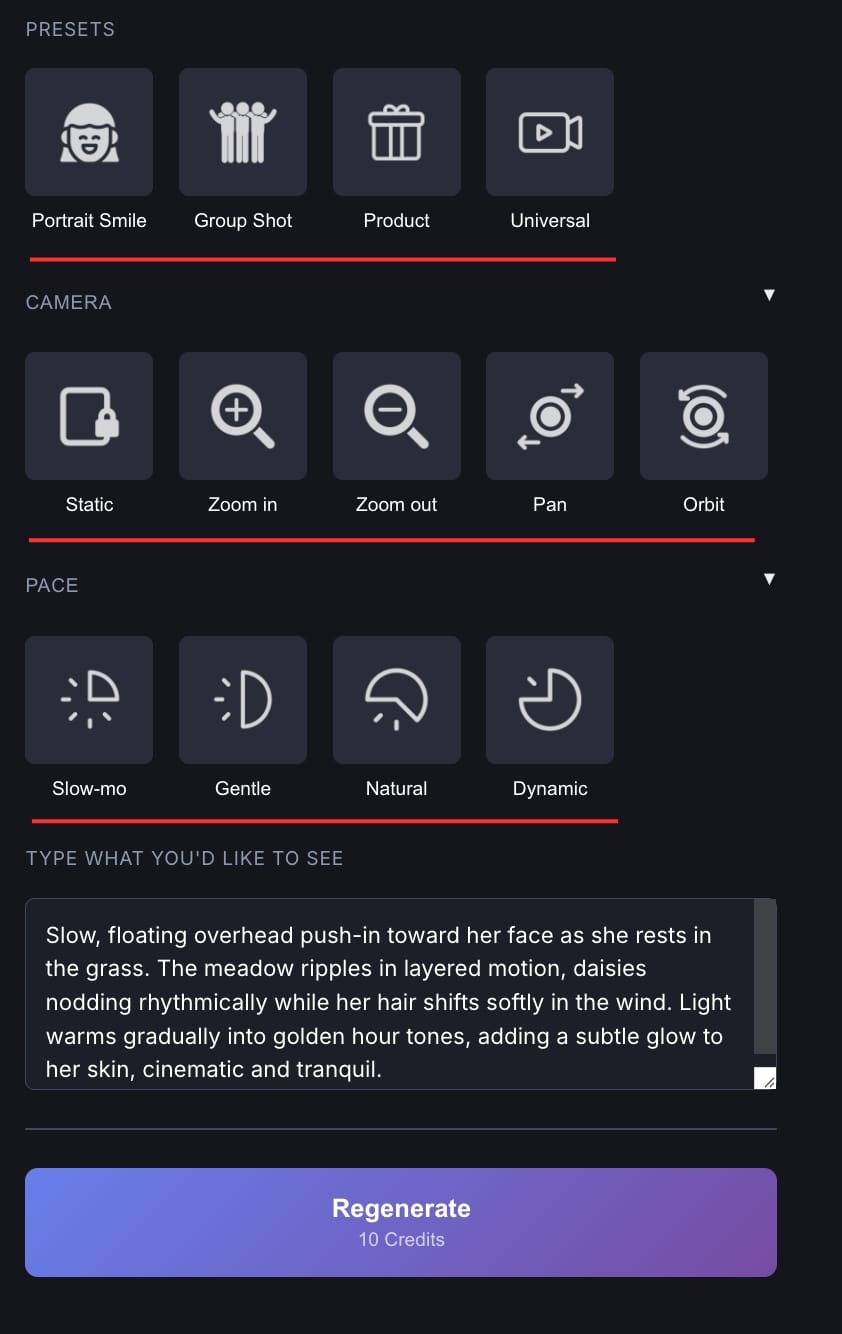
Use the built-in controls first, then add a prompt if you need specific direction.
What you can control:
- Choose the right preset from the available 4 (Portrait Smile, Group Shot, Product, or Universal)
- Adjust the camera movement settings (static, zoom in, zoom out, pan, orbit)
- Choose your desired pace speed (slow-motion, gentle, natural, dynamic)
Step 3: click Generate and review
Start processing, review and download your video after 90 seconds.
Note that each animation costs 10 credits.
Step 4: upscale video to 4K
Most image-to-video tools output 1080p natively. Video Upscaler is designed for that finishing step.
Just click the arrow button to open the video upscaler workspace inside LetsEnhance.
Video Upscaler finishes 1080p clips into higher-resolution output
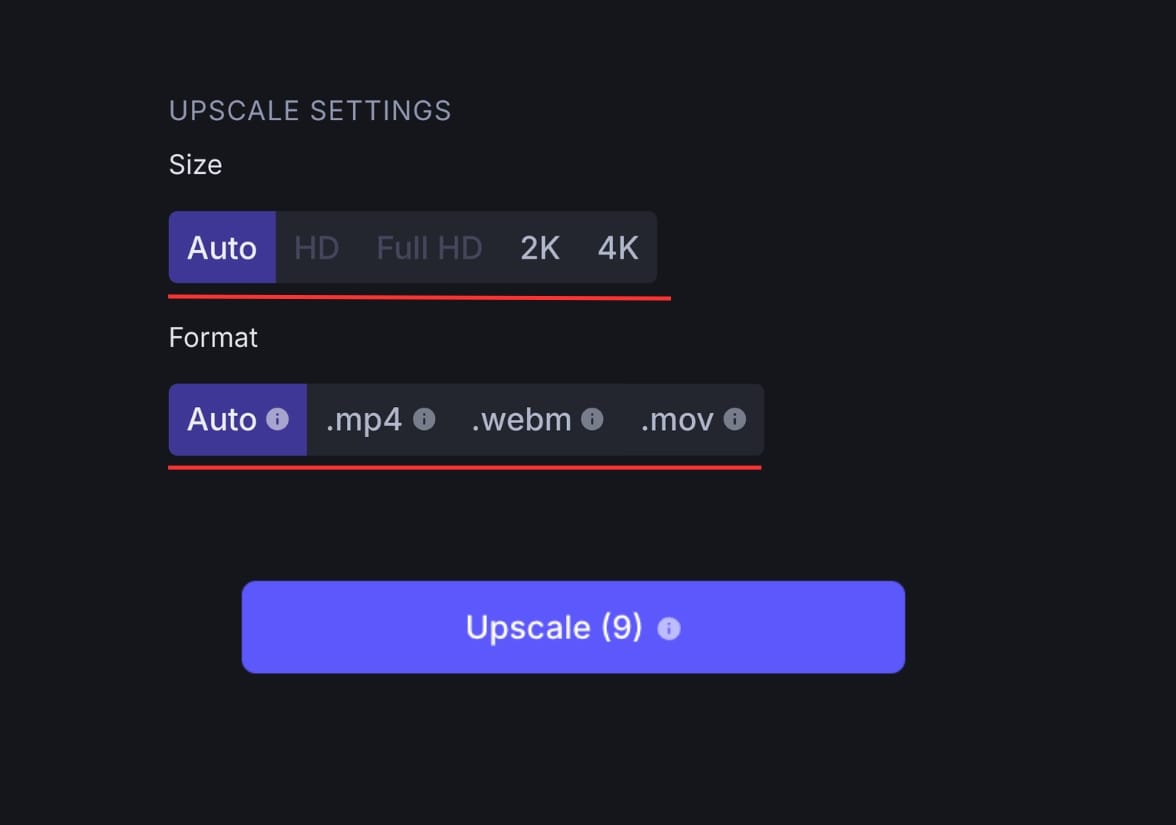
Step 4: choose the settings
Simply choose the upscaling size (HD, Full HD, 2K, 4K) and format (.mp4, .mov, and .webm).
Step 4: start processing and download
Click "Upscale" and download the 4K video once it's ready.
Main use cases
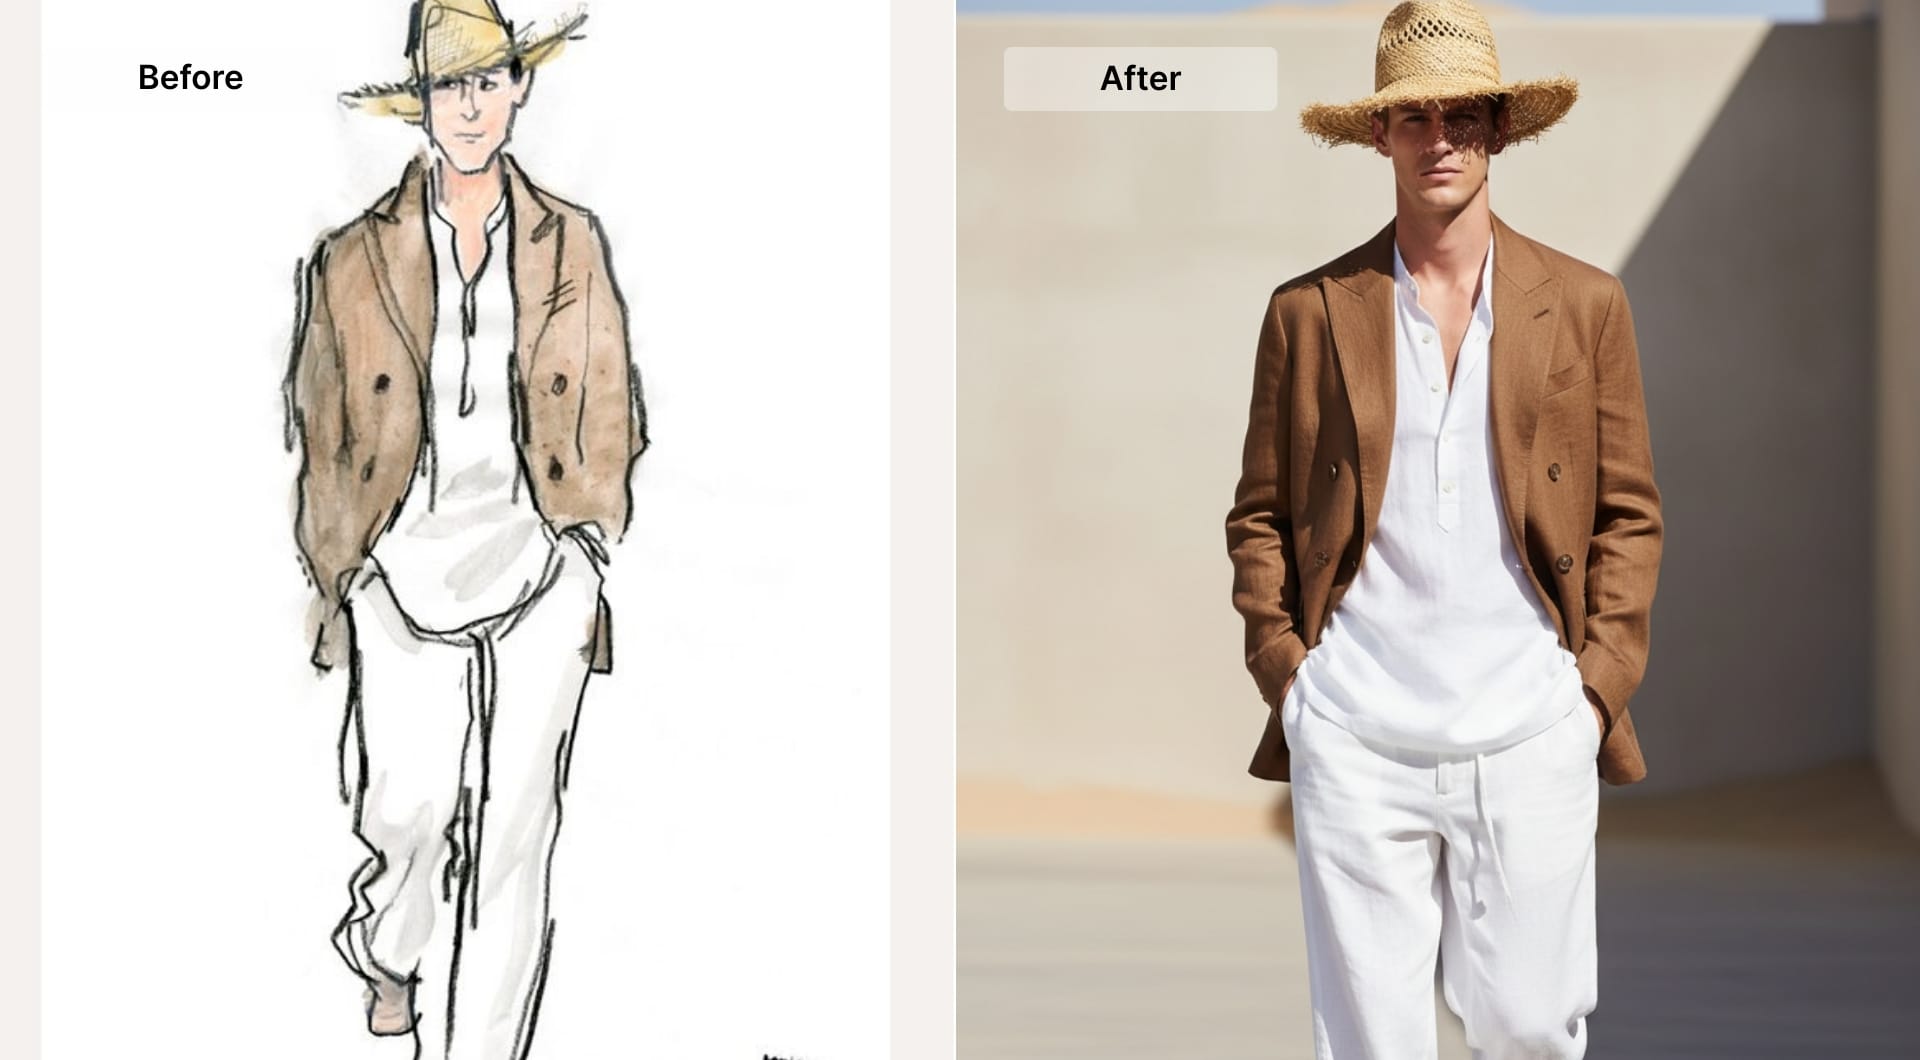
Fashion sketches and apparel concepts
Fashion sketches communicate cut and styling, but they rarely answer the questions that matter for ecommerce: how fabric behaves under light, how seams read at thumbnail size, and whether colors look credible.
Here's what to focus on when creating an image with AI:
- Fabric type and surface finish
- Stitching and seams
- Lighting style, studio or editorial
- Background simplicity, especially for ecommerce
Product design and industrial concepts
Early industrial design lives in linework: proportions, ergonomics, button placement, curvature, and overall geometry. Where sketches fall short is surface truth. Material, finish, and assembly detail often decide whether a design feels credible.
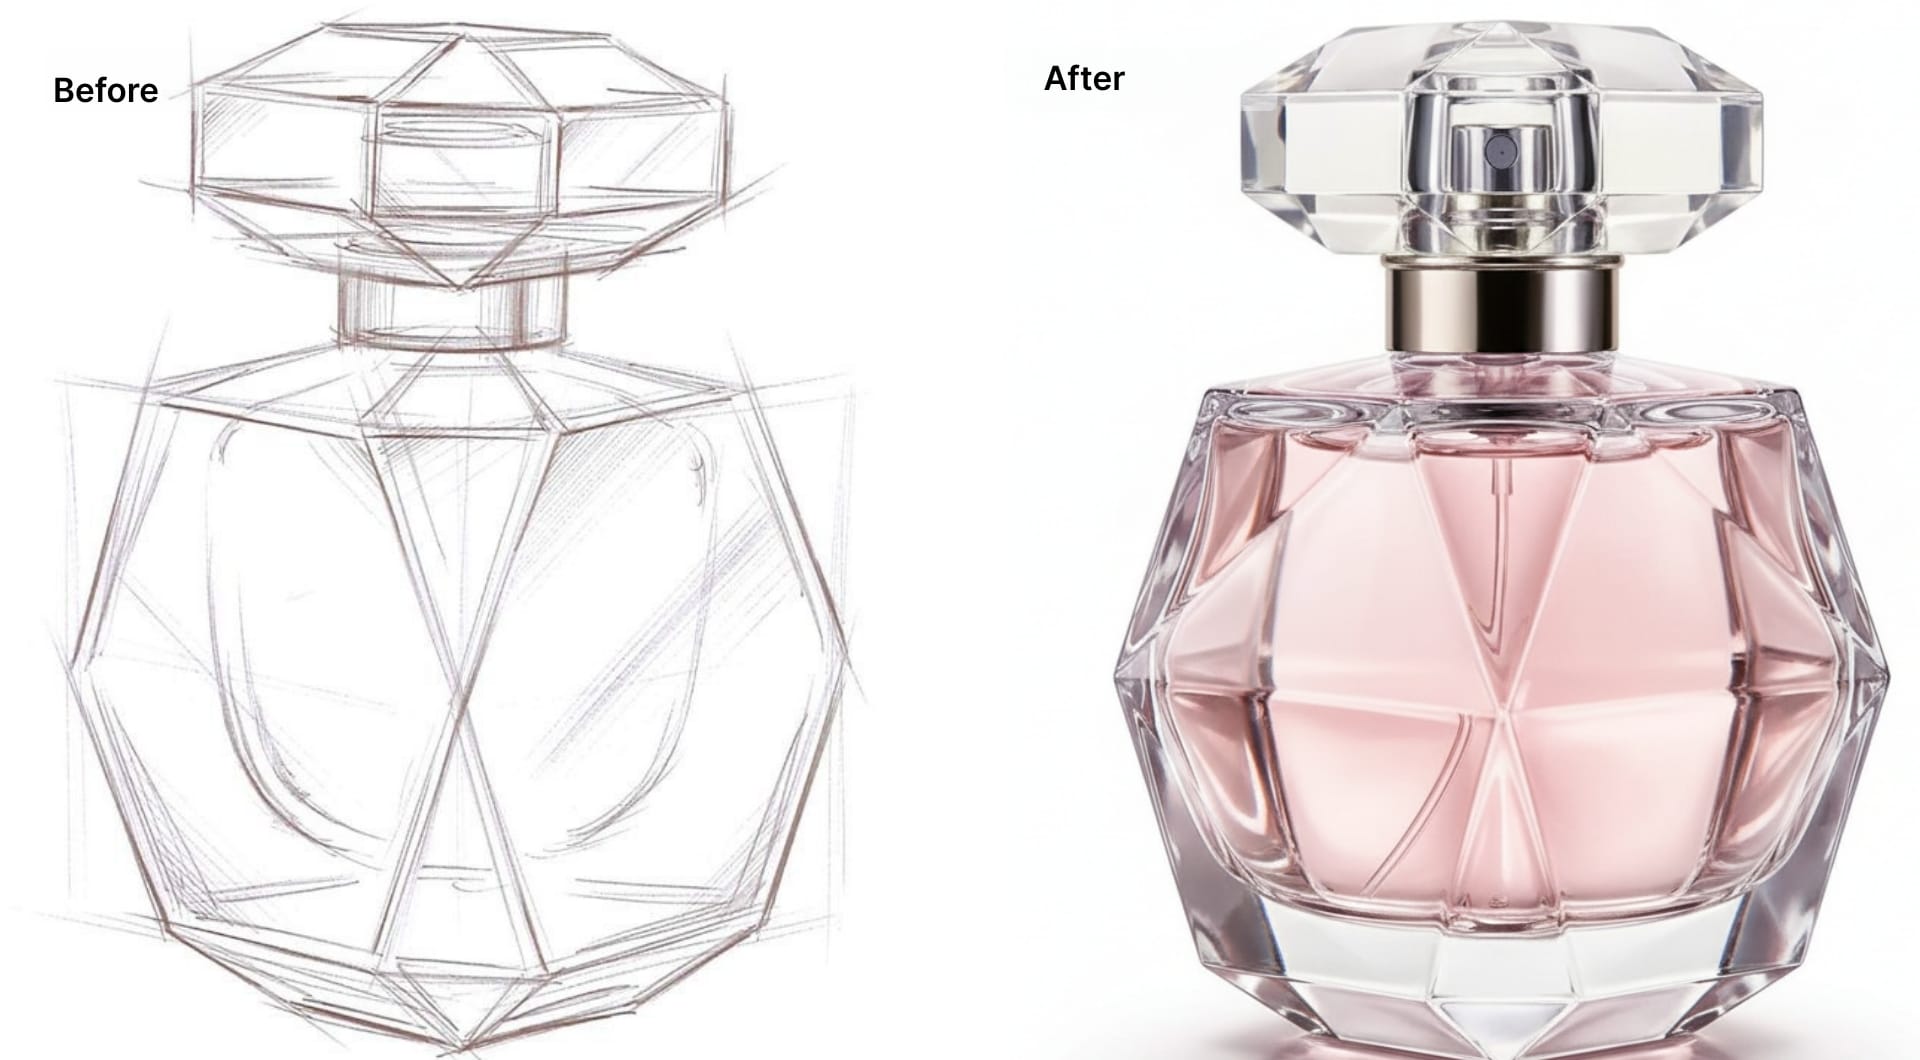
A glossy polymer reads differently than matte. Brushed metal changes how edges reflect. Even the way highlights roll over a curve affects whether something looks like a manufacturable product or a concept drawing.
Realistic images help in two ways. First, they let teams evaluate how the object will actually read in the real world, under light. Second, they make it easier to align across functions. Engineering can spot unrealistic constraints earlier. Brand teams can validate whether the design matches the company’s visual language. Stakeholders can react to something that looks closer to a real product, not a suggestion.
Prompting focus for product design: material and finish first, then lighting, then micro-details like edge highlights, surface grain, and labeling. Avoid adding extra props unless the goal is a lifestyle scene.
Architecture and interior planning
Architectural sketches are essential for quick iteration, but they rarely answer the questions clients actually ask. How does the space feel at different times of day? What do materials look like together? How does light move through the room? Does the ceiling height feel right? What’s the atmosphere?
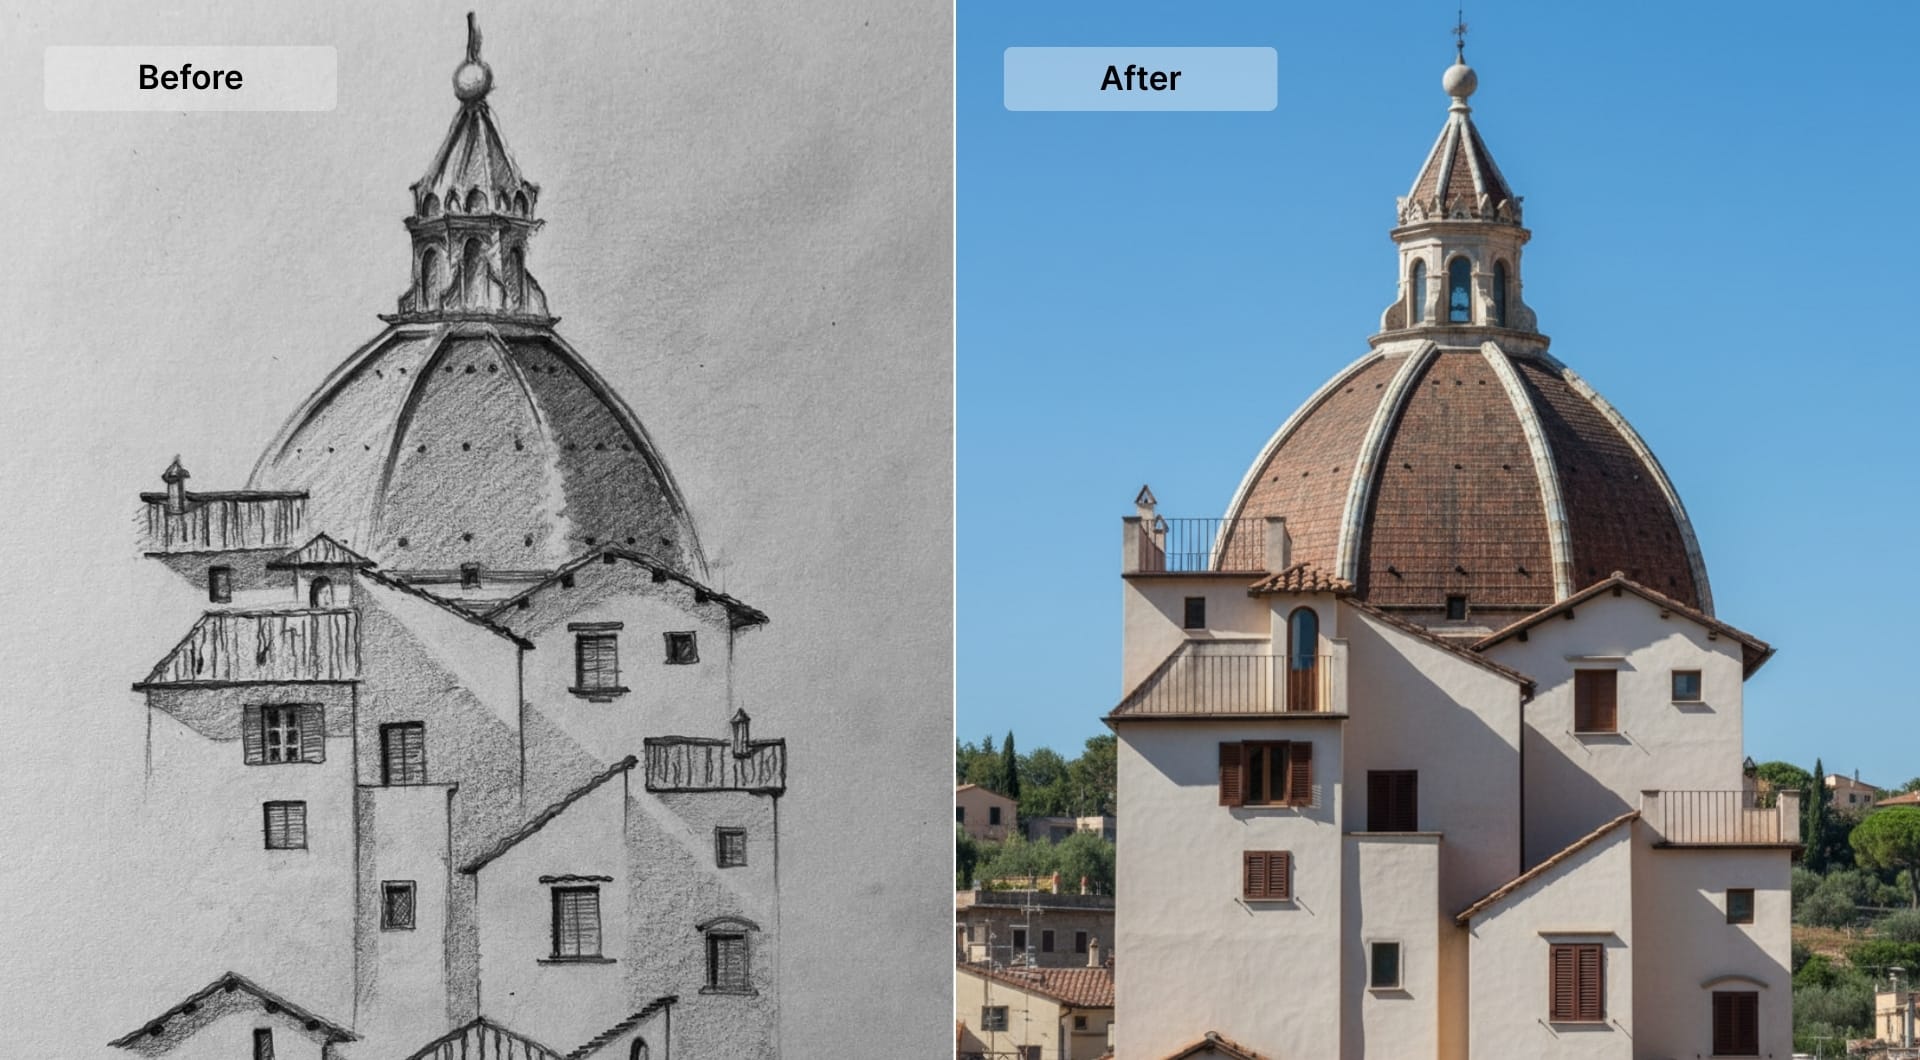
Photoreal visuals help because architecture is experienced. A realistic image gives clients something closer to lived reality. It reduces misinterpretation early and helps designers validate decisions like material pairing, lighting temperature, and visual clutter before committing to more detailed rendering work.
Prompting focus for architecture: daylight direction and time of day, material palette, and camera perspective. If structure matters, explicitly lock layout and major elements so the model does not “improve” the plan.
Storyboards, concept frames, and creative direction
Storyboards communicate sequence, framing, and action. They aren't meant to carry tone, texture, or realism. But in a pitch, tone is often the decision.
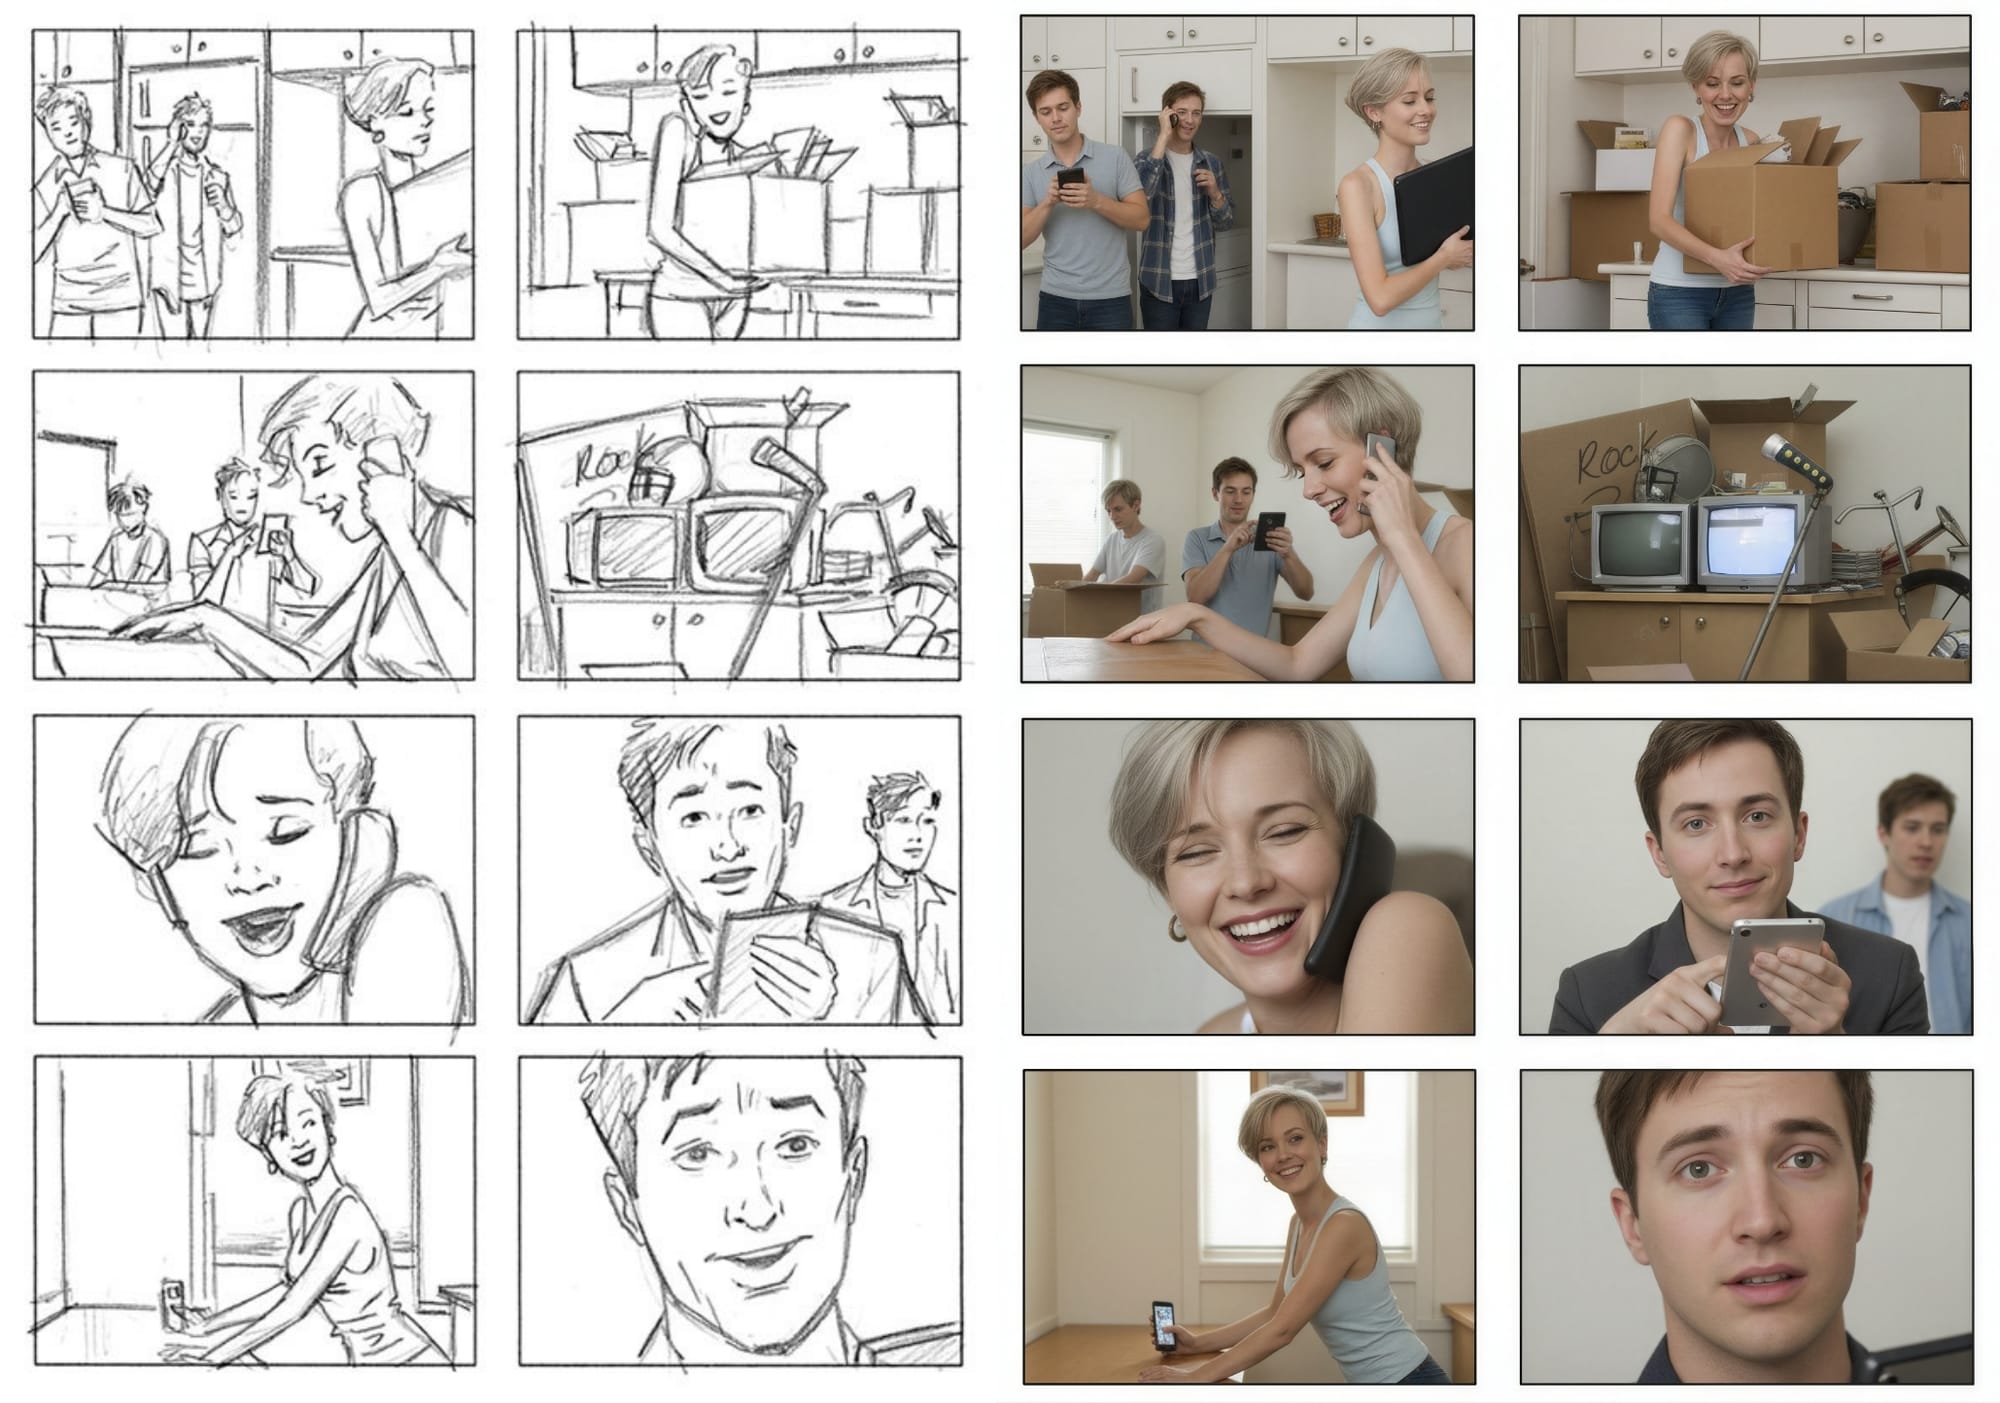
Turning storyboard frames into realistic stills gives creative teams something closer to a “reference frame.” It helps align directors, clients, and production teams on lighting, mood, and composition.
Prompting focus for concept frames: lens feel (wide vs close), lighting mood, and realism cues. Lock composition and subject placement so the storyboards remain faithful to the original intent.
Getting started for free
If you're excited to bring your sketches to life, create an account and get 10 free credits to get started. You can use the credits to generate realistic images with Chat Editor and upscale to 4K.
Note that you'll need a paid plan for AI Video and Video Upscaler. LetsEnhance offers monthly subsriptions starting from 9$ as well as pay as you go bundles with one time purchase.
FAQ
What is the difference between sketch editing in Chat Editor and generating an image from text?
Text-to-image tools start from nothing but a prompt, so composition and proportions are guesses. Chat Editor starts from your sketch and edits what you upload, which makes it easier to preserve the original design intent.
Why does the Chat Editor output look low resolution at first?
Chat Editor outputs a 1 MP draft so you can iterate quickly. Once you like the result, you upscale up to 16x as the final step.
How do I keep the model from changing the silhouette or layout?
The most reliable approach is to reduce the scope of each prompt. Ask for photorealism first, then refine one variable at a time, such as color, then material, then lighting. If you request many changes in one message, you increase the chances of structural drift.
What prompts help produce natural colors instead of artificial tones?
Start with a photographic target: “natural editorial photo with realistic colors” tends to behave better than vague style prompts. Then correct color in a follow-up prompt and lock everything else: “make the fabric true navy, keep lighting and background unchanged.” This sequence reduces the chance of the model “fixing” color by changing the whole scene.
Can I turn a sketch into a video directly?
Yes, you can directly upload your sketch to image-to-video workspace and adjust the settings. AI Video turns a single image into a 5-second MP4 in 1080p.
What are the technical specs of LetsEnhance AI Video?
AI Video outputs a 5-second MP4 in 1080p at 24 fps. It accepts JPG, PNG, and WebP inputs and optimizes high-resolution inputs to 1080p for animation.
Do I need a paid plan for AI Video?
Yes. AI Video is available on paid plans and costs 10 credits per 5-second clip.
How does Video Upscaler pricing work?
Video Upscaler cost is calculated from output duration and resolution. The published rule of thumb is roughly 1 credit per second of Full HD output, with higher resolutions costing more.
That is why it works best as a finishing step after you are satisfied with the motion.
What are the current Video Upscaler limits and formats?
Supported formats include mp4, mov, and webm. Current limits are 100 MB and up to 2 minutes per clip.
