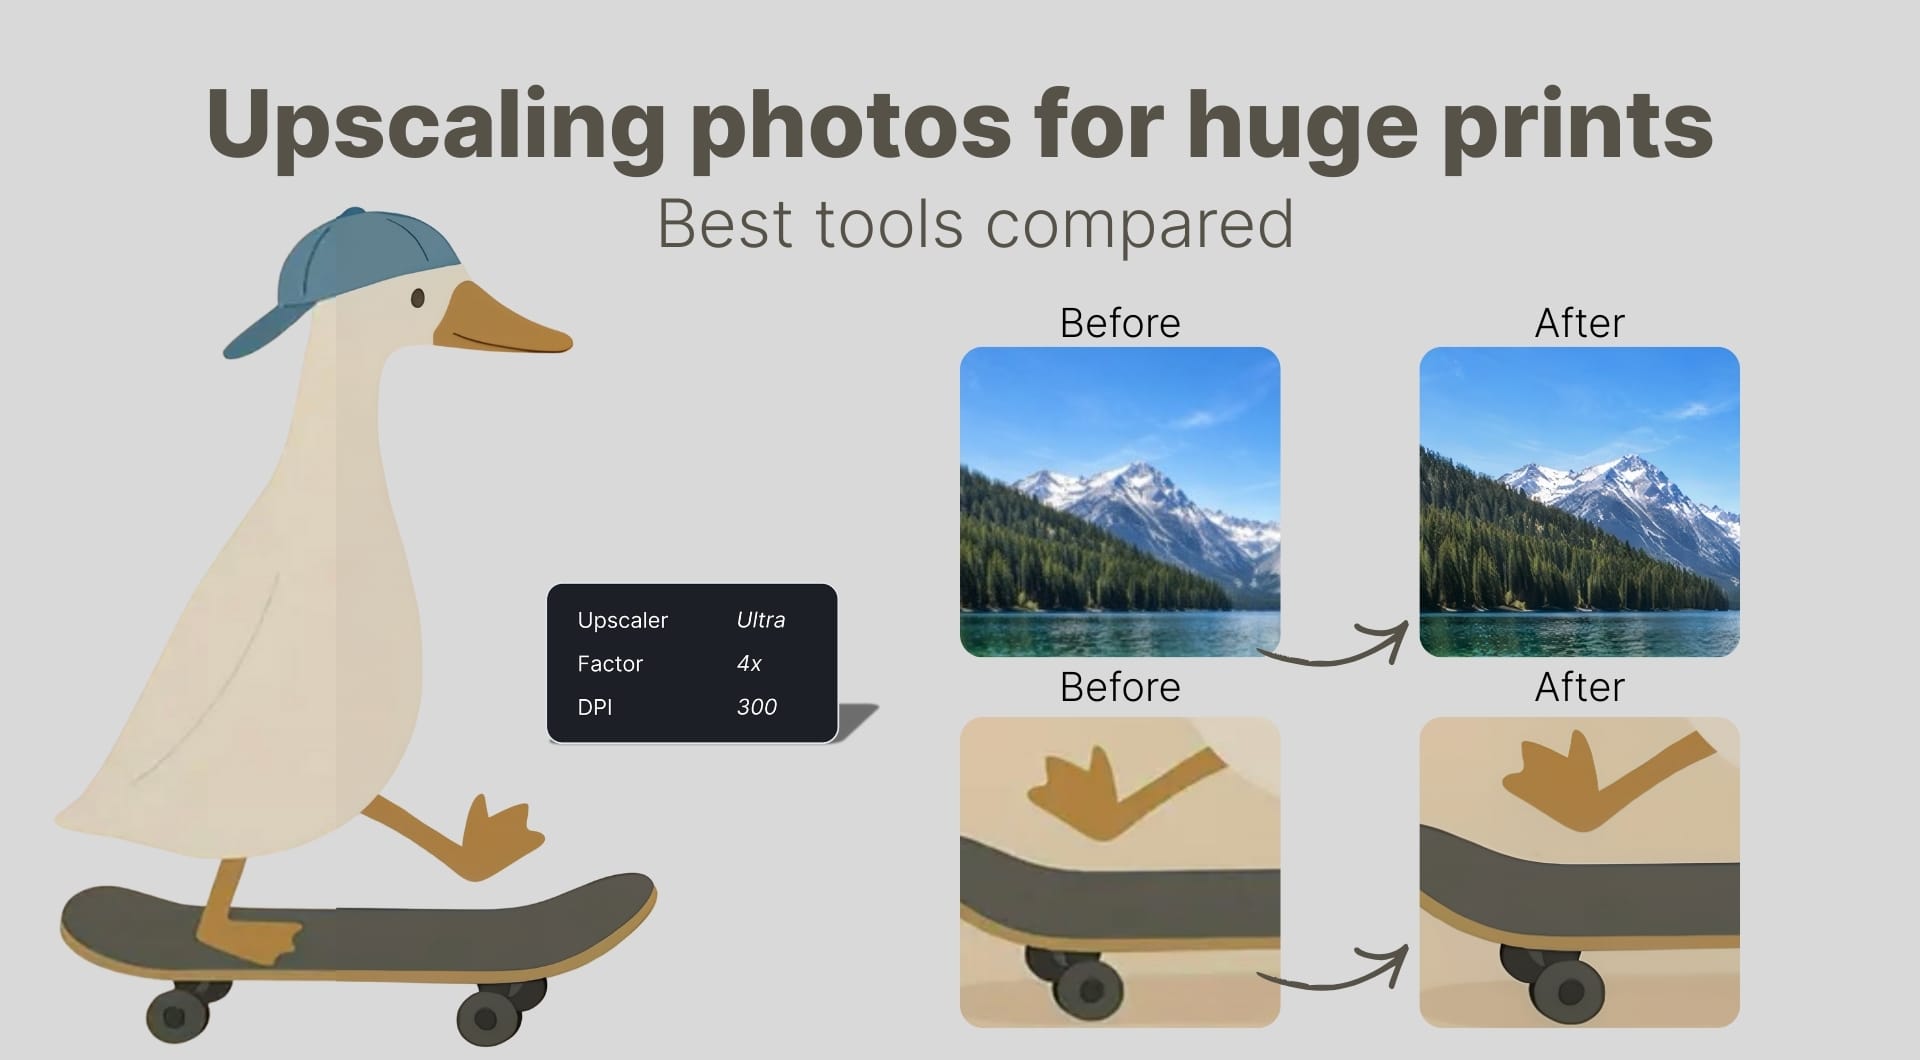
Need a printing solution to get sharp 24×36 or bigger from a small file? These AI upscalers help you get real-world poster resolutions, from 150–300 DPI (dots per inch), without plastic artifacts or mushy detail.
Let's learn about each tool and what they have to offer.
Key takeaways
| Tool name | Best for | Pricing model | Key strength |
|---|---|---|---|
| LetsEnhance.io | Best overall for large prints & posters | Free tier + subscriptions from $9/mo | Huge max resolution (up to 512 MP) with tuned modes for photos, products, and art |
| Topaz Photo AI | Photographers needing desktop control for big prints | One-time license ≈$199 + optional upgrades (or Studio subscription) | Excellent detail recovery plus strong noise + sharpen combo for print |
| Adobe Super Resolution (LR/PS) | Existing Adobe users preparing occasional large prints | Adobe Photography Plan subscription | Integrated 2× “Super Resolution” for RAW files with a great color pipeline |
| ON1 Resize AI | Dedicated print workflows and fine-art posters | One-time purchase or subscription (ON1 plugins) | Print-oriented tools like gallery wrap, tiling, and precise inches/PPI controls |
| VanceAI Upscaler | Online upscaling for very large images and posters | Free limited + paid from ~$9.90/mo | Up to 8× online (40× in desktop app) with a simple 1-click workflow |
| Upscayl | Free open-source desktop upscaler | Completely free (FOSS) | Local, GPU-accelerated upscaling with no upload limits |
| Bigjpg | Anime/illustration posters and graphics | Free with limits, paid from ≈$5/mo | Specialized models for line art and anime, up to 16× upscale |
Closer look at upscalers for large print
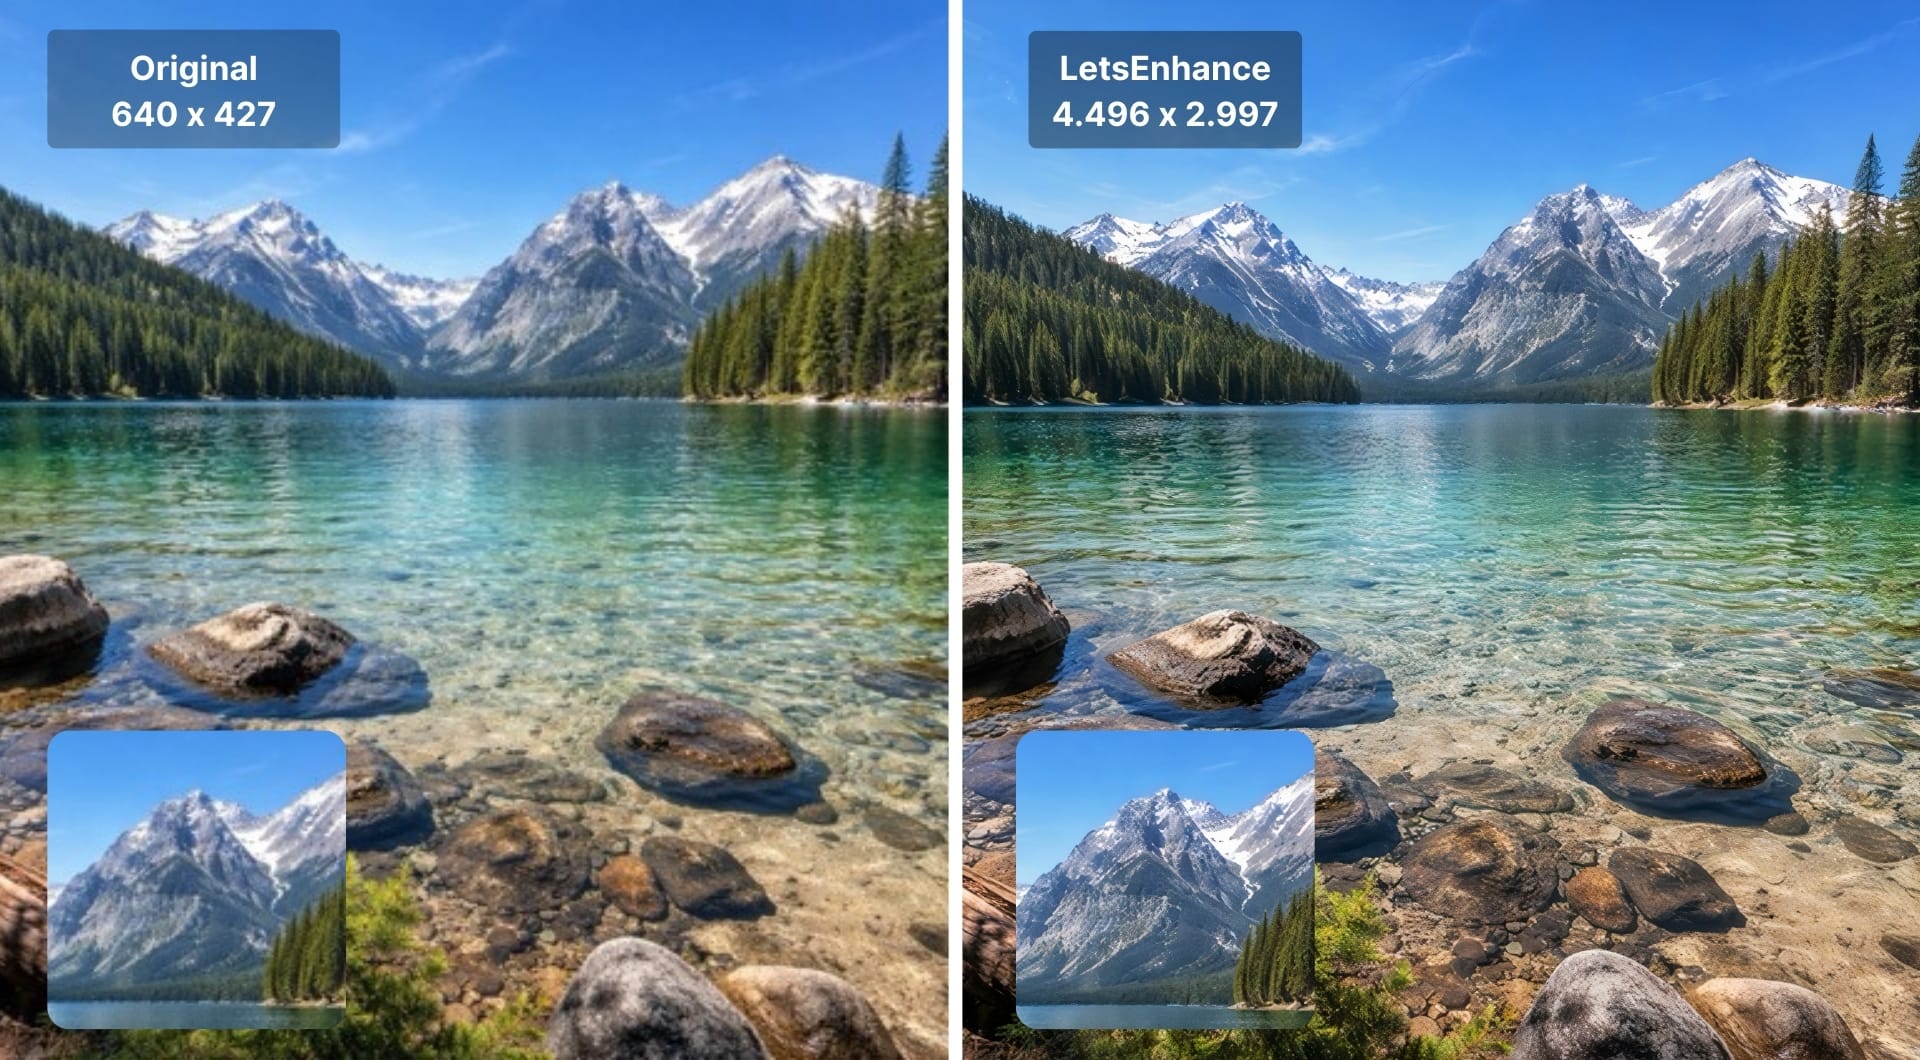
1. LetsEnhance.io (best overall print-ready upscaler)
LetsEnhance is a browser-based AI enhancer that combines denoising, sharpening, artifact removal and upscaling in one pass. You upload an image, choose a dedicated AI model (Balanced, Gentle, Ultra, Strong, Old photo or Digital art), and it outputs a higher-resolution, cleaner file suitable for 300 DPI printing. It also offers ready-to-use printing presets that include popular printing formats and sizes.
Free users can upscale up to 64 MP, while paid plans go to 256 MP (personal) and up to 512 MP (business). This is enough for huge wall art and even near-billboard-scale prints at respectable PPI (pixels per inch).
It also includes Text-to-Image, an image Chat Editor, and an Image-to-Video tool, so you can both generate artwork and make it print-ready in the same ecosystem.
Key features
- Multiple AI modes tuned for different content: Gentle (fidelity), Ultra (max detail), Old photo (restoration), Digital art (illustrations/anime), etc.
- Very high max resolution (up to 512 MP on upper plans), suitable for large posters and wall art.
- Automatic artifact cleanup, deblurring and noise reduction in the same pass.
- Batch processing and presets for consistent series of prints.
- Web-based, no GPU or install required.
- Super easy interface and workflow, perfect for beginners.
Best for
- Photographers and AI-art creators who need 300 DPI prints at sizes like 20×30, 24×36, or bigger.
- Poster and wall-art sellers on Etsy / POD platforms who want a simple “upload → print-ready” pipeline.
- Anyone dealing with mixed sources (old scans, iPhone shots, AI art) and needing them all at high resolution.
Pricing
LetsEnhance offers a 10 free trial. After that, paid subscriptions start at $9/month, with higher tiers offering more credits and higher resolution caps. There are also one-time bundles if you only upscale occasionally.
Pros
- Very high output resolution, practical for poster and canvas prints.
- Several specialized models instead of a one-size-fits-all network.
- Handles denoise, de-JPEG and sharpening in one step.
- Runs in the browser, so no hardware constraints.
- Tight link to Claid API for when you need automation and bulk processing.
Cons
- Requires uploading images, which can be slow for very large files over weak connections.
- Some advanced tools require subscription.
2. Topaz Photo AI and Gigapixel (best for photographers on desktop)
Topaz Photo AI is a desktop application that merges Topaz’s sharpening, denoising and Gigapixel-style upscaling into one tool. It is widely recommended in photography and printing communities for photos that need aggressive enlargement while keeping realistic textures.
Photo AI can upscale up to about 6×, and Gigapixel historically supported extremely large outputs (up to 32,000 px on the long edge), which is plenty for big posters when you start from a decent base file.
Key features
- Combined sharpening, denoise and upscaling pipeline with strong control over each step.
- Autopilot mode that detects faces, noise and subject type, then applies appropriate models.
- Upscaling up to ~6× while preserving text and fine details, useful for signage and posters.
- Runs locally using your GPU, so no upload limits.
Best for
- Photographers already working with RAW files on desktop who want maximum control.
- Large photo prints where skin tones, hair detail and subtle textures matter.
- Clients demanding fine-art paper or gallery prints.
Pricing
Current pricing is split between one-time licenses and an optional broader subscription. A one-time Topaz Photo AI license is around $199 with one year of updates, while Topaz’s broader Studio/All-Access subscription covers multiple products on a monthly basis.
Pros
- Industry benchmark quality for many photographic upscaling tasks.
- Strong control over noise and sharpening, which is critical for large prints.
- Desktop based, so you avoid file size upload limits.
- Good for batch processing whole shoots.
Cons
- Heavier system requirements and slower processing on weaker GPUs.
- Subscription / licensing is more expensive than many web tools.
- Interface and depth of controls can overwhelm casual users.
3. Adobe Lightroom / Photoshop Super Resolution (best if you already pay for Adobe)
Adobe’s “Enhance” features in Lightroom and Camera Raw include Super Resolution, which doubles the linear resolution (4× total pixels) of a file using AI. A 12 MP image can become a roughly 48 MP file, enough for about a 16×24 in print at 300 DPI.
In Photoshop, Preserve Details 2.0 provides AI-assisted resampling for enlargements, and this is specifically suitable for large-format and high-DPI printing.

Key features
- Super Resolution in Lightroom/Camera Raw: 2× linear upscale of RAW, JPEG and TIFF.
- Preserve Details 2.0 resampling in Photoshop for manual size control.
- Integrated with your existing color management, soft proofing and print modules.
- Non-destructive workflows and batch processing in Lightroom.
Best for
- Photographers already on the Adobe Photography Plan who need occasional poster-sized prints.
- Workflows where color management and local editing are more critical than extreme scaling.
Pricing
Super Resolution and Preserve Details 2.0 are included in the standard Lightroom/Photoshop subscriptions, so you pay nothing extra beyond your Adobe plan. It also offers 7-day free trials for new users.
Pros
- Integrated into the tools many photographers already use daily.
- Excellent color handling and print pipeline end to end.
- Good enough for moderate enlargements, especially from clean RAW files.
Cons
- Max 2× linear Super Resolution; not ideal if you must jump from very low res to huge posters.
- Less aggressive reconstruction than some dedicated upscalers; can be softer at extreme sizes.
4. ON1 Resize AI (best for dedicated print workflows)
ON1 Resize AI is purpose-built for preparing images for print. It merges AI upscaling with the older Genuine Fractals interpolation to produce sharp enlargements and includes print-specific features like gallery wrap, tiling, and precise size controls in inches and PPI.
For posters and canvas, this is one of the few tools that treats upscaling as part of a full print layout workflow rather than a generic resize.
Key features
- AI-powered upscaling combined with Genuine Fractals technology for edge clarity.
- Gallery wrap generation for canvas, including mirrored or extended edges.
- Tiling and layout tools for very large prints made from multiple panels.
- Works as standalone or plugin for Photoshop, Lightroom, Capture One.
Best for
- Fine-art and gallery prints, especially canvas and large framed work.
- Print labs and photographers who regularly prepare files for specific paper sizes and PPI.
- Anyone needing multi-panel wall art or mural-style outputs.
Pricing
Resize AI is sold either as a standalone/plugin license or as part of ON1’s broader subscriptions. Pricing changes occasionally but is in line with other pro plugins (often around other ON1 products’ range).
Pros
- Very print-focused interface and features.
- Good balance between crisp detail and smooth gradients at large sizes.
- Strong integration with Adobe ecosystems via plugin mode.
Cons
- Desktop only; no quick cloud option.
- Less general editing power than full suites like Topaz Photo AI.
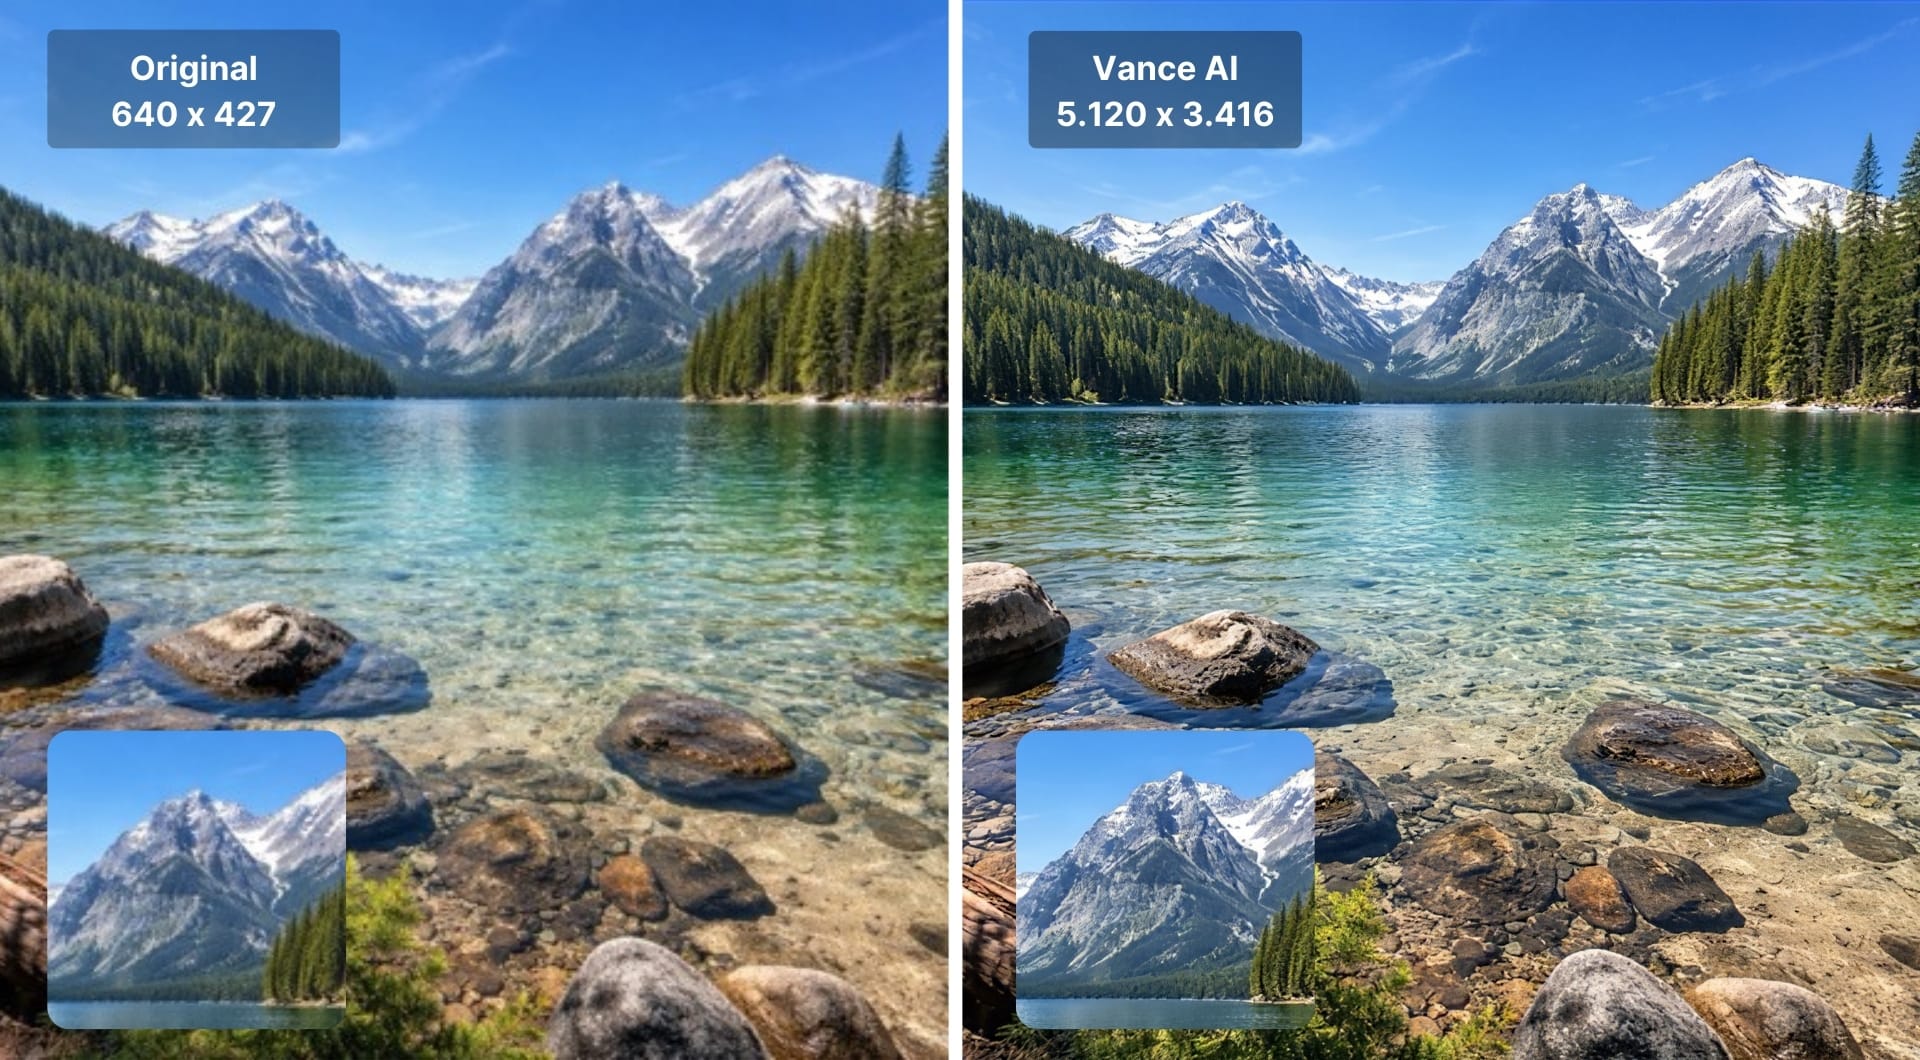
5. VanceAI Image Upscaler (best for aggressive online upscaling)
VanceAI’s Image Upscaler is an online service (with a desktop app) that can upscale up to 8× in the browser and up to 40× in its software version. It targets scenarios like printing, AI art enlargement and low-res web images that need to become 4K or higher.
There are different scales and AI models, and the marketing explicitly calls out use for printing larger photos and posters.
Key features
- 2×, 4×, 8× online upscales; up to 40× in desktop software.
- Separate models for art, anime, and photos.
- Denoise and sharpening integrated into the upscale.
Best for
- Users who want aggressive upscaling of AI art or small web images for posters.
- People without strong hardware who still need big prints.
Pricing
VanceAI has a free trial with a limited number of images and watermarks; paid plans start around $9.90/month, going higher for more credits and removing watermarks.
Pros
- Very high potential scale factors, helpful for tiny sources.
- Simple “one click” workflow.
- Good specialized models for AI art and anime.
Cons
- Free tier is restrictive (watermarks, limited images).
- Results can look more artificial than tools focused on photographic fidelity if pushed too far.
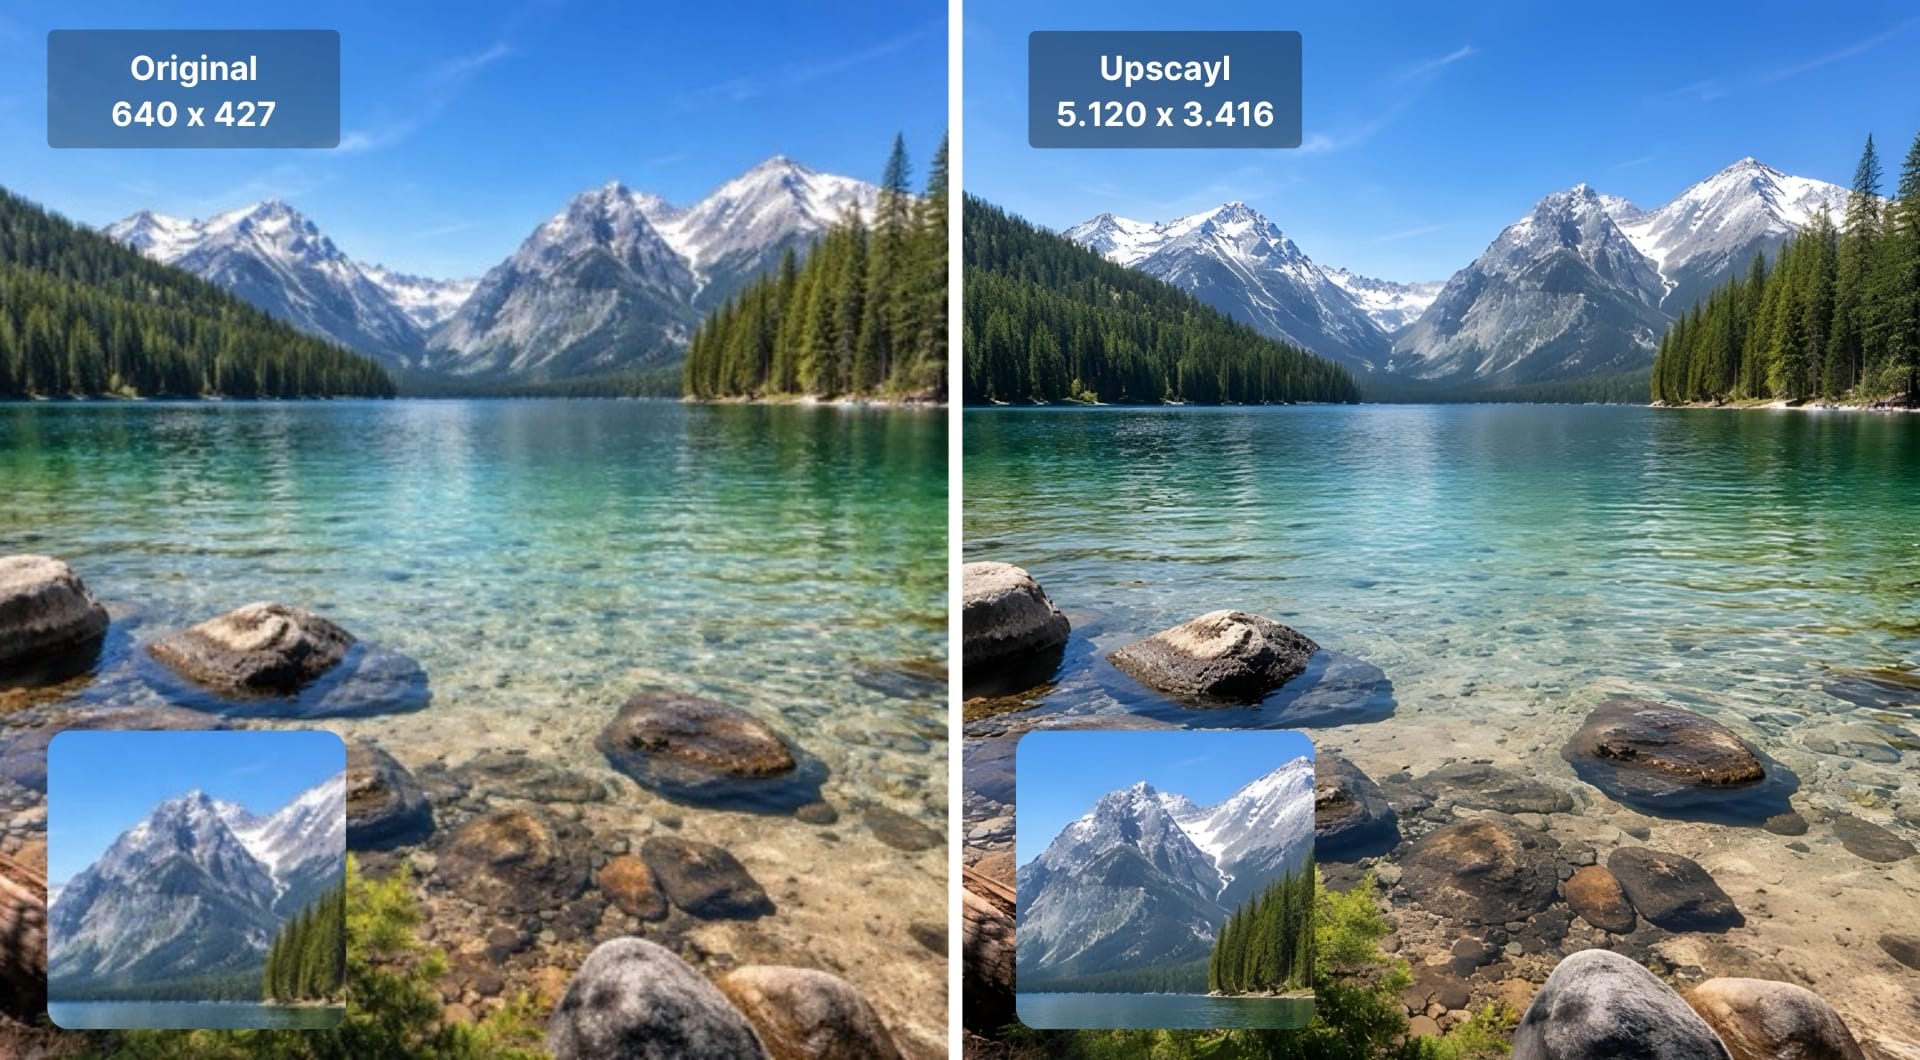
6. Upscayl (best free and open-source desktop upscaler)
Upscayl is a free, open-source AI upscaler for Windows, macOS and Linux that runs entirely on your machine. It wraps popular ESRGAN-style models in a simple interface and is widely recommended as a solid free alternative to commercial upscalers, especially for natural textures.
Because it is local, you can process large batches and big files without worrying about upload limits or recurring subscription costs.
Key features
- Multiple AI models for general photos, digital art and more.
- GPU-accelerated desktop app on all major OSs.
- Completely free and open source.
Best for
- Enthusiasts comfortable installing desktop software who want a free option.
- Large batches of images for personal posters or hobby projects.
- Privacy-sensitive work where uploads are not desirable.
Pricing
Fully free, open-source; you only pay in GPU time and electricity.
Pros
- No per-image or monthly fees.
- Great for experimentation with different models.
- Realistic free alternative for moderate upscaling.
Cons
- Less polished and less idiot-proof than commercial tools.
- No integrated print-specific options (inches, DPI, soft proofing).
- Quality depends heavily on which model you pick.
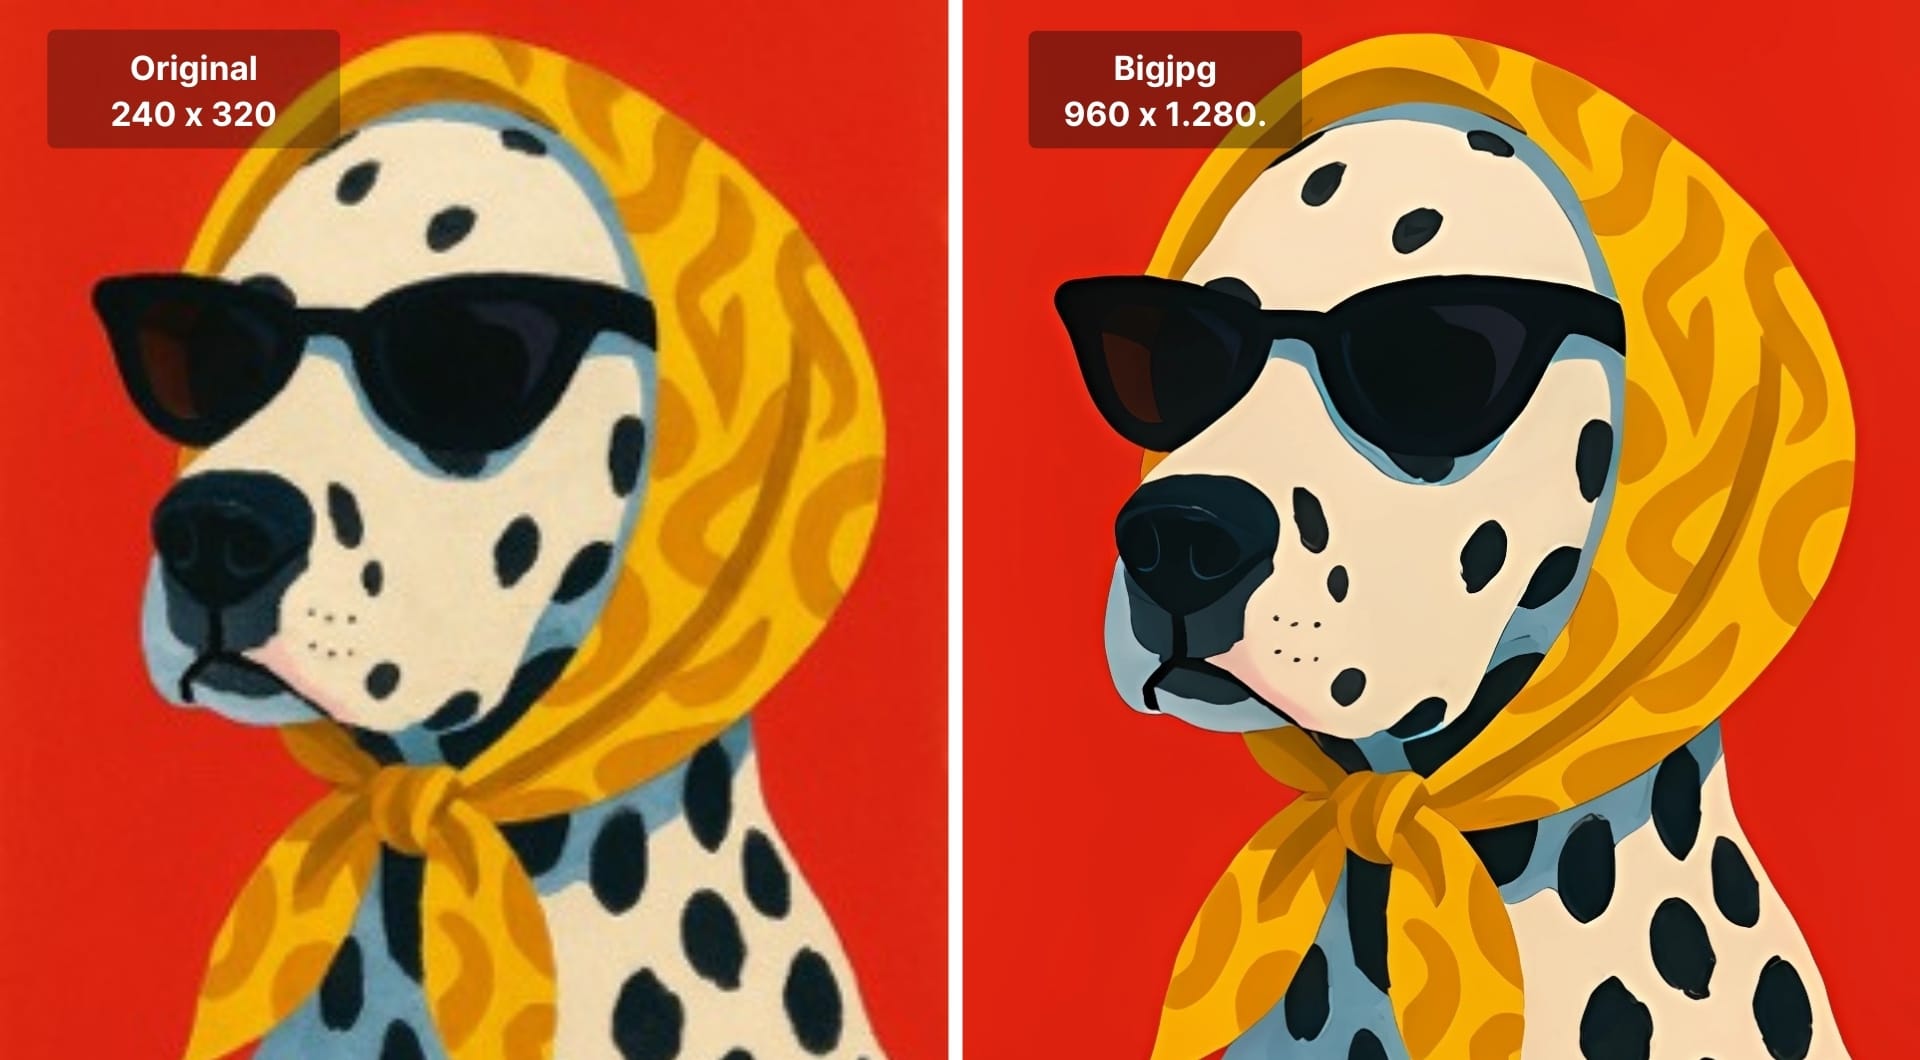
7. Bigjpg (best for anime and illustration posters)
Bigjpg is an AI upscaler designed originally for anime-style and illustration images, using deep convolutional neural networks to enlarge images up to 16× while reducing noise and jagged edges. It also supports standard photos, but its real strength is clean line art and stylized graphics.
Given how much AI art and digital illustration is used for posters, Bigjpg is a solid pick when you want crisp lines without halos.
Key features
- Specialized models for anime/illustration and regular photos.
- Supports up to 16× upscale on paid tiers.
- Available on web and mobile (Android, iOS).
Best for
- Manga, anime and vector-ish artwork turned into posters.
- AI-generated illustrations where lines and color blocking must stay clean.
Pricing
Bigjpg has a free tier with lower resolution caps and slower processing. Paid plans start around $5/month or $50/year, lifting caps and speeding up processing.
Pros
- Very good at reducing jaggies and banding in stylized art.
- High upscaling factors for small base files.
- Mobile apps make it easy to prepare posters directly from a tablet.
Cons
- Free tier has resolution and speed limits.
- Not as strong as specialized photo tools for natural images and skin.
How to choose an upscaler for large prints
Understand DPI, PPI and print size
Printers talk about dots per inch (DPI), while your files live in pixels per inch (PPI). For posters we care about PPI:
- Pixels = inches × PPI (for each dimension).
- Example: A 24×36 in print at 300 DPI needs 7200×10800 pixels (24×300 and 36×300).
For large wall prints, 150–300 PPI is the real-world range:
- 300 PPI: close viewing (photo exhibitions, fine art, critical clients).
- 200–240 PPI: good compromise for living-room posters and canvas.
- 150 PPI: big wall prints viewed from a few meters; often fine for decor or advertising.
An AI upscaler is what lets you move from “I only have 2400×3600 px” to “I can actually hit 200–300 PPI at my target size.”
How many pixels you actually need for common poster sizes
Here is a quick reference for 300 DPI (high-detail scenarios):
| Print size (in) | Pixels at 300 DPI |
|---|---|
| 8×10 | 2400×3000 |
| 8.5×11 | 2550×3300 |
| 11×14 | 3300×4200 |
| 16×20 | 4800×6000 |
| 20×30 | 6000×9000 |
| 24×36 | 7200×10800 |
If you are comfortable with 200 DPI for a large wall print, divide those pixel values by 1.5. For example, a 24×36 poster at 200 DPI needs about 4800×7200 px.
This table naturally drives tool choice: if your upscaler tops out around 16–20 MP, it will struggle with 24×36 in at 300 DPI; if it reaches 256–512 MP (like LetsEnhance), you can go far beyond standard poster sizes.
When AI upscaling actually helps and when it doesn't
AI upscaling helps most when:
- Your base file is reasonably clean but lacks enough pixels for the target size.
- You need to recover texture from a mildly soft image (slight motion blur, high ISO noise).
- You are enlarging AI art, anime or graphics that start from small canvases.
It helps less when:
- The source is extremely compressed or tiny (e.g. a 400×600 px Facebook thumbnail for a 24×36 in poster). You can avoid hard pixelation, but it will never look like a native high-res capture.
- Focus is badly missed; AI may sharpen halos and artifacts as much as real detail.
- There is severe banding or posterization in gradients; some tools can reduce this, but not always perfectly.
You prefer online vs desktop vs API workflows
Online tools (e.g. LetsEnhance, VanceAI, Bigjpg, browser version of Topaz’s online upscaler) are ideal when:
- You do not have a powerful GPU.
- You only need a handful of images per month.
- You want simple presets instead of tweaking sliders.
Desktop tools (e.g. Topaz Photo AI, ON1 Resize AI, Upscayl, Adobe LR/PS) make sense when:
- You already have a photo editing workflow on your computer.
- You need to process large batches or very large files.
- You care about color management, proofing and other print-specific steps.
API-driven tools (LetsEnhance via Claid API) become important when:
- You run a print-on-demand or marketplace operation and need automation.
- You want consistent upscaling rules for thousands of SKUs or AI-generated poster designs.
- You need to enforce specific marketplace guidelines (minimum size, aspect ratio, background rules) programmatically.
Choosing based on your use case
- Photographers printing client work: If you already pay for Adobe, start with Lightroom/Photoshop Super Resolution. For demanding large prints, add Topaz Photo AI or LetsEnhance for the final upscale.
- AI art and illustration posters: LetsEnhance (Digital art mode), Bigjpg, and VanceAI are strong picks. Choose Bigjpg when anime lines matter most, LetsEnhance when you want the highest megapixels and balanced detail.
- Print-on-demand sellers: LetsEnhance for flexible subjects and very high resolutions; Claid.ai if you want full product styling and API automation.
- Budget-conscious users: Upscayl is a good free starting point; if you hit its limits, you can move a few key images to a paid cloud service like LetsEnhance or VanceAI for final output.
FAQ
What is the best upscaler for large prints and posters?
If you care primarily about resolution headroom and simplicity, LetsEnhance is currently one of the strongest choices: it supports outputs up to 256–512 MP depending on plan, had ready-to-use printing presets and offers different AI models tuned for photos, products, old photos and AI art.
For photographers heavily invested in desktop workflows and RAW files, Topaz Photo AI and ON1 Resize AI are top picks. Topaz is great for serious upscaling while Adobe Super Resolution offers a solid built-in alternative for moderate enlargements.
How many pixels do I need for a 24×36 poster?
For a 24×36 in print:
- At 300 DPI:
- 24 × 300 = 7200 px
- 36 × 300 = 10800 px
So you need 7200×10800 px (about 78 MP).
At 200 DPI, you can get by with 4800×7200 px (≈35 MP), often fine for wall viewing distance. Anything significantly below 150 DPI at that size starts to look soft unless viewed from far away.
Is 300 DPI necessary for posters and wall art?
Not always.
- Close-viewed prints (small gallery prints, portfolios, books): 300 DPI is a good target.
- Typical living-room posters and canvases: 180–240 DPI usually look indistinguishable from 300 DPI at normal viewing distances.
- Large advertising posters and bus-stop displays: 100–150 DPI is common, because they are designed to be viewed from several meters away.
If you can hit 300 DPI with a good upscaler like LetsEnhance or Topaz, do it. If not, for a 24×36 poster on the wall, 180–220 DPI is often perfectly acceptable.
How big can I print a 3000×2000 image?
A 3000×2000 px file printed at:
- 300 DPI gives 10×6.67 in (3000/300 by 2000/300).
- 200 DPI gives 15×10 in.
- 150 DPI gives 20×13.3 in.
So natively, it is comfortable up to about 10×15 in as a high-detail print. If you want a 20×30 in poster, you either accept ~100 DPI (soft) or use an upscaler to bring it closer to 4000–6000 px on the long edge before printing.
How to change 72 DPI to 300 DPI for print?
Changing a file from “72 DPI” to “300 DPI” without adding pixels does nothing for print quality; it just changes metadata. For a real improvement, you need to change the pixel dimensions using an AI upscaler and then set the final document to 300 DPI at your target inches.
Can AI upscaling really fix a low-resolution image for print?
It can improve a low-resolution image dramatically, but it cannot invent real detail that was never there.
- Upscalers like LetsEnhance, Topaz, VanceAI and Bigjpg can remove compression artifacts, smooth jagged edges and recreate plausible fine texture.
- For mildly under-resolved files (e.g. 1800×2700 px for an 8×12 in print), the difference on paper can be significant.
- For extreme cases (e.g. trying to make a sharp 24×36 poster from a 640×960 px screenshot), AI will give you something less blocky, but it will still look “painted” or synthetic under close inspection.
What is a good DPI for t-shirt printing designs?
Most DTG/DTF screen printers recommend 300 DPI at the final print size for detailed photo or illustration designs. 150–200 DPI is often acceptable for simpler, bold graphics viewed at arm’s length.
When preparing t-shirt artwork:
- Work in RGB at print size and 300 DPI.
- Use an upscaler (e.g. LetsEnhance, Bigjpg, VanceAI) if your base art is too small.
- Avoid over-sharpening and very small text; even with high dpi, tiny elements can get lost in the fabric weave.
