If you have an agency, print studio, and marketplace and need to process images at volume without sacrificing quality, then read on.
In this guide, we discuss about how to use Let's Enhance's sister product, Claid.ai API, to automate various image enhancement operations, how to build a real batch pipeline, and demonstrate what it looks like in production.
Why manual image processing breaks at scale
At volume, manual editing not just slows down but stops working. Client uploads arrive at inconsistent resolutions, compression artifacts accumulate as files move between systems, bleed margins are missing, colors drift between batches. Each issue is fixable one at a time, but not consistently across thousands of files, and not without cost scaling directly with headcount.
An API solves this structurally: define your operations once, route images through programmatically, and the same logic runs on ten images or ten thousand.
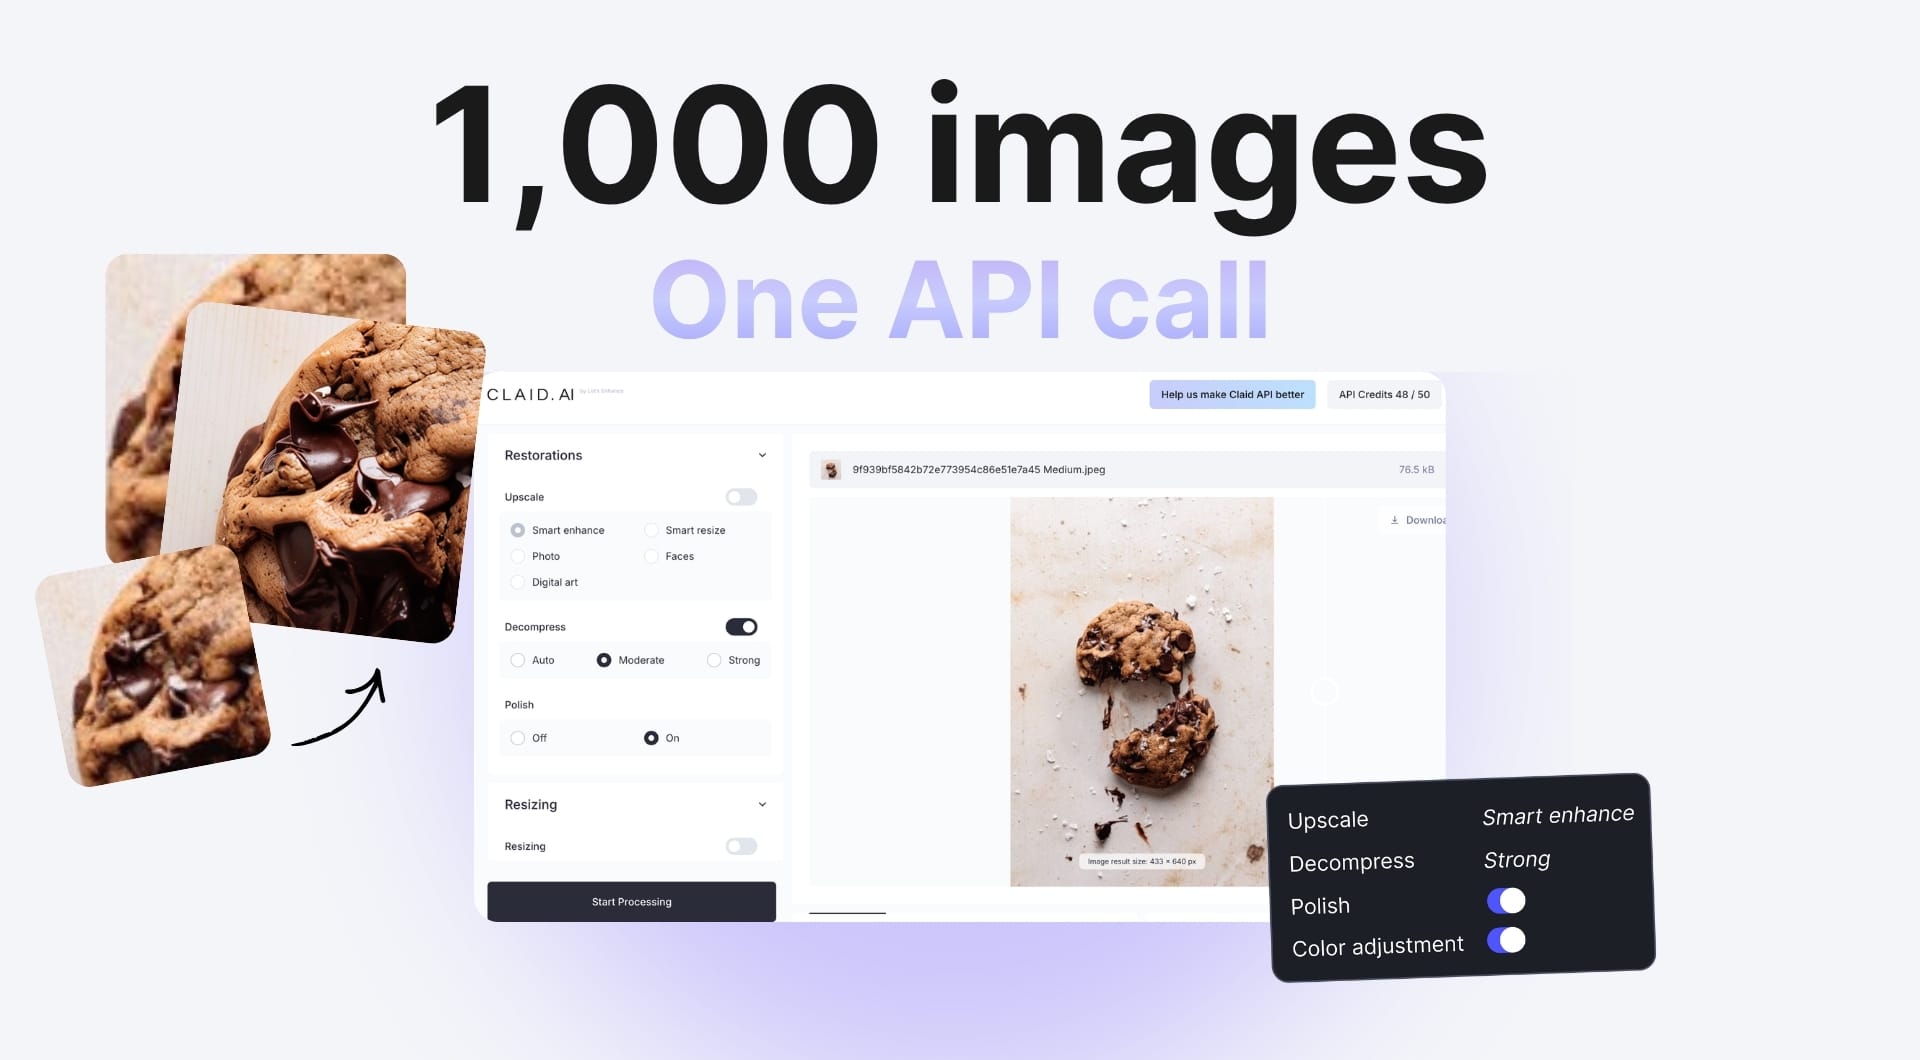
What you can automate with Claid.ai API
Before writing a single line of code, it helps to understand what the API's building blocks actually do. Most batch pipelines combine several of these in a single request.
Upscaling and super-resolution
This is the core of most enhancement workflows. Claid's AI upscaling reconstructs detail rather than just interpolating pixels, producing sharper output at higher resolutions. It supports up to 16x enlargement and resolution of up to 512–559 megapixels.
There are five specialized models it offers. Get to know them because choosing the right one matters.
| Model | Best for |
|---|---|
smart_enhance |
Small or low-quality product, food, and real estate images |
smart_resize |
Already decent quality general images like food, real estate and products with text |
photo |
General photography: people, nature, architecture from phones or cameras |
faces |
Portraits and images where people are the primary subject |
digital_art |
Illustrations, cartoons, AI-generated art, anime |
We mean it when we say choosing the right model matters. Running photo on a cartoon will produce noticeably worse results than digital_art. At scale, model selection belongs in your pipeline logic, not as a manual decision per image.
Decompression and artifact removal
Images that have been saved, re-uploaded, or passed through social media accumulate JPEG compression artifacts such as blocking, color banding, edge ringing, etc. The decompress operation targets these directly and it can be used alongside with the upscale operation to prepare an image for upscaling.
auto: detects compression level and applies the appropriate strengthmoderate: standard artifact removal for lightly compressed filesstrong: aggressive cleanup for heavily degraded images

For batch workflows where input quality is unpredictable, auto is typically the right default. It avoids over-processing clean images and catches the worst offenders automatically.
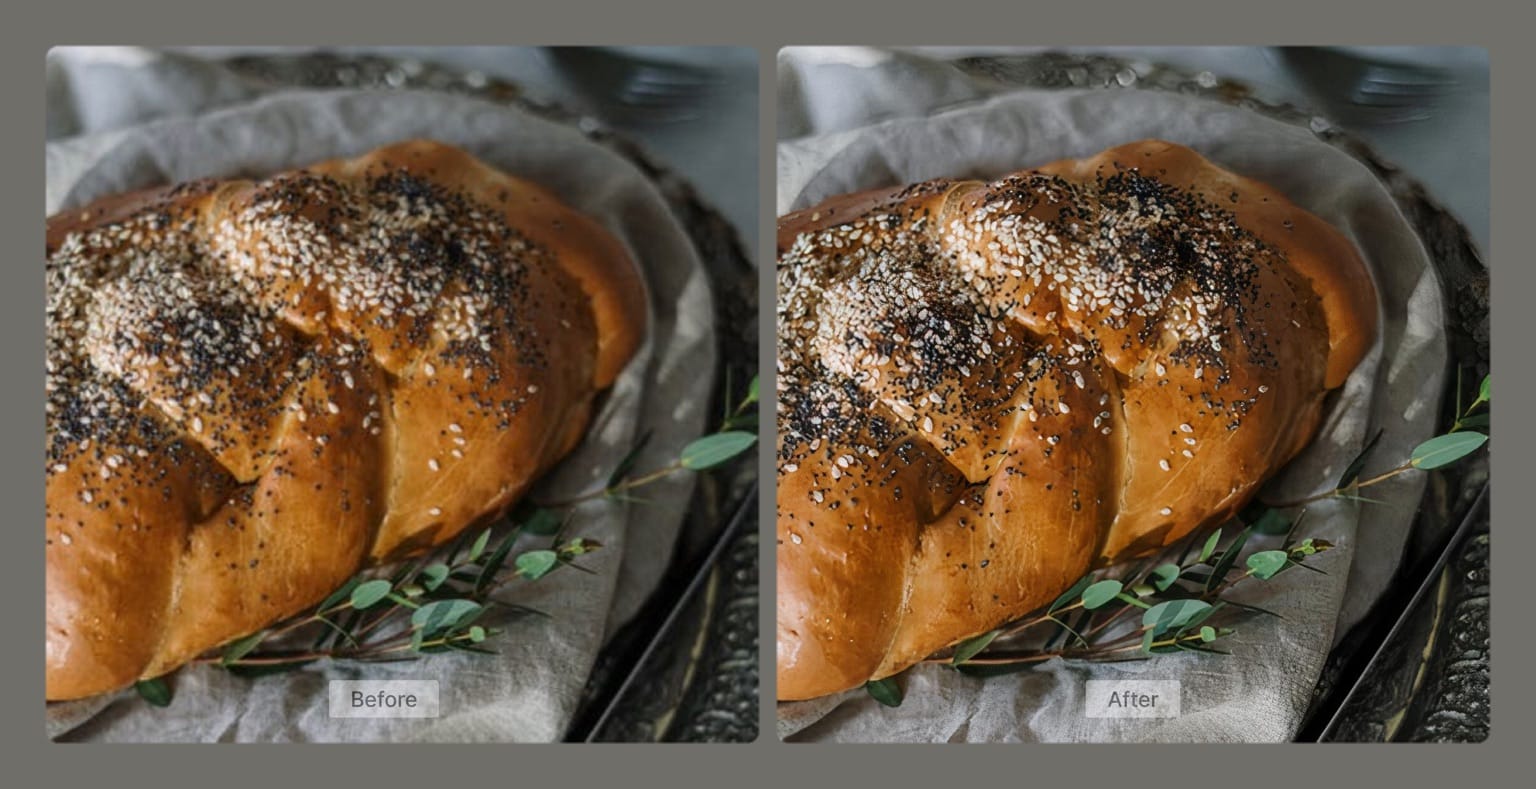
Polish and sharpening
The polish operation redraws image details to increase perceived sharpness while preserving the original structure. It works at 1x (no resize), making it useful when you need cleaner output without changing dimensions. Note: polish currently has a 16MP target size limit.
smart_enhance upscaling for the highest-quality output on product images.Color correction
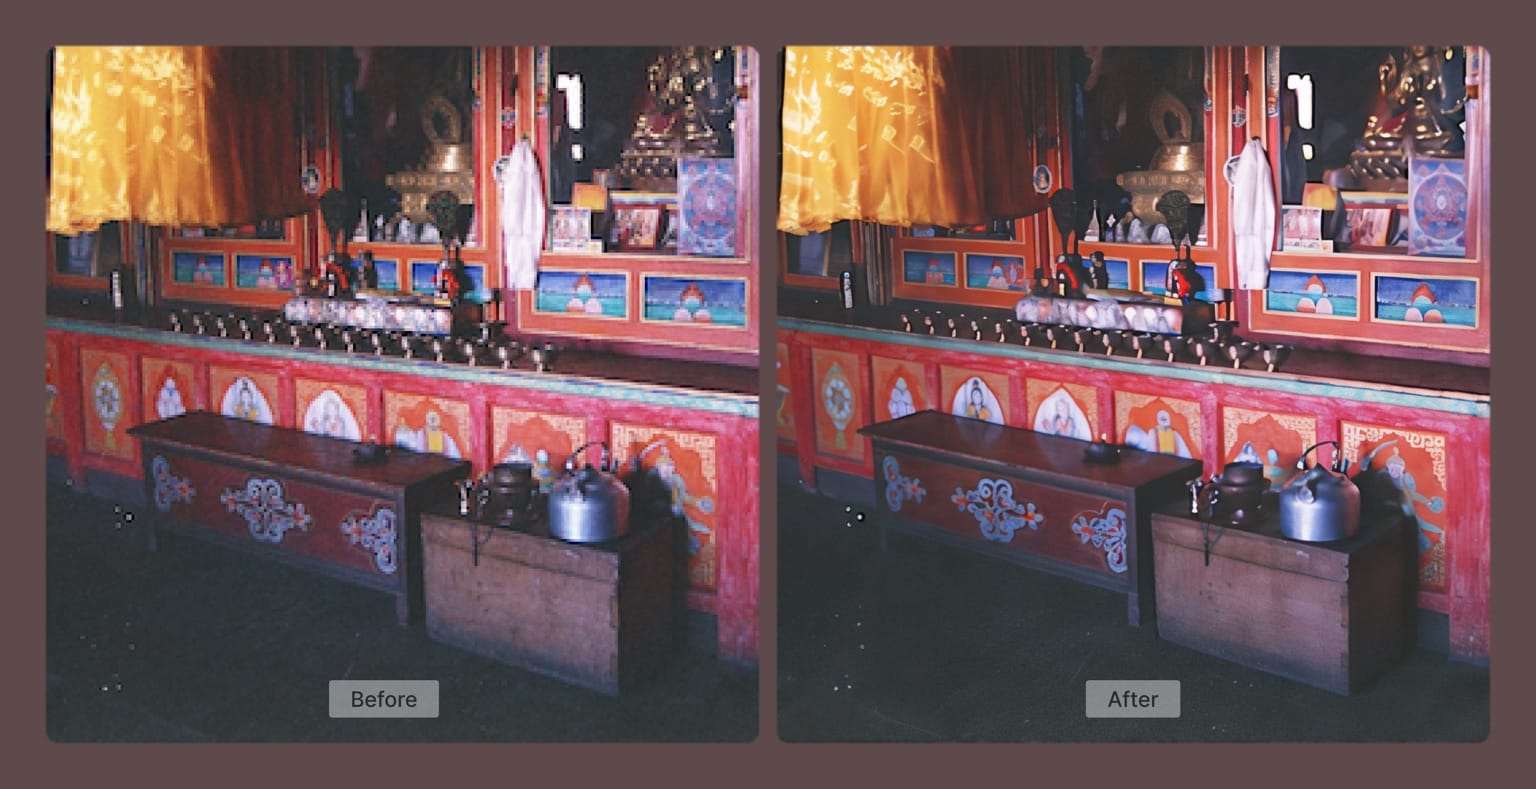
Inconsistent color and lighting is one of the most common problems in batch workflows. Images arriving from different photographers, devices, or time periods rarely match as exposure varies, saturation drifts and white balance shifts.
The automated hdr adjustment analyzes and rebalances the full image histogram, including exposure, color cast, and dynamic range, in one pass. It's the right default for batch jobs where inputs are varied and you don't want to make per-image decisions. Supports changing the intensity from 0 to 100; 100 is the recommended value for most correction use cases.

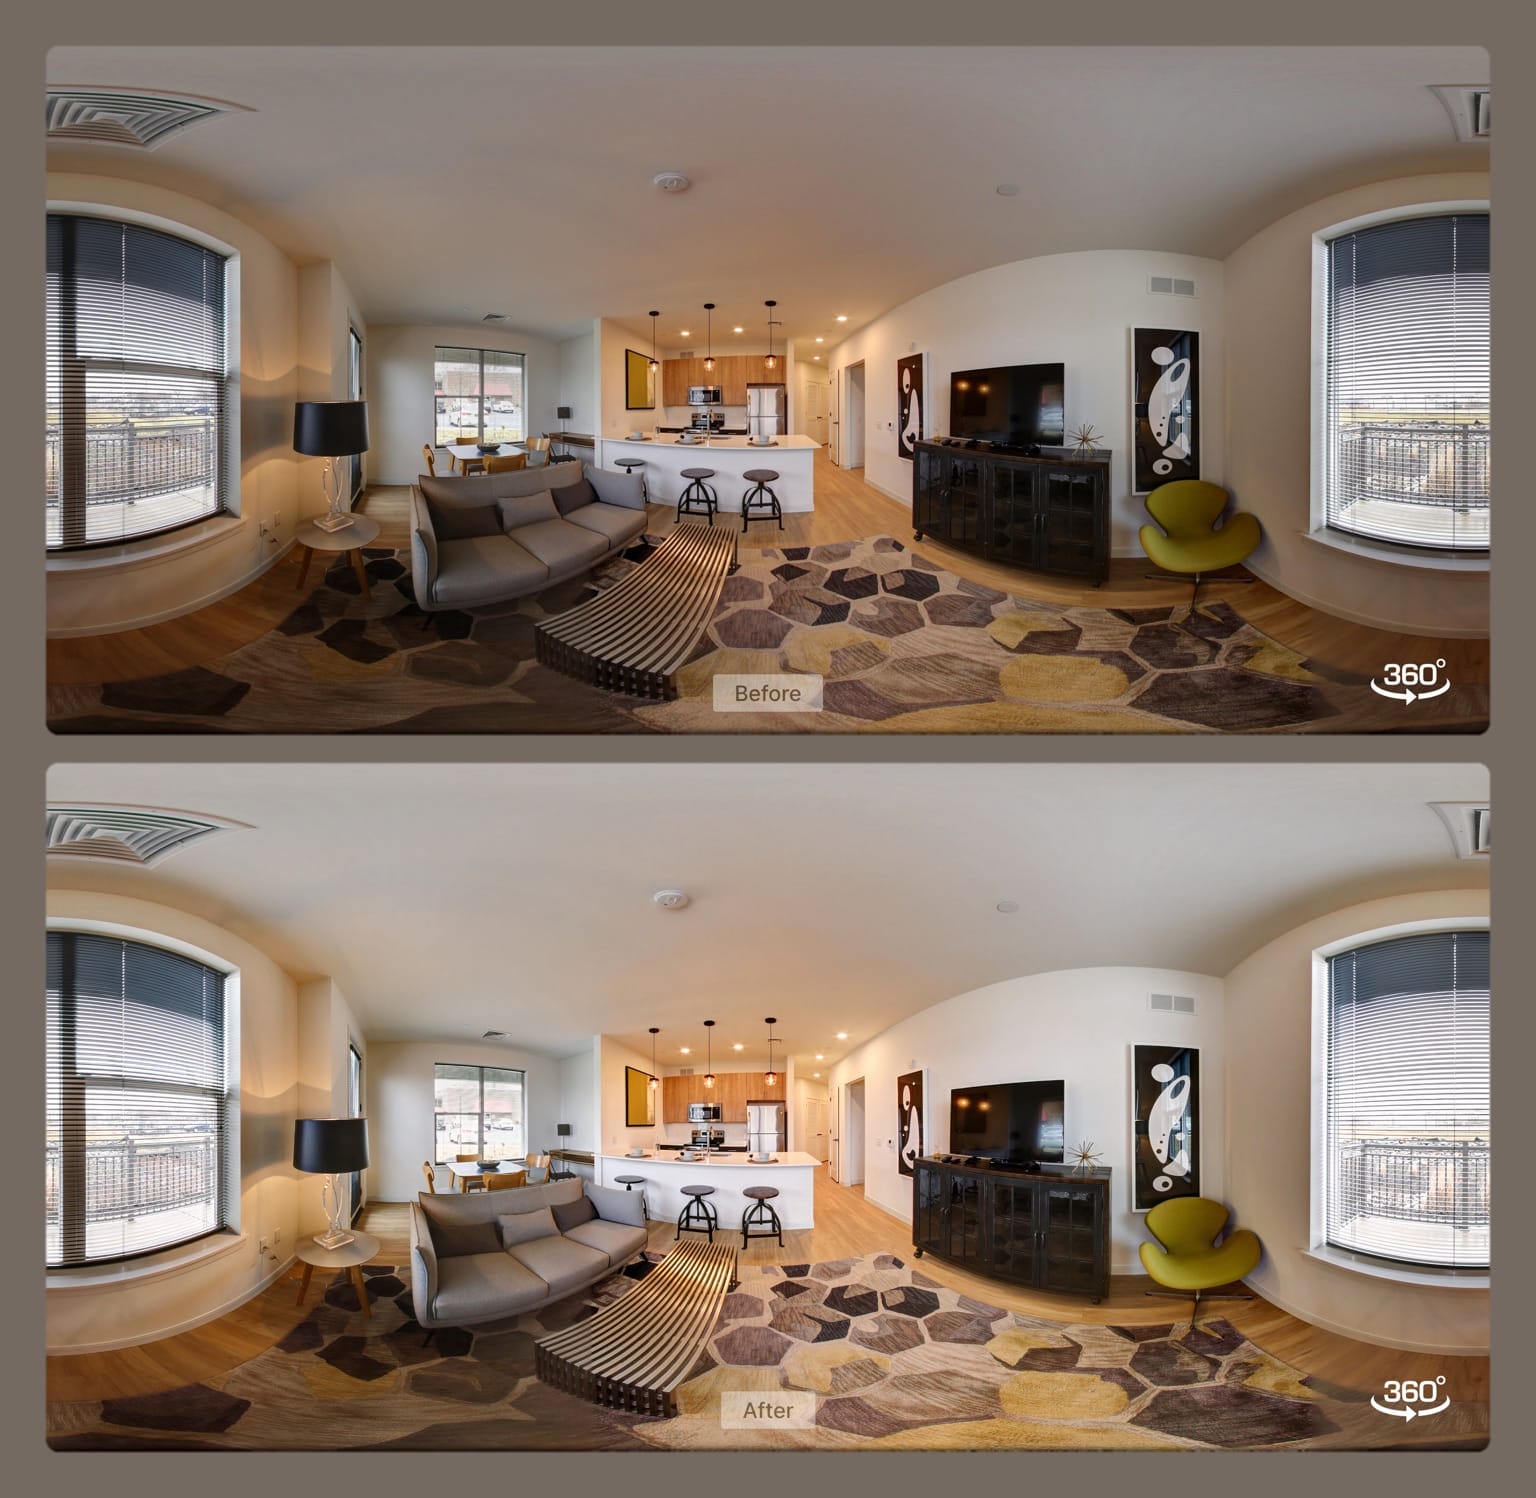
For 360° imagery, such as virtual tours, real estate panoramas, there's an additional stitching option that handles edge artifacts where the image wraps around.
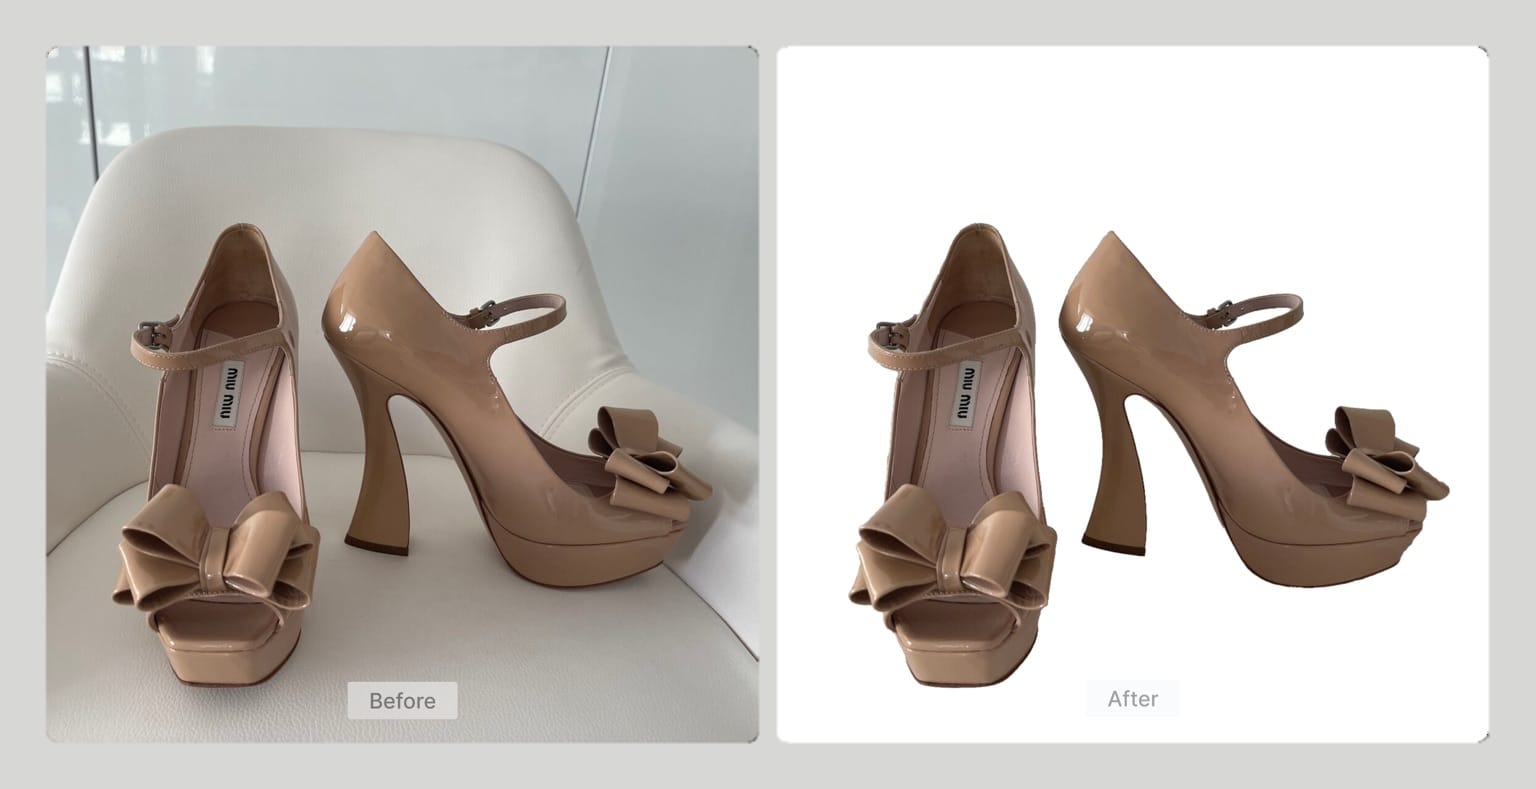
Background removal, resizing, and chaining operations
This is where Claid separates from single-purpose tools. You can combine multiple operations in one API request: upscale, remove background, add a new AI-generated background, apply color correction, resize to spec in a single call. That's one HTTP request, one credit transaction, and one output file.
For high-volume pipelines, eliminating intermediate processing steps is significant. Every extra service call adds latency, error surface, and complexity.
How to build a batch image pipeline with Claid.ai API: Step by step
Step 1: Get your API key
Sign up at Claid.ai and get 50 free credits for testing. Your API key is in the dashboard. The base endpoint for all image editing requests is:
https://api.claid.ai/v1/image/editAuthentication is a standard Bearer token in the request header.
Step 2: Define your operation set
Before writing batch code, decide what operations your pipeline needs. Here's a useful framework:
| Input type | Likely issues | Recommended operations |
|---|---|---|
| Customer-uploaded product photos | Mixed resolution, compression artifacts | smart_enhance upscale + decompress: auto + hdr |
| Print files from clients | Low DPI, missing bleed | smart_enhance upscale to 300 DPI + outpainting for bleed |
| Photography catalog (consistent source) | Minor softness, color inconsistency | smart_resize upscale + hdr |
| AI-generated art | Low base resolution for print | digital_art upscale + hdr |
| Portrait/editorial photography | Variable quality, skin tones | faces upscale + polish |
This table becomes the logic layer of your pipeline: route images to different operation sets based on content type or input metadata.
Step 3: Send a sync request (for testing and small batches)
The synchronous API is the right starting point. Here's a Python example that decompresses JPEG artifacts, upscales a product photo 4x with smart_enhance, and applies color correction in one call:
import requests

response = requests.post(
    "https://api.claid.ai/v1/image/edit",
    headers={"Authorization": "Bearer YOUR_API_KEY"},
    json={
        "input": "https://example.com/product.jpg",
        "operations": {
            "restorations": {
                "upscale": "smart_enhance",
                "decompress": "auto"
            },
            "resizing": {
                "width": "400%",
                "height": "400%"
            },
            "adjustments": {
                "hdr": 100
            }
        }
    }
)

output_url = response.json()["data"]["output"]["tmp_url"]
print(output_url)
Test this on a representative sample of your input files before scaling. Check that your chosen model and operations produce the expected results across the range of quality levels you'll encounter in production.
Step 4: Scale with the async API and webhooks
Sync calls time out under load. For batches of hundreds or thousands of images, the async API is the correct approach.
The pattern is as following: submit a job, receive a job ID, and get notified via webhook when processing completes.
import requests

# Submit async job
response = requests.post(
    "https://api.claid.ai/v1/image/edit/async",
    headers={"Authorization": "Bearer YOUR_API_KEY"},
    json={
        "input": "https://example.com/product.jpg",
        "operations": {
            "restorations": {"upscale": "smart_enhance", "decompress": "auto"},
            "resizing": {"width": "400%", "height": "400%"},
            "adjustments": {"hdr": 100}
        }
    }
)

job_id = response.json()["data"]["id"]
print(f"Job submitted: {job_id}")
Your webhook endpoint receives a POST when the job completes, containing the output URL and job metadata. Configure your webhook endpoint in the Claid dashboard (Integrations → Webhook Settings). Once set up, your endpoint receives a POST when each job completes, containing the output URL and job metadata.
Step 5: Connect cloud storage for zero-transfer pipelines
For large-scale operations, passing image URLs through the API adds unnecessary overhead and latency. Claid supports direct connectors to AWS S3 and Google Cloud Storage. By linking these external storages, your images are read directly from your bucket, processed, and written back without requiring intermediate URLs.
This matters at 10,000+ images/month. It removes a significant source of egress cost and simplifies error handling (no URL expiry issues, no third-party CDN dependency).
Configure your storage connector in the Claid dashboard, then reference bucket paths directly in your API requests.
Step 6: Error handling and production QA
Batch pipelines fail in interesting ways. A few practices worth building in from the start:
- Log every job ID. When something looks wrong in an output image, you need to trace it back to the specific request and input.
- Sample-check outputs. Don't rely solely on API success responses. Run a QA pass on a percentage of processed images, especially on new input sources.
- Handle partial failures gracefully. If 3 images in a batch of 500 fail, your pipeline should flag them for retry rather than halting the entire job.
- Rate limits. Check your plan's rate limits and implement backoff logic. The async API is more forgiving than sync for burst workloads.
Real-world workflow: how Mixam processes 50,000+ images per month
Mixam is a leading UK online print platform, handling books, magazines, zines, posters and anything in between. Every day, thousands of customer-uploaded print files arrive and many of them are technically broken. There are under-100 DPI images that will print blurry, missing bleed margins, CMYK color that can't shift even slightly without ruining the final print.
Their integration with Claid's API runs four operations in parallel on every qualifying upload:
- Smart upscale to 300 DPI. Low-resolution files are detected automatically and upscaled to print-ready quality, preserving color and sharpness.
- AI outpainting for bleed. Missing margins are extended using generative AI, which fills in artwork naturally instead of stretching or cropping.
- Color-safe processing. CMYK and grayscale artwork flows through without tinting or color shifting.
- TIFF support at scale. The pipeline handles large TIFF files and multi-page PDFs, not just JPEG and PNG.
Here's the results after rolling out Claid: 78% fewer quality-related complaints, 1,000+ users per month relying on the automated enhancement flow, and a significantly faster path from file upload to press-ready approval. Sounds impressive, doesn't it?
Pricing: what to expect at scale
Claid.ai offers flexible and robust API solutions for any needs. It uses a credit-based model, which scale with the complexity of operations and the output resolution.
- Enhancement operations (decompress, polish, HDR): 1 credit per image
- Upscaling: 1–6 credits depending on output size
- Free trial: 50 credits upon signup
- Paid plans: starting at $59 for 1,000 credits ($0.06/credit)
If you process at catalog scale, have specific compliance requirements, or want a team to handle pipeline design rather than building in-house, talk to the Claid team directly.
FAQ
What is batch image processing, and how does it differ from processing images one at a time?
Batch image processing means applying the same set of operations to a large number of images automatically, without manual intervention per file. In practice, this means sending API requests programmatically instead of uploading images through a UI. The key difference for production workflows is that batch processing is repeatable, consistent, and doesn't require a human decision for every image. An API-based approach like Claid also lets you apply multiple operations (upscaling, enhancement, background removal, color correction) in a single request, rather than chaining separate tools.
How do I upscale 1,000 product images at once?
The most practical approach is to loop through your image list and submit async API requests to Claid, using webhooks to handle completions. For very high volumes, connect your cloud storage (AWS S3 or Google Cloud Storage) directly, so images flow bucket-to-bucket without intermediate URL handling. Next step is choosing the right upscaling model. The smart_enhance is good for most product photography as it's specifically trained for product, food, and real estate images.
What's the difference between the Claid.ai sync API and the async API?
The sync API processes an image and returns the result in the same HTTP response. It's straightforward for testing and small batches, but it times out under load. The async API accepts a job, returns a job ID immediately, and delivers the result via webhook when processing is complete. For anything above a few dozen images at a time, async is the right default. It handles burst workloads cleanly and allows parallel processing without holding open connections.
How do I choose the right AI upscaling model for my content?
Model selection is based on content type. Use smart_enhance for product photos, food, and real estate. Use photo for general photography from cameras or phones. Use faces when people are the primary subject. Use digital_art for illustrations, cartoons, and AI-generated imagery. Use smart_resize when the source image is already high quality and you want to enlarge it with minimal processing.
Can I run enhancement and background removal in the same API call?
Yes. This is one of Claid's more practical advantages over chaining single-purpose tools. A single request can include upscaling, decompression, color correction, background removal, and resizing. Fewer API calls means lower latency, simpler error handling, and fewer credits spent on intermediate steps.
What cloud storage integrations does Claid.ai support?
Claid supports direct connectors to AWS S3 and Google Cloud Storage. Once configured in the dashboard, you can reference bucket paths directly in API requests instead of passing public URLs. This removes the overhead of URL-based transfer, avoids CDN dependency issues, and is significantly more efficient for high-volume pipelines where images are already living in cloud storage.
How much does bulk image processing cost with Claid.ai?
Credits are the unit of cost, and the rate depends on the operation. Enhancement operations (decompress, polish, HDR) cost 1 credit per image. Upscaling costs 1–6 credits depending on output resolution. Paid plans start at $59 for 1,000 credits, working out to roughly $0.06 per image for a basic enhancement pass. Volume discounts apply at higher tiers. Sign up and start with the 50 free credits included on signup to validate your pipeline against real files.
What image formats and maximum sizes does the Claid.ai API support?
Input formats: JPEG, PNG, WebP, TIFF, BMP, GIF, AVIF, and HEIC. Output formats: JPEG, PNG, WebP, TIFF, and AVIF with configurable quality settings. Upscaling supports output up to 559 megapixels. For requirements beyond these limits, the enterprise plan covers custom configurations.
How does Claid.ai compare to Photoshop batch actions or Topaz Gigapixel for bulk processing?
Photoshop batch actions can apply recorded steps to a folder of images, but they run locally, require manual setup per job type, and don't adapt to varying input quality. As a result, every image gets the same treatment regardless of what it actually needs. Topaz Gigapixel offers strong upscaling quality but also runs locally, requires capable hardware for large batches, and doesn't integrate into server-side production pipelines.
Claid is a cloud API. Meaning, you integrate it once, and it processes any volume without local hardware constraints, adapts operations to input parameters, and fits directly into the rest of your infrastructure.
What's the relationship between LetsEnhance and Claid.ai?
LetsEnhance.io is the consumer-facing web product and the interface individual users interact with to enhance and upscale images. Claid.ai is the API platform built on the same AI technology, designed for developers and businesses that need to integrate image processing into their own products and pipelines. If you've used LetsEnhance to enhance an image manually and want to automate that at scale, Claid.ai is where you do it.
