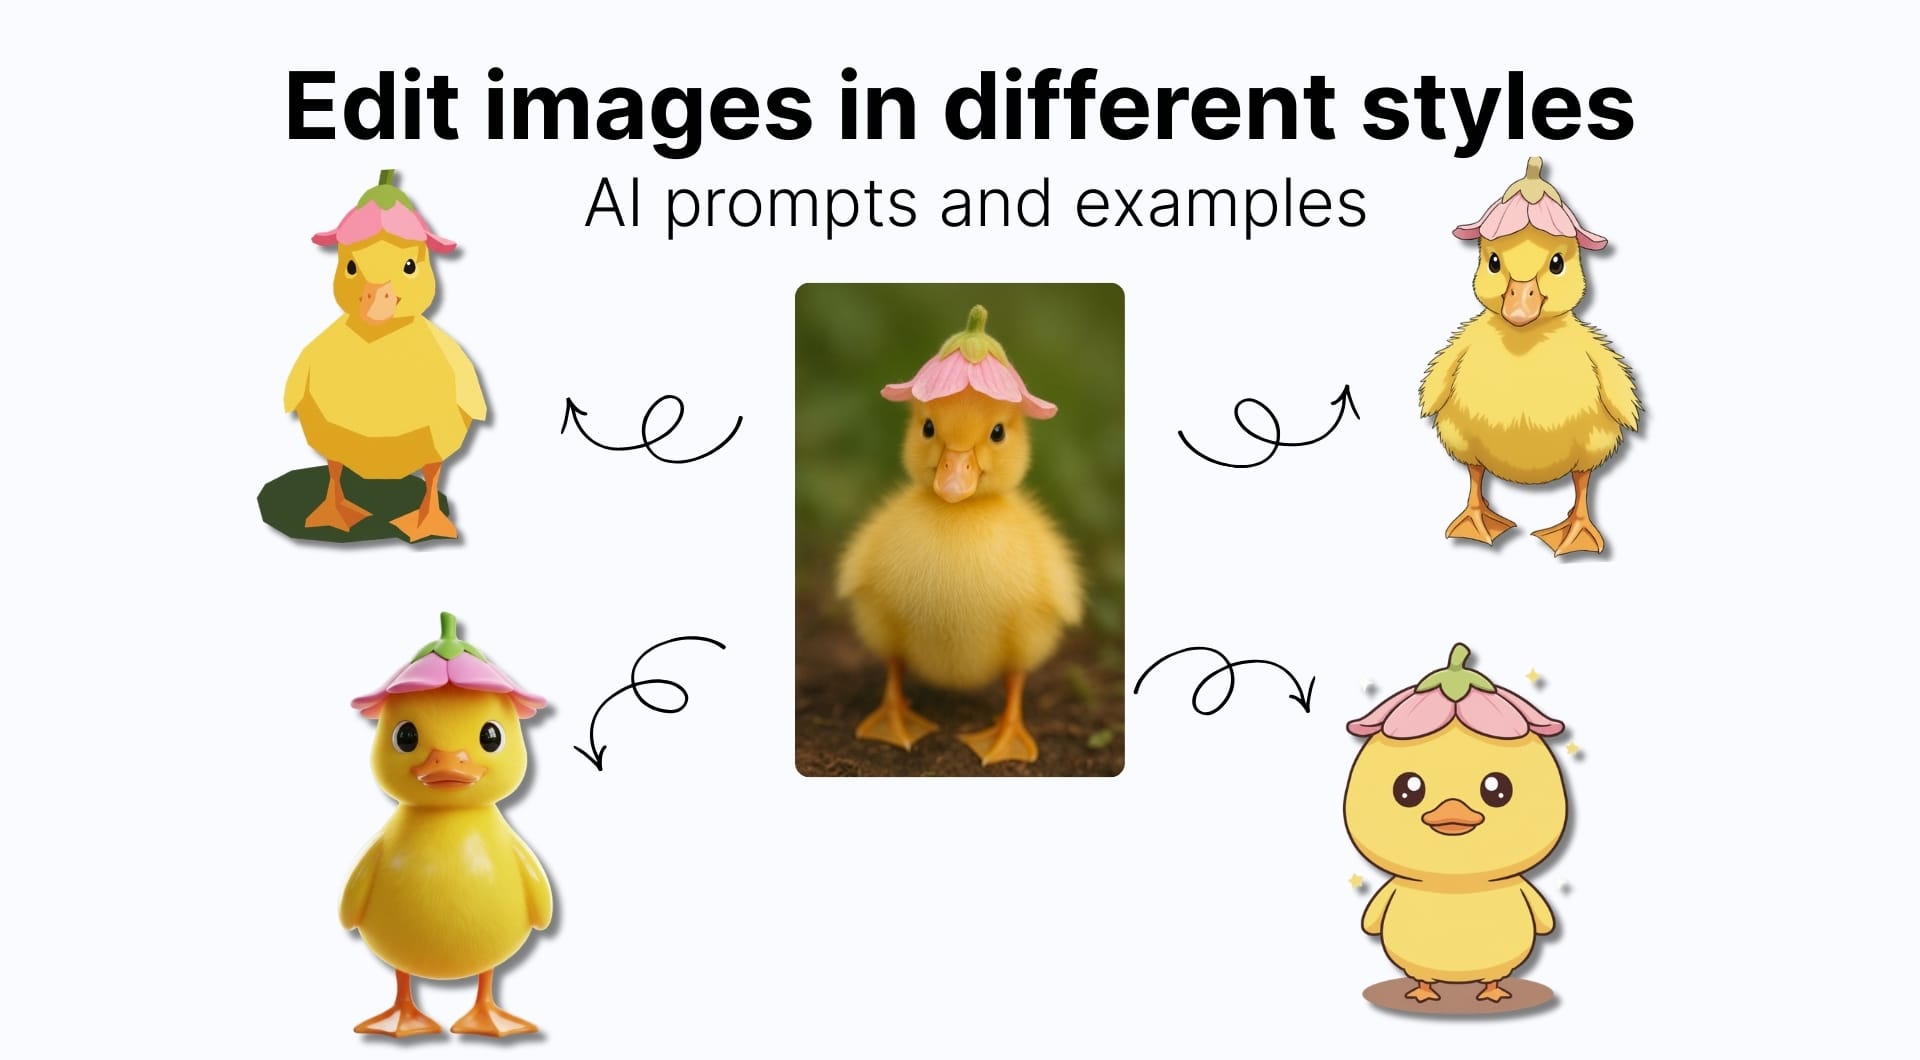
The last few years of generative imaging made image editing in different styles easier than ever. You just upload an image, describe the look and the model applies it.
With the right prompt, you can push the same photo into a clean 3D render, a paper-cut illustration, or a gritty ink poster, then upscale the final result to 4K resolution.
This guide explains the characteristics of the most used AI art styles, copy-paste prompts for each style and a free workflow to edit images using LetsEnhance's Chat Editor.
Prompting tips before you start
Style edits are mostly a prompting problem. The model can generate anime, 3D, or comic, but it won’t guess what matters to you: likeness, background discipline, framing, or what details must not change.
A reliable style prompt usually contains three parts:
- Anchor: what must stay the same (pose, face structure, hairstyle, product shape, key accessories).
- Style rules: how the new image should be constructed (line art, shading method, texture/material, lighting).
- Limits: what to avoid (no text, no extra objects, no busy background, no realism, etc.).
If you want a deeper breakdown, including model-specific advice and iteration patterns, check out our full guide on writing better AI image prompts.
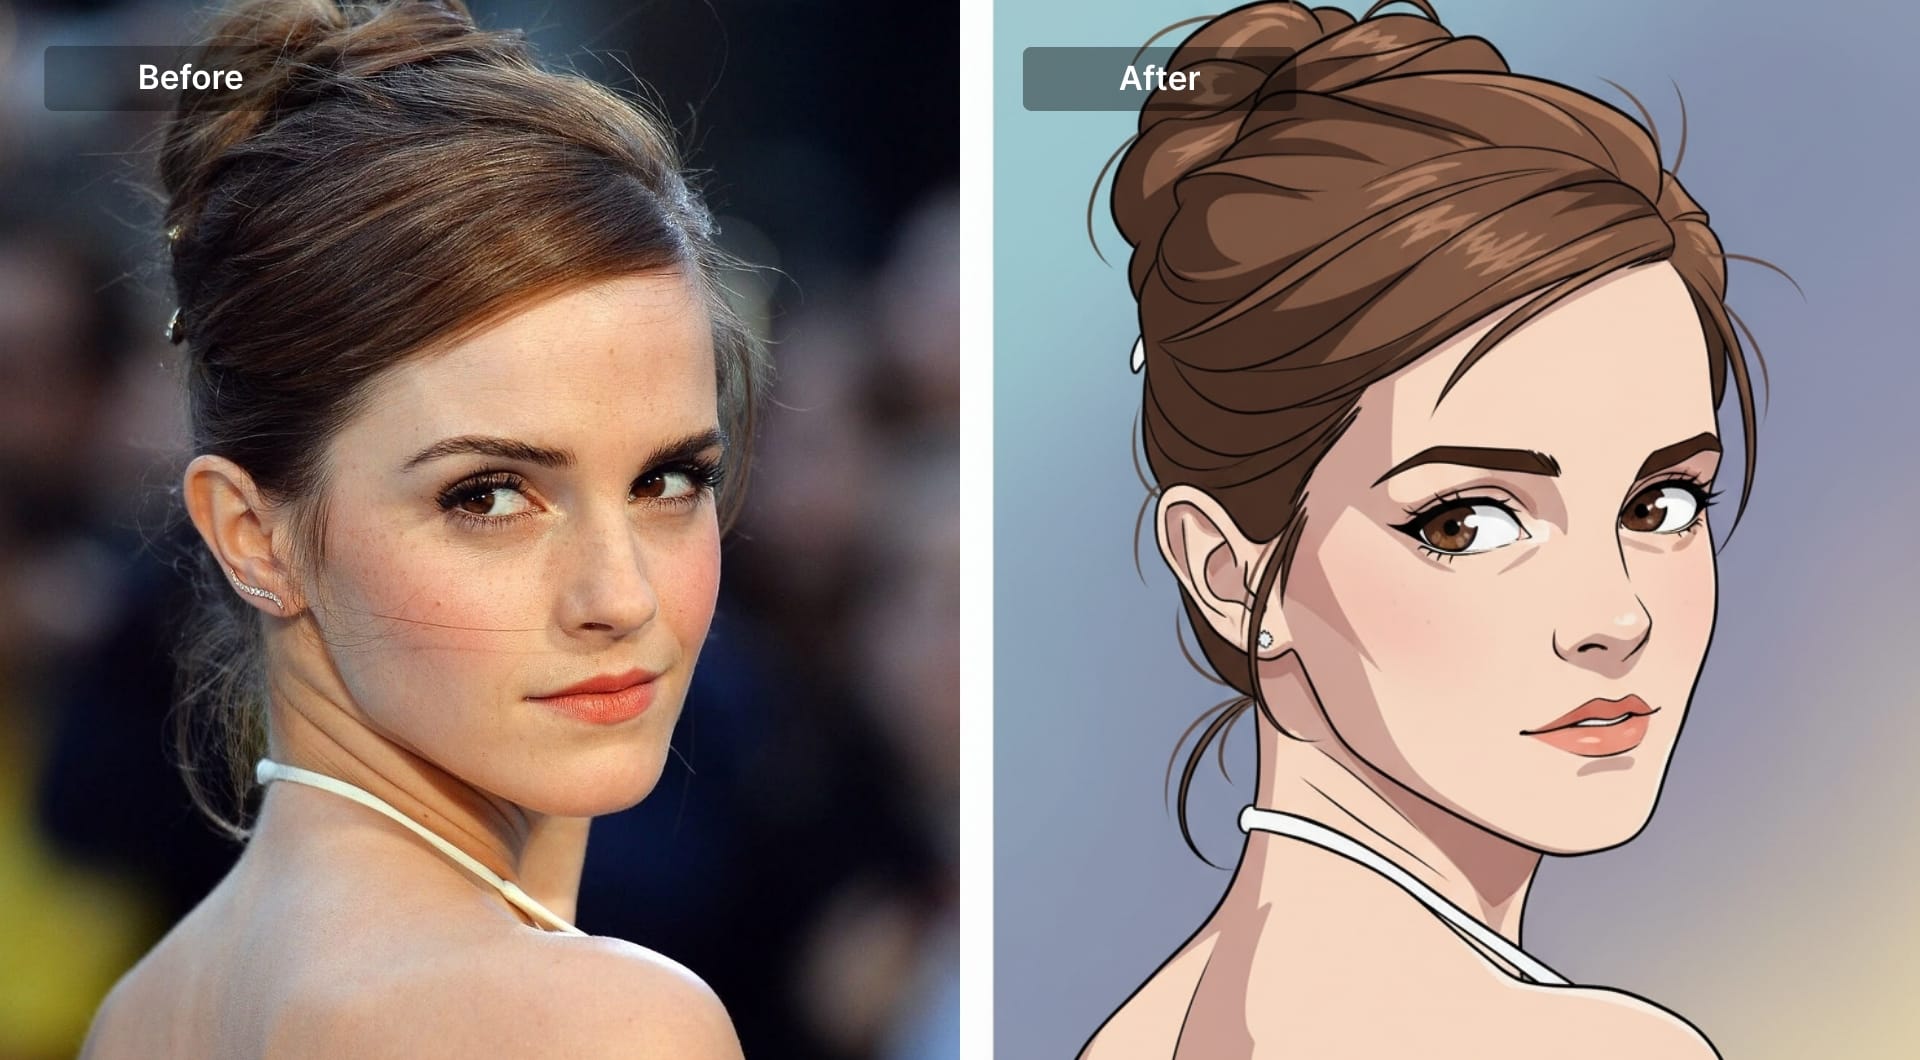
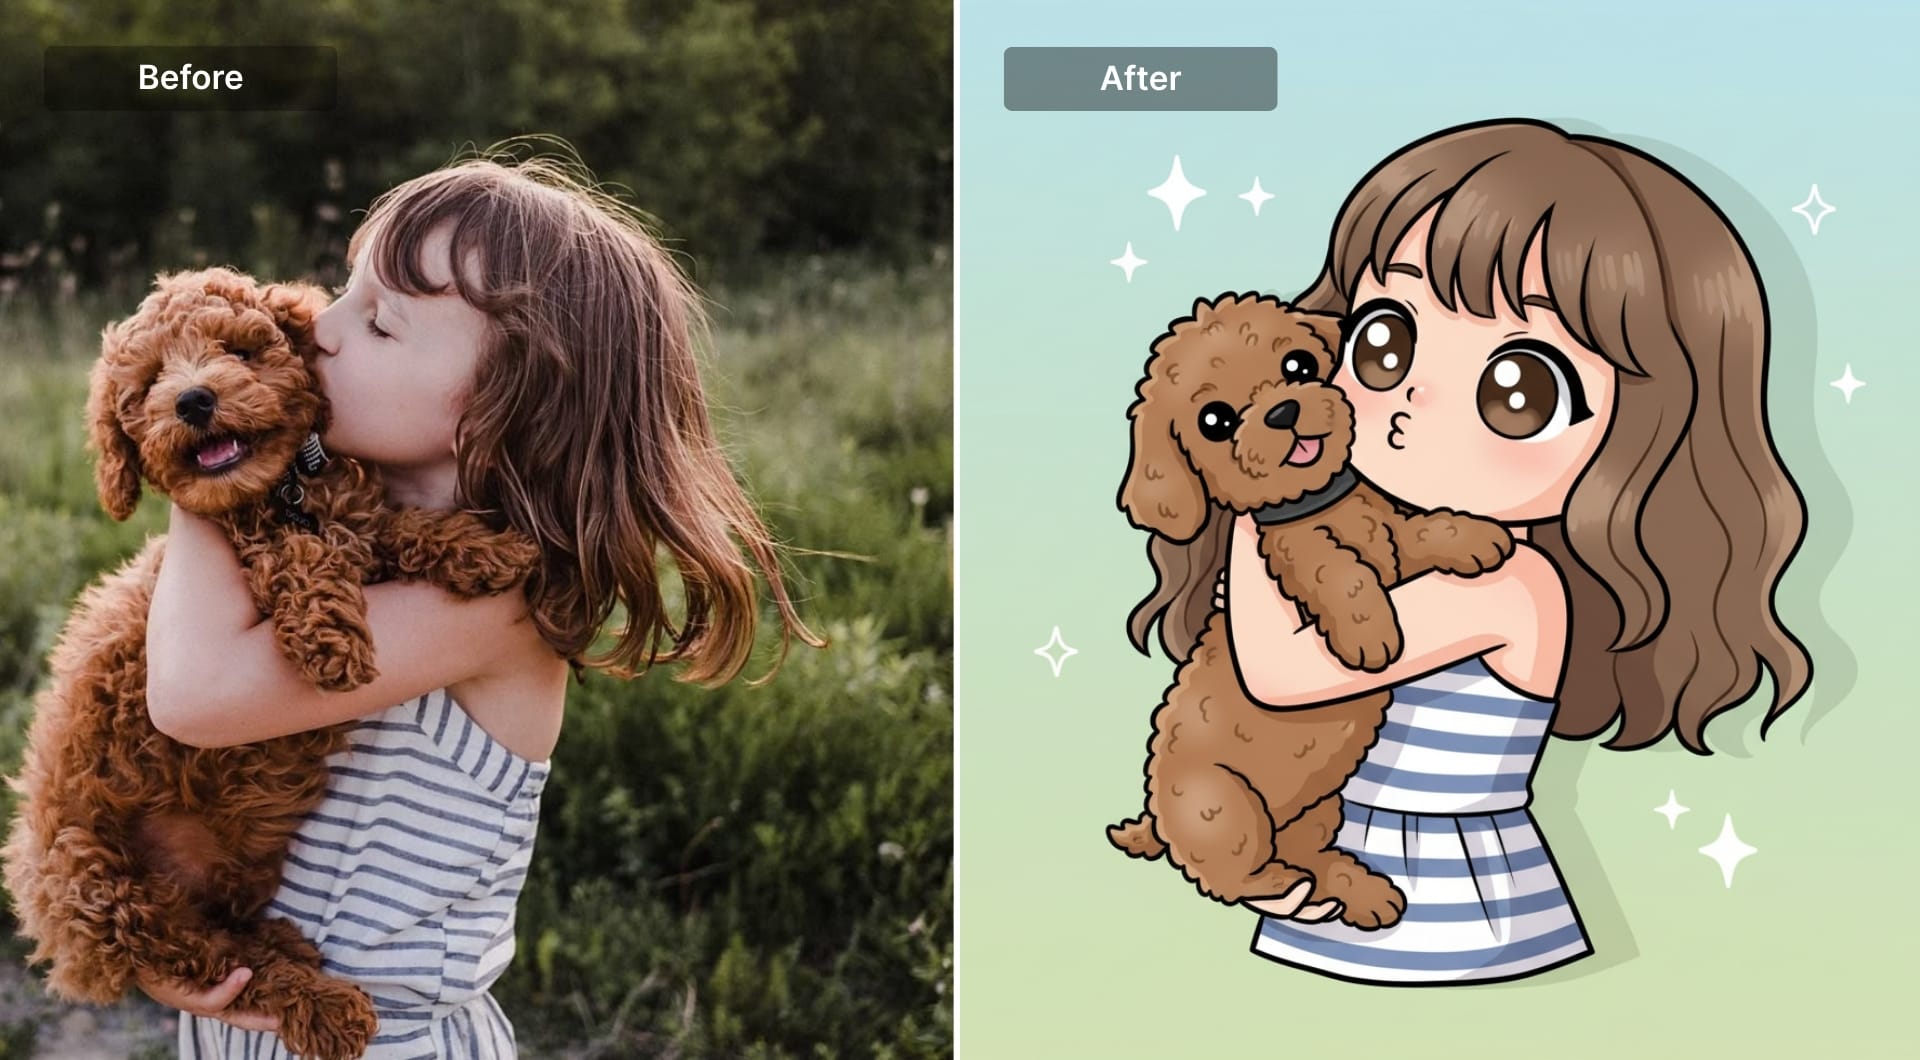
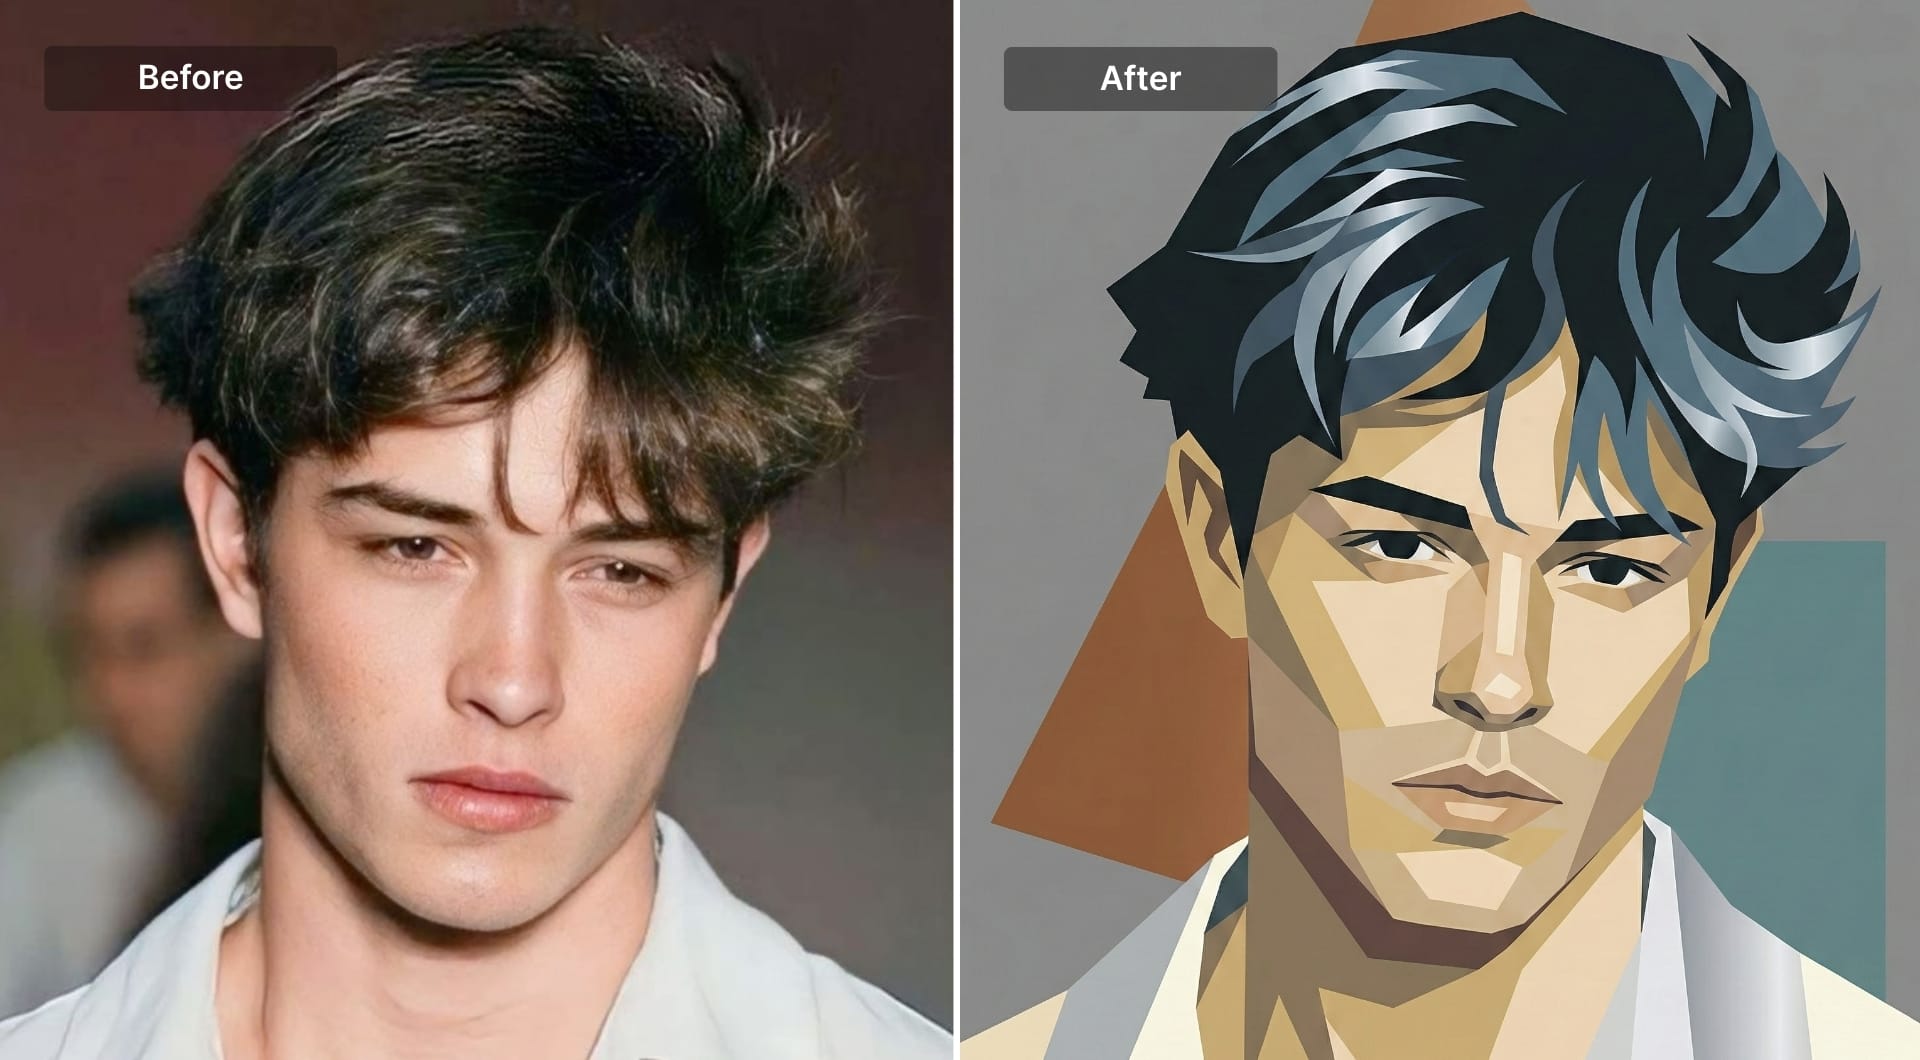
Anime portrait
Anime transformation is about clean line art, cel shading, and deliberate simplification. The best results keep the subject recognizable while converting real-world textures into flat color planes. If you don’t explicitly control eyes, shading, and background, you usually get a generic “anime-ish” face with messy detail.
This style is popular for profile photos, creator branding, character concepts, and social avatars because it reads well at small sizes and stays visually consistent across different images.
Prompt
Transform the uploaded photo into a high-quality anime character illustration. Keep the subject fully recognizable by preserving facial structure, hairstyle, and key accessories, but convert everything into anime proportions and clean shapes. Use crisp line art with controlled line weight and sharp edges. Apply classic cel shading with clearly defined shadow shapes (no smooth gradients). Eyes should be expressive with clean highlights, but keep their shape consistent with the original face. Simplify clothing into stylized folds while keeping the original outfit design. Background should be minimal or softly painted with two or three supporting colors, no clutter. No photorealistic skin texture, no pores, no glossy beauty-filter look, no text.
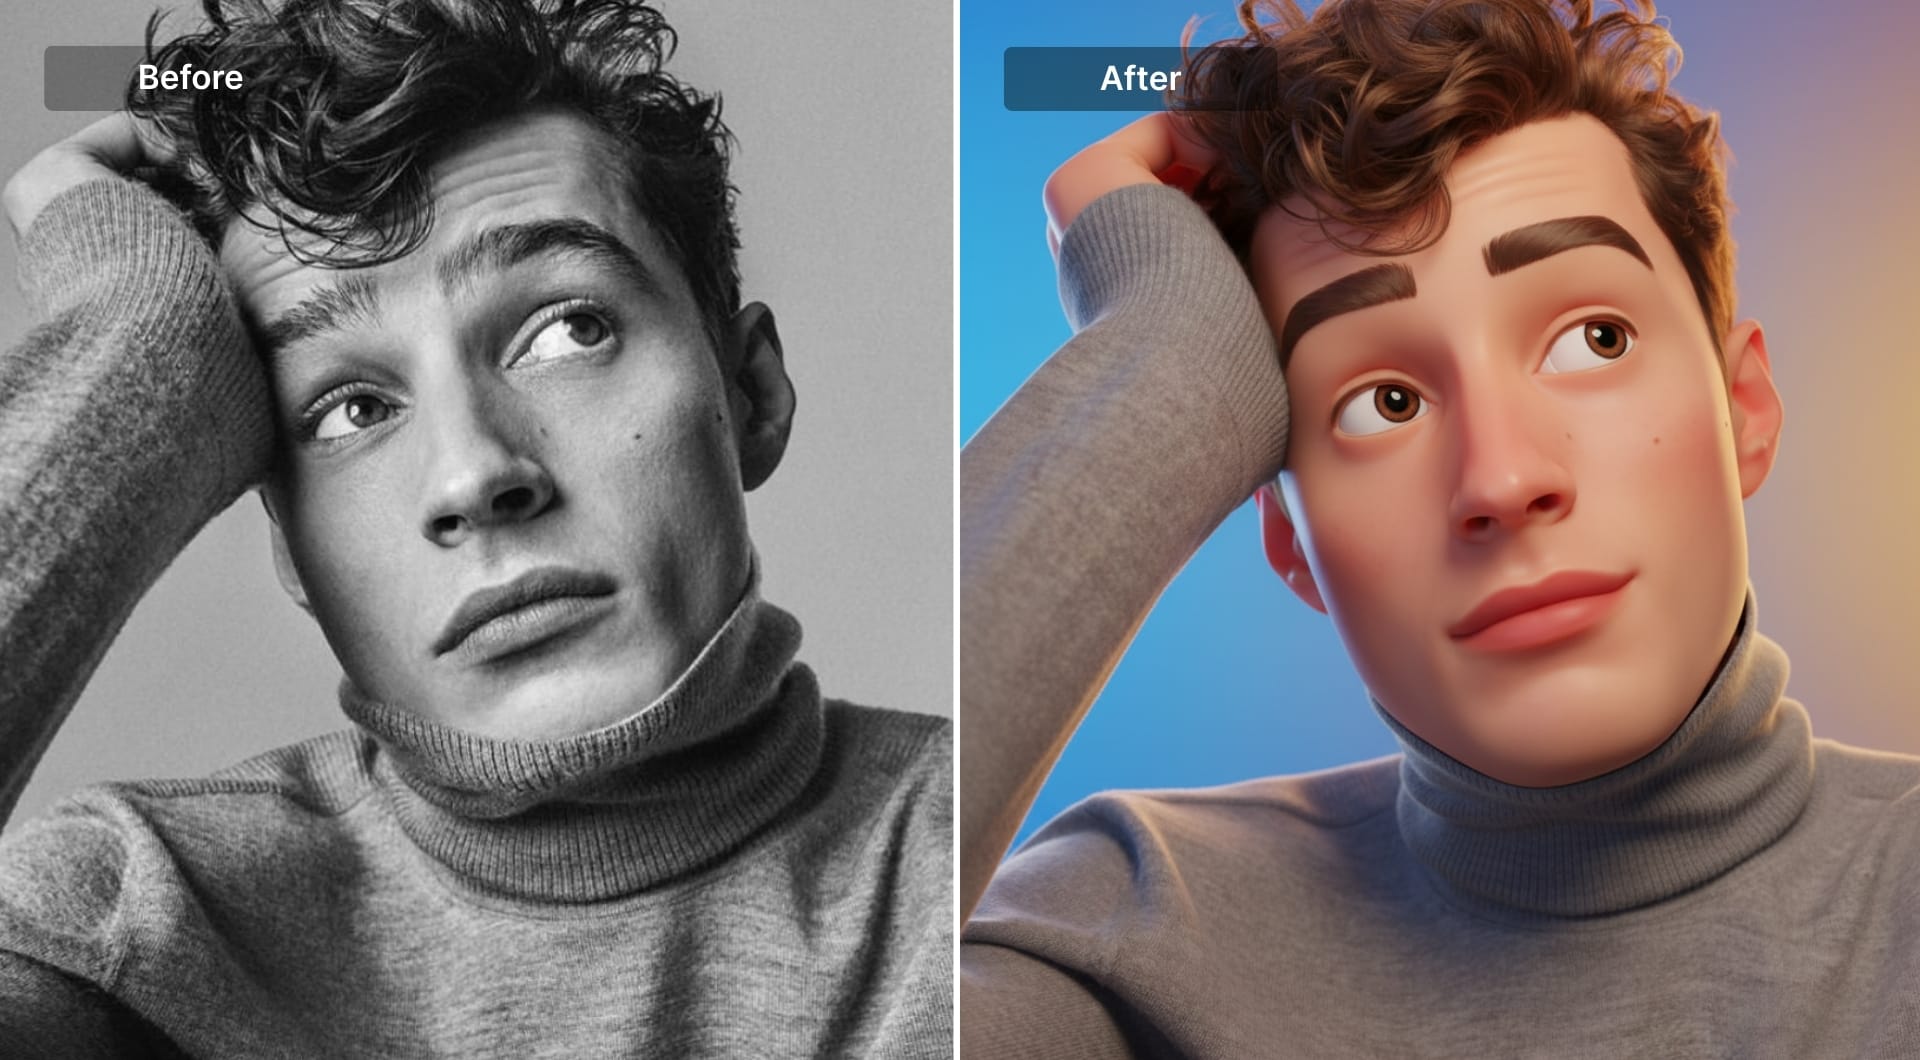
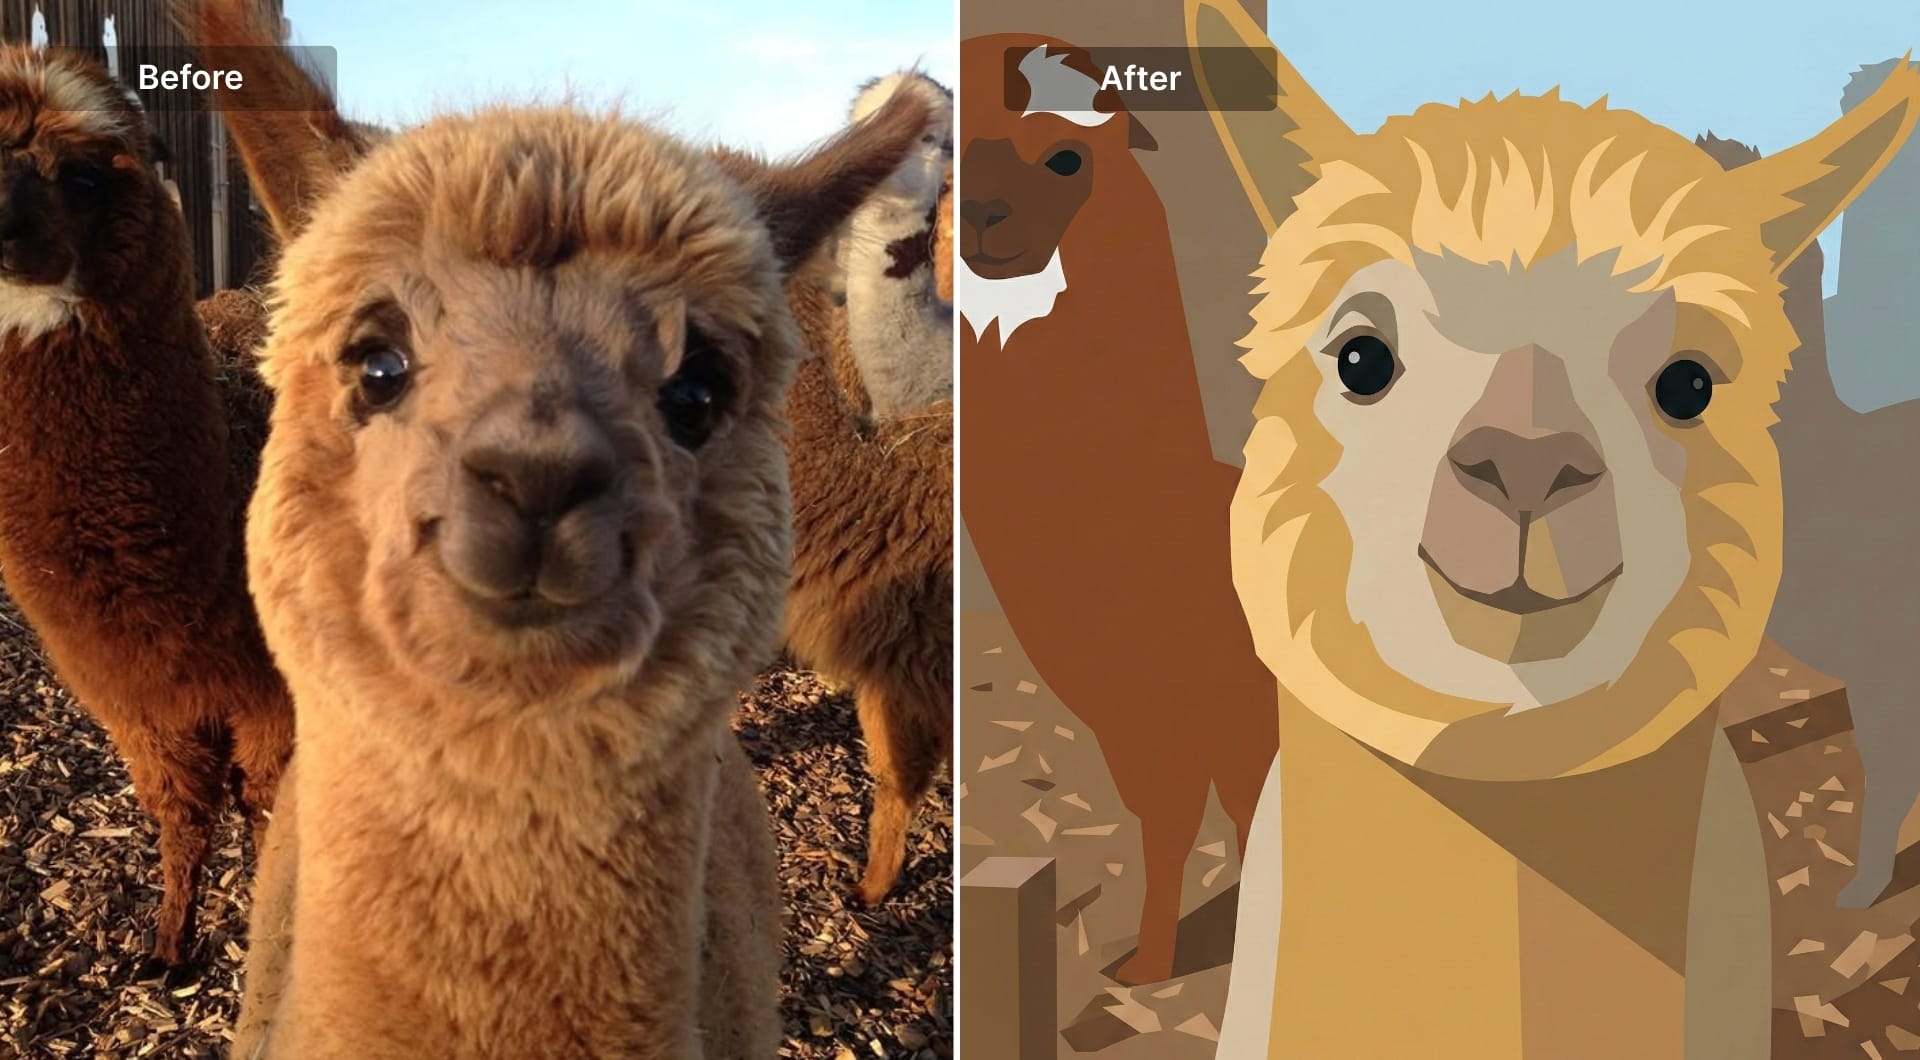
2) 3D character (Pixar-like)
This is the “premium mascot” look: smooth geometry, soft studio lighting, and clean materials. The transformation works when the prompt forces a polished render: subtle rim light, controlled reflections, and simplified details. It is widely used for mascots, app visuals, onboarding graphics, and brand avatars because it feels designed rather than filtered. If you don’t specify materials, the result often becomes waxy or uncanny.
Prompt
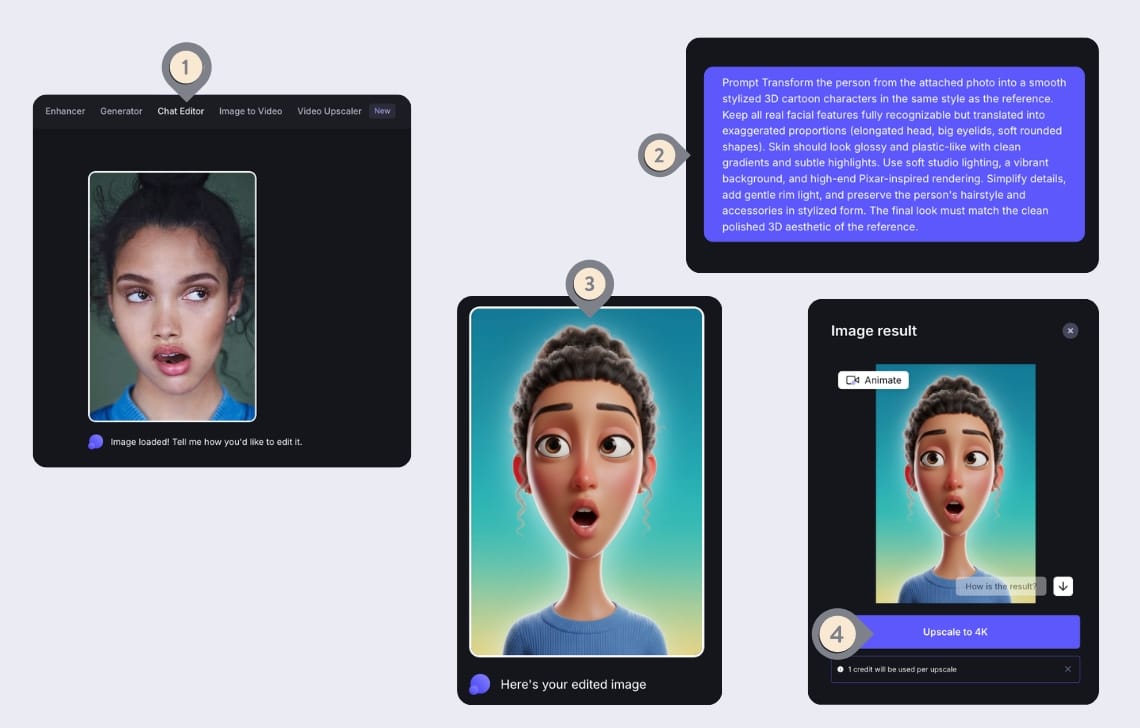
Transform the person from the attached photo into a smooth stylized 3D cartoon characters in the same style as the reference. Keep all real facial features fully recognizable but translated into exaggerated proportions (elongated head, big eyelids, soft rounded shapes). Skin should look glossy and plastic-like with clean gradients and subtle highlights. Use soft studio lighting, a vibrant background, and high-end Pixar-inspired rendering. Simplify details, add gentle rim light, and preserve the person's hairstyle and accessories in stylized form. The final look must match the clean polished 3D aesthetic of the reference.
3) Comic book (ink + halftone)
Comic style is a transformation built for print logic: strong inks, limited palette, and halftone dot shading instead of smooth gradients. It's used for posters, ads, editorial visuals, and story panels. The model needs explicit instructions to produce real halftone and not fake “comic filters.” This style works especially well on portraits and products because contrast makes the subject pop.
Prompt
Redraw the uploaded image in modern comic-book style. Preserve the subject identity and composition, but convert the image into inked linework with intentional line variation. Use flat color fills with a limited palette and apply halftone dot shading in shadow areas like printed comics. Increase contrast for bold readability without losing key details. Keep highlights as clean flat areas, not gradients. Background should be simplified into graphic shapes and negative space so the subject remains dominant. Do not add any text, speech bubbles, logos, or extra objects. No photoreal textures, no smooth shading, no glossy effects.
4) Manga black-and-white (screen tones)
Manga transformation is stricter than anime: monochrome line art, speed lines, screen-tone shading, and high-contrast facial features. It’s used for stylized portraits, fan-art, and graphic social content. The main failure mode is muddy gray shading. Screen tones should be deliberate and patterned, with clear whites for highlights.
Prompt
Transform the uploaded photo into a black-and-white manga illustration. Keep the subject recognizable by preserving its shape and key elements. Use clean black ink line art with sharp edges and confident strokes. Add manga-style screen tones (dot and line patterns) for shading instead of smooth gradients. Keep highlights as pure white paper space. Increase contrast for a crisp printed look. Background should be minimal with simple manga-style tone shapes or speed-line accents, but no clutter. No color, no painterly shading, no photoreal texture, no text.
5) Chibi
Chibi is an extreme transformation: oversized head, tiny body, simplified limbs, and cute, readable expressions. It’s used for stickers, community badges, merch, and brand mascots. To keep identity, you must lock in signature features (hair shape, accessory, outfit color) because facial detail gets simplified.
Prompt
Convert the subject into a chibi character with a very large head and a small body. Keep the subject identifiable through key facial structure cues, hairstyle silhouette, and accessories. Use clean outlines and simple cel shading with soft shadow shapes. Eyes should be large and expressive with clear highlights, and the mouth should be small and stylized. Simplify clothing into cute, readable shapes while preserving the original outfit colors and main design elements. Pose should be lively and readable. Background should be minimal with two or three supportive colors and small simple accents (sparkles, stars), no detailed scenery. No realism, no text.
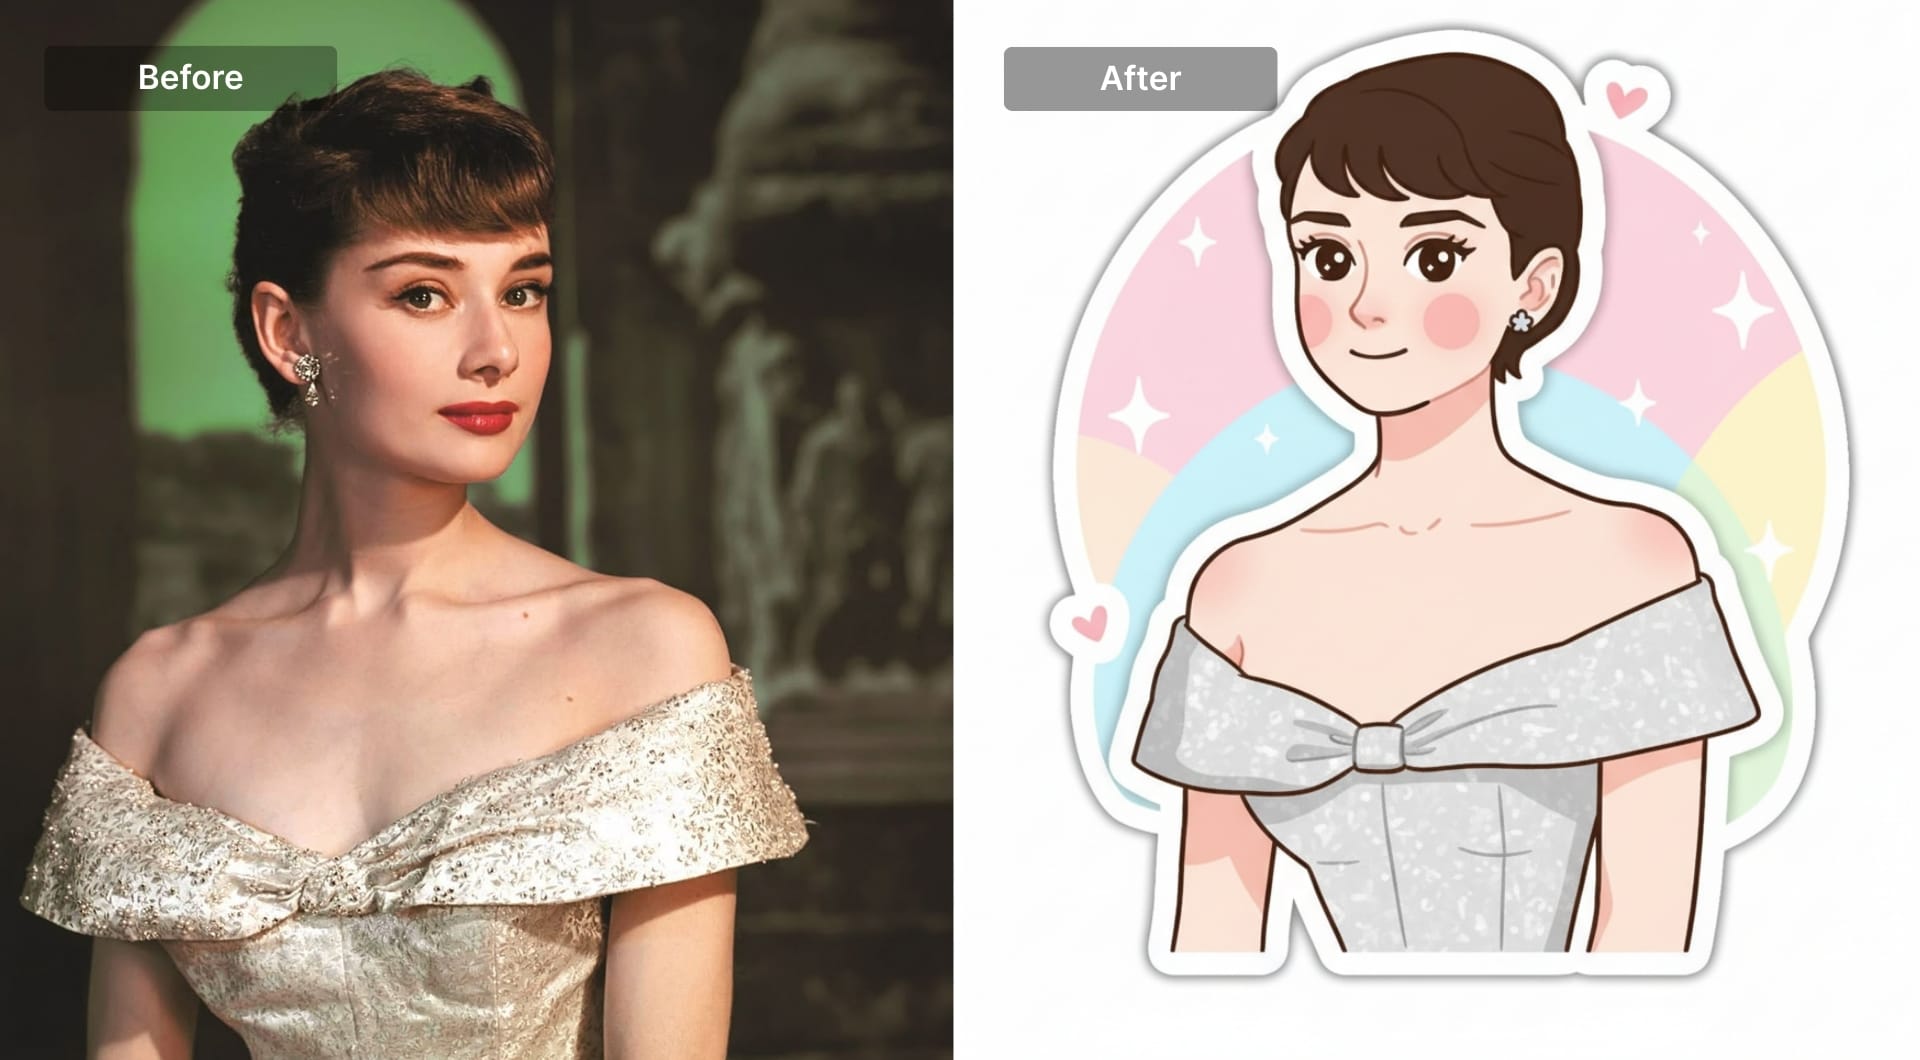
6) Kawaii sticker style
Kawaii is less about “anime” and more about a specific cute illustration system: rounded shapes, dot-like features, blush, pastel palette, and sticker outlines. It’s used for stickers, emotes, product inserts, and playful branding. The prompt should enforce matte textures and minimal detail so the result doesn’t turn into a detailed illustration.
Prompt
Transform the uploaded photo into a kawaii sticker illustration. Preserve the subject’s identity through hair shape, key accessories, and main outfit colors, but simplify everything into rounded, adorable shapes. Use large shiny eyes, a tiny mouth, and soft blush cheeks. Keep shading minimal and soft, with a matte finish. Add a clean white sticker outline around the subject. Background should be simple pastel shapes with small cute elements (sparkles or hearts) but no clutter. No realism, no heavy texture, no complex lighting, no text.
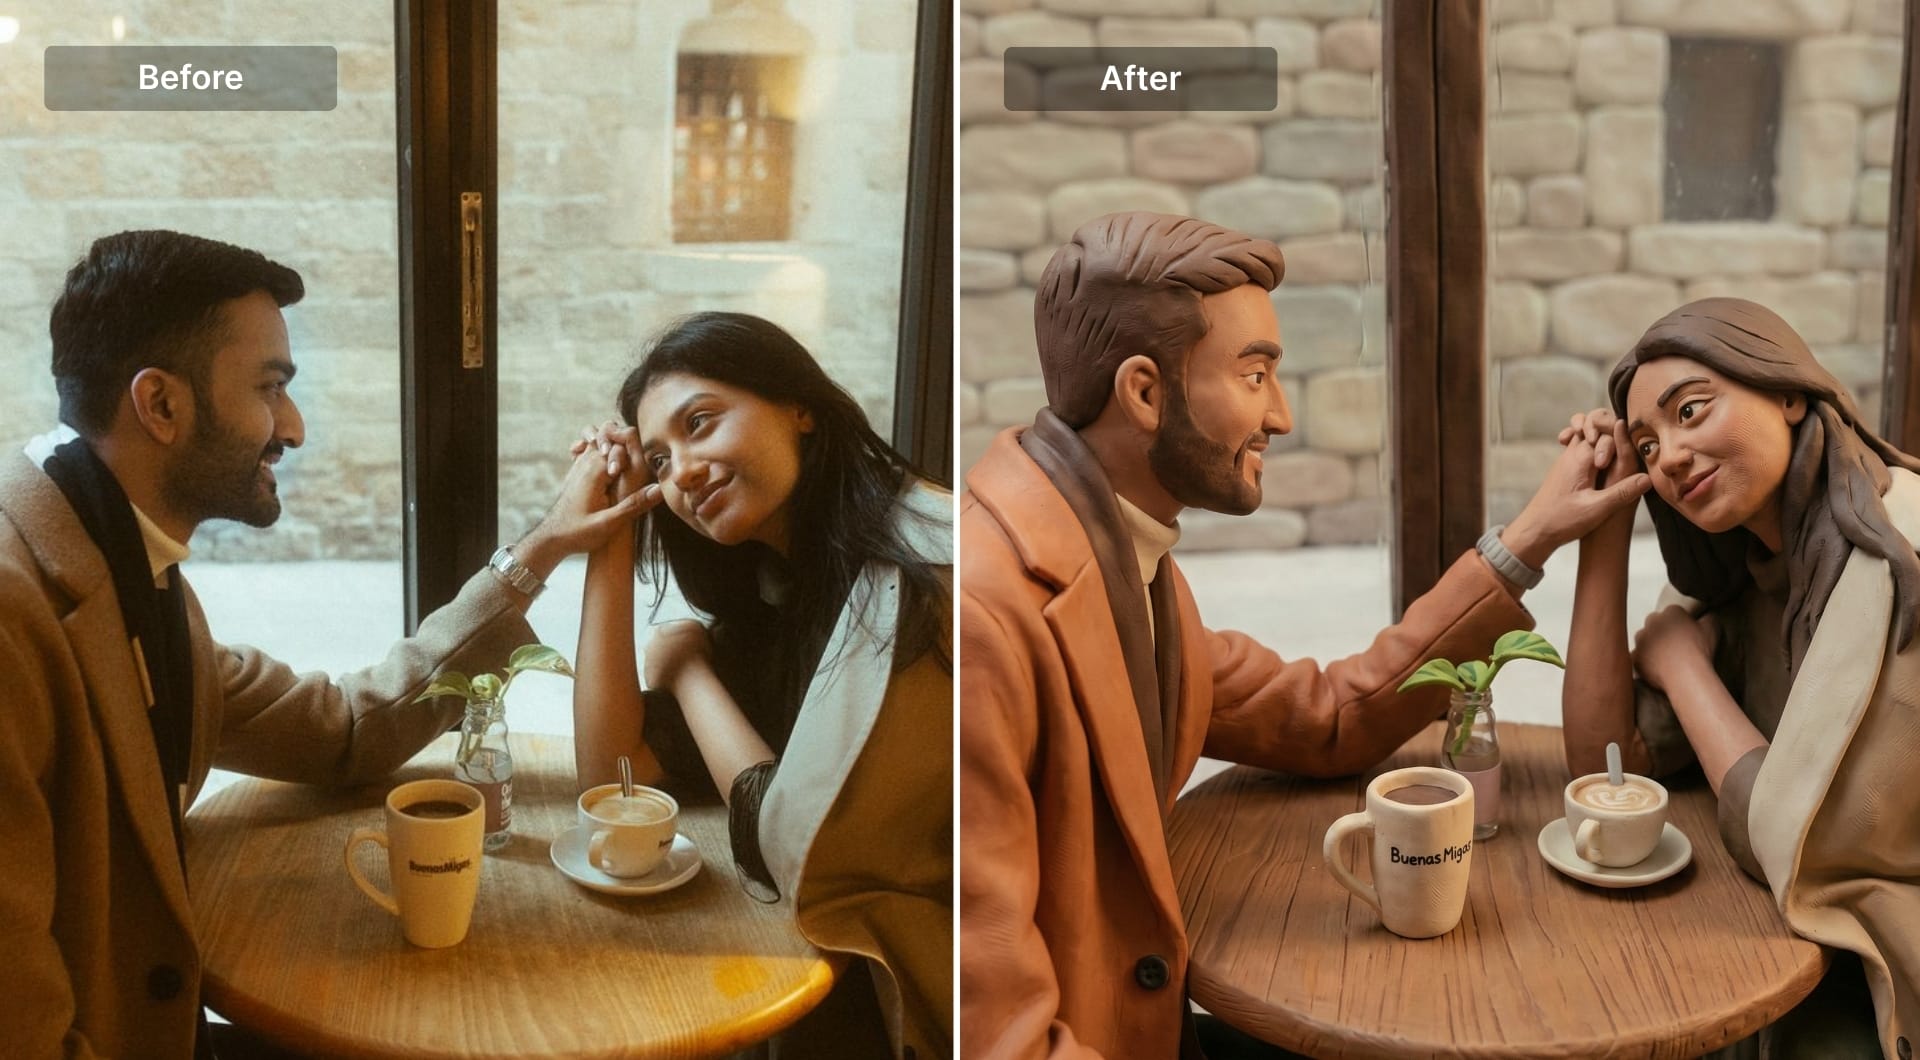
7) Claymation (stop-motion clay)
Claymation is a full material transformation: matte clay texture, slight imperfections, soft edges, and miniature studio lighting. It’s popular because it looks handcrafted and distinct. The key is explicitly asking for clay surface behavior and small asymmetries; otherwise you get shiny plastic 3D.
Prompt
Transform the uploaded image into a stop-motion claymation look. Keep the subject recognizable but rebuild it as hand-molded clay with soft rounded shapes and slight imperfections (fingerprint texture, tiny dents, mild asymmetry). Use matte clay surfaces with subtle color variation. Light the scene like a miniature set with soft key light and gentle shadows, no harsh highlights. Preserve hairstyle and accessories in simplified clay form. Background should be simple and cozy, not busy. Avoid glossy plastic, avoid photoreal skin, avoid crisp digital edges. No text.
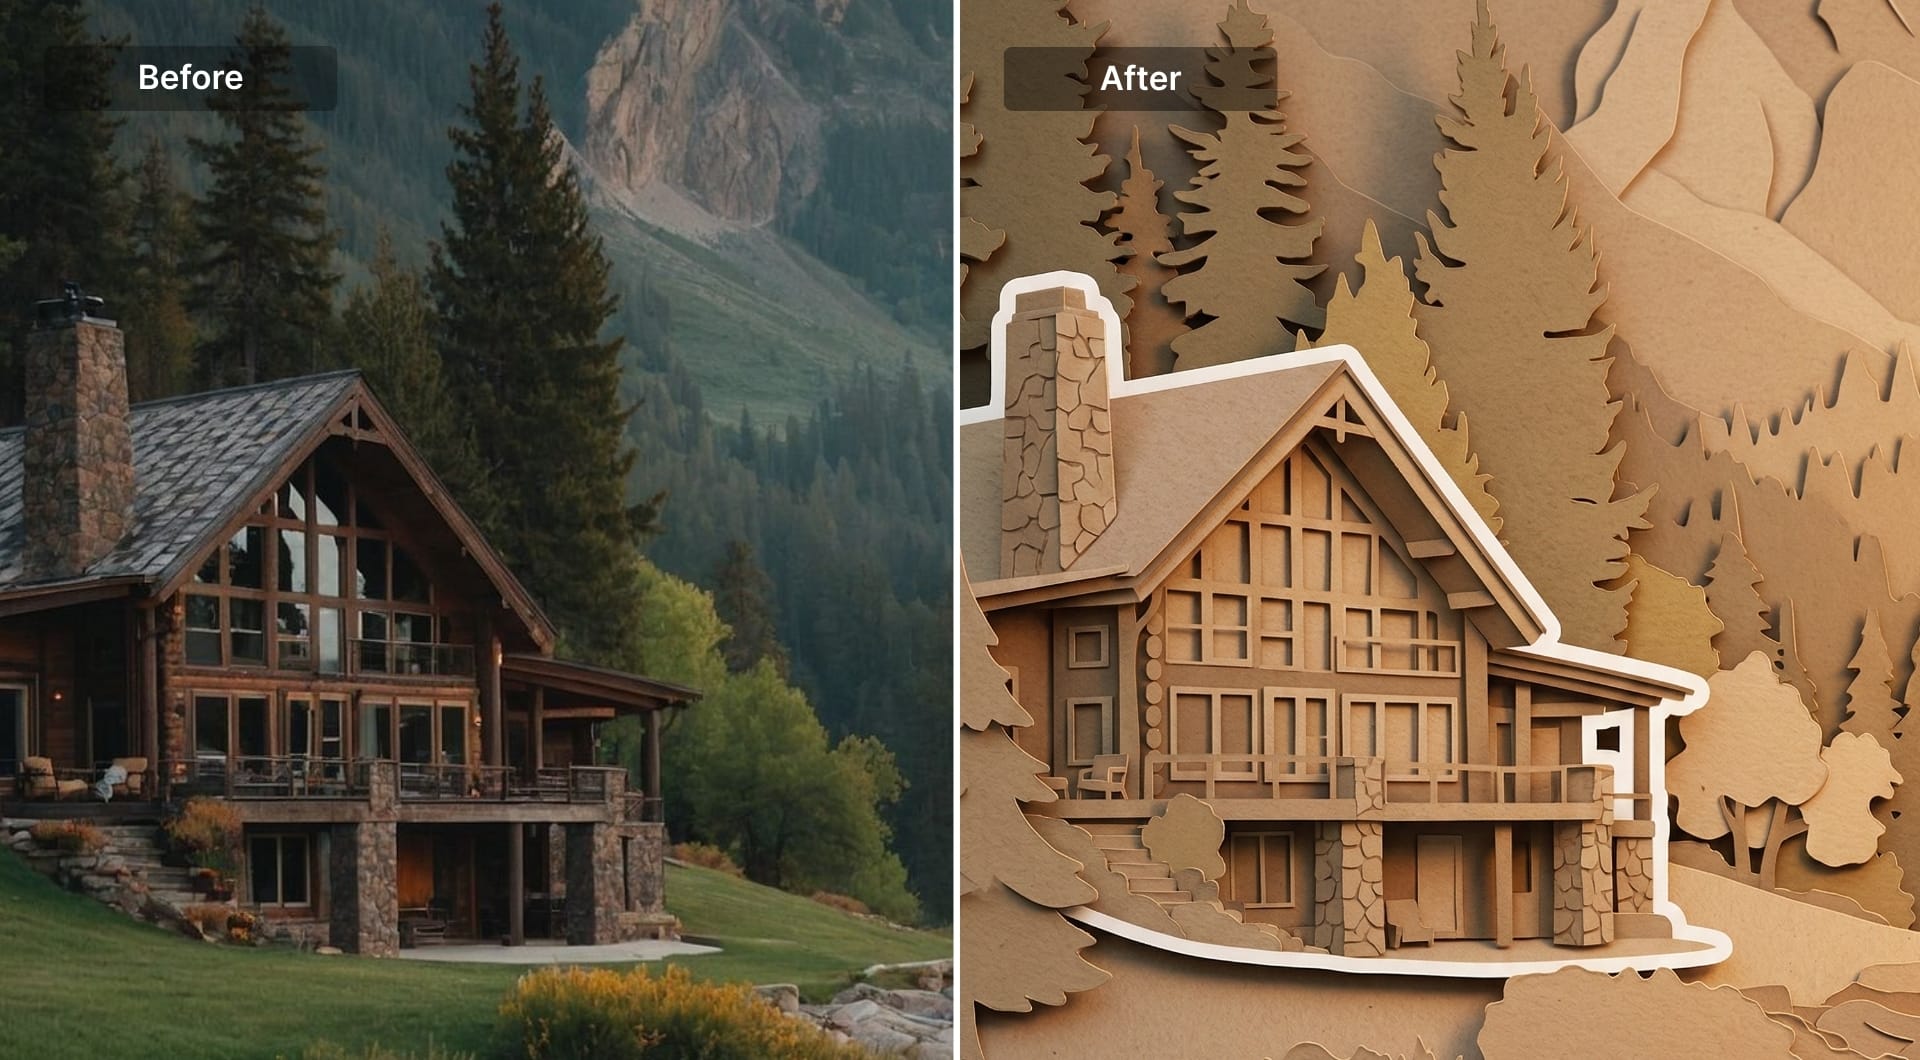
8) Paper cut (layered craft illustration)
Paper cut is a strong transformation because it replaces photography with layered shapes, tactile textures, and soft shadows between layers. It's widely used in packaging, seasonal campaigns, and editorial art because it feels handmade and prints well. The prompt needs to enforce layers, matte paper texture, and simplified silhouettes.
Prompt
Turn the uploaded image into a handcrafted layered paper-cut illustration. Preserve the subject silhouette and composition, but rebuild the scene using stacked paper layers with rounded cut edges. Add subtle soft shadows between layers to show depth. Use matte paper texture with visible grain and a tactile feel. Simplify facial features and small details into cute minimal forms while keeping the subject recognizable. Add a clean white outline around the main subject like a sticker cutout. Lighting should feel warm and cozy. No realism, no glossy surfaces, no smooth gradients, no text.
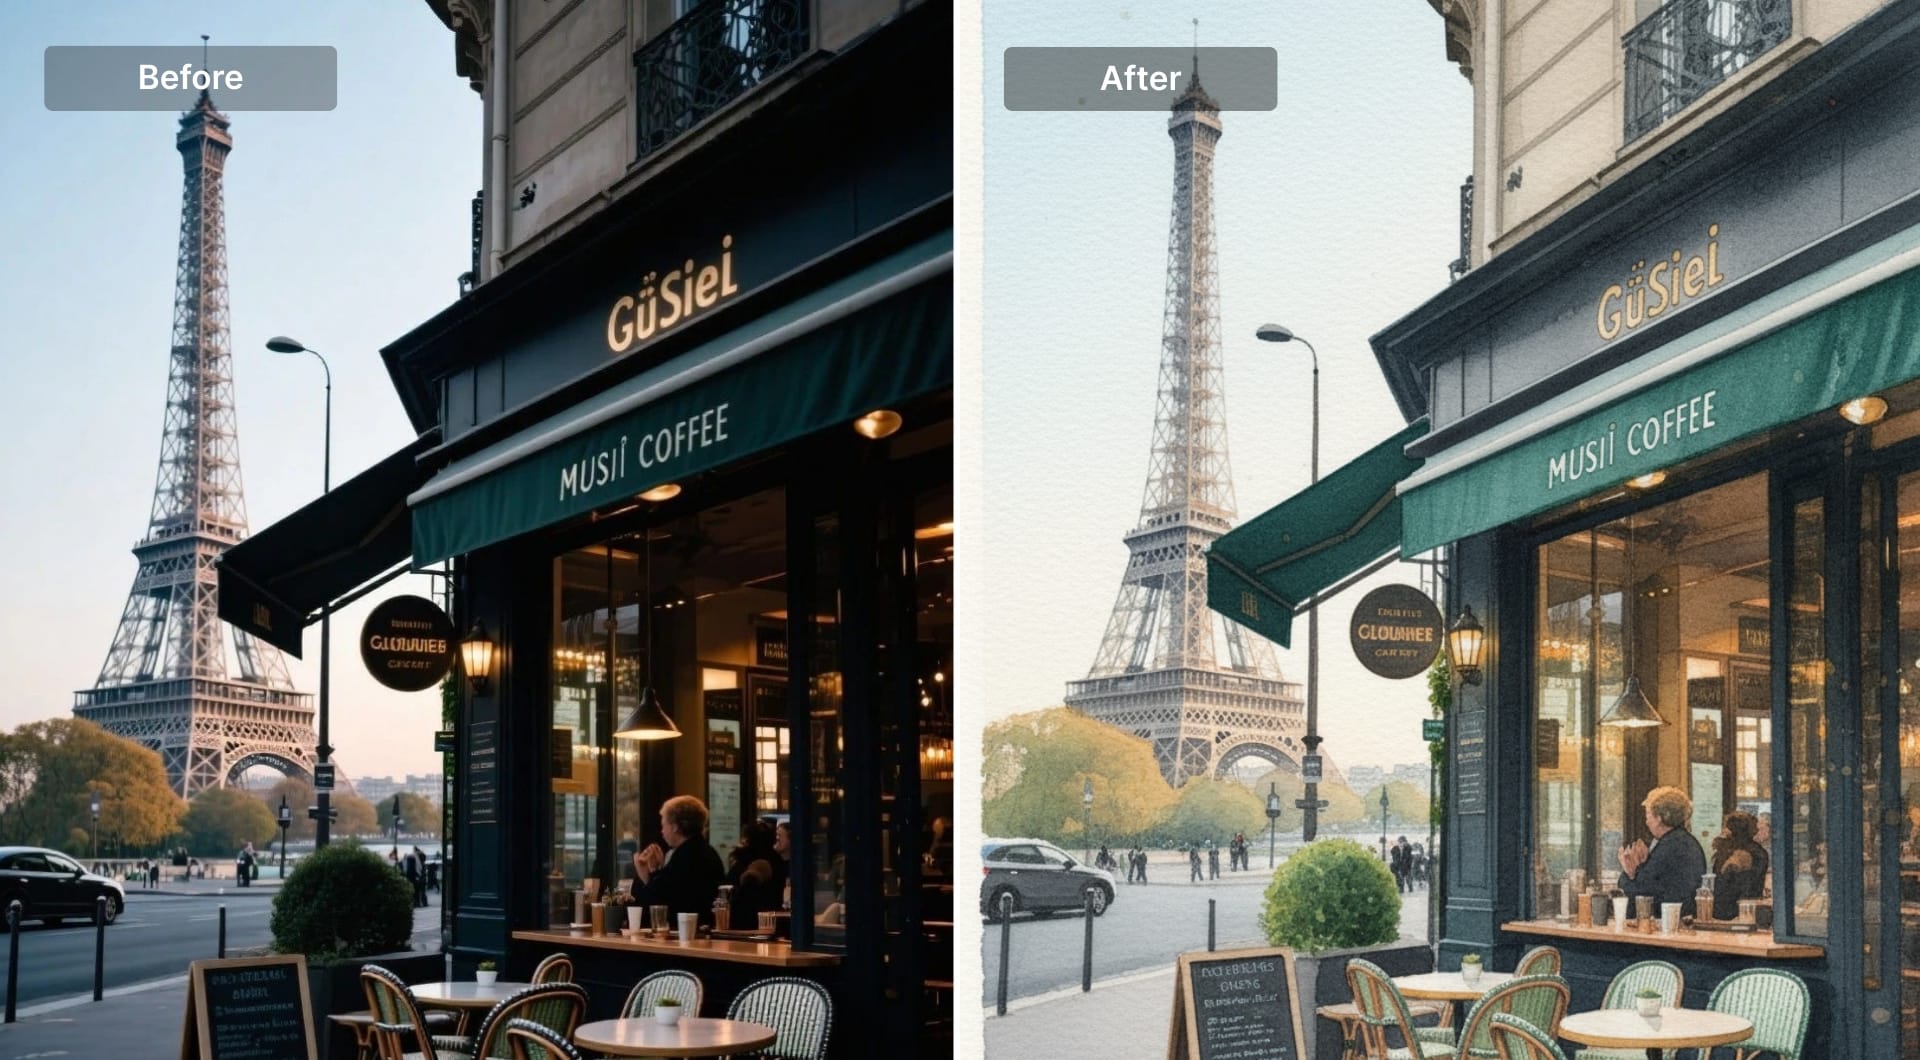
9) Watercolor painting
This transformation replaces crisp detail with pigment behavior: soft blooms, paper grain, and imperfect edges. It’s popular for portraits, pets, landscapes, and gift-style prints. If the prompt doesn’t specify paper and pigment properties, the model often returns digital smears. Ask for cold-press texture and controlled washes.
Prompt
Transform the uploaded photo into a watercolor painting on textured cold-press paper. Preserve the main subject and composition but convert details into soft washes and natural pigment blooms. Let paper grain show through lighter areas. Use gentle color mixing and subtle granulation, with slightly imperfect edges where washes dry. Add minimal ink linework only if needed for structure. Keep colors natural and slightly muted, not neon. No sharp photoreal detail, no glossy effects, no hard digital gradients, no text.
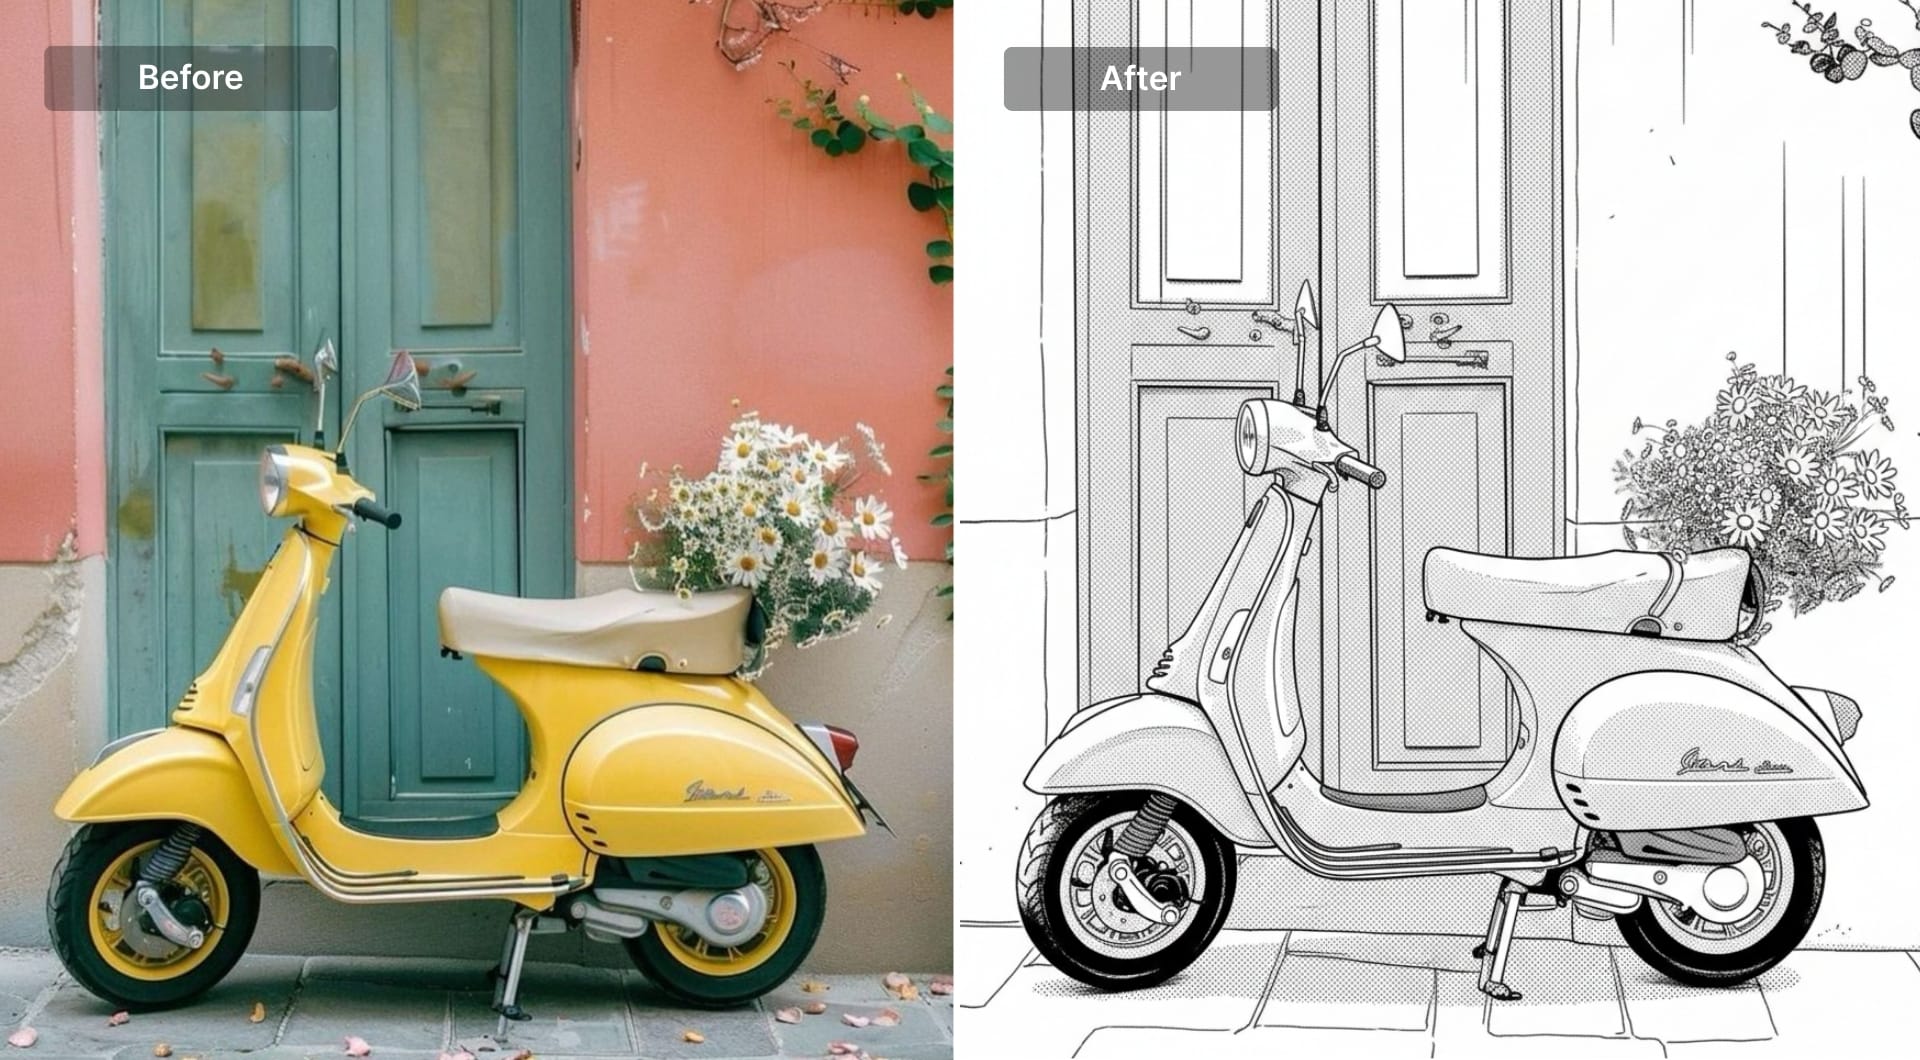
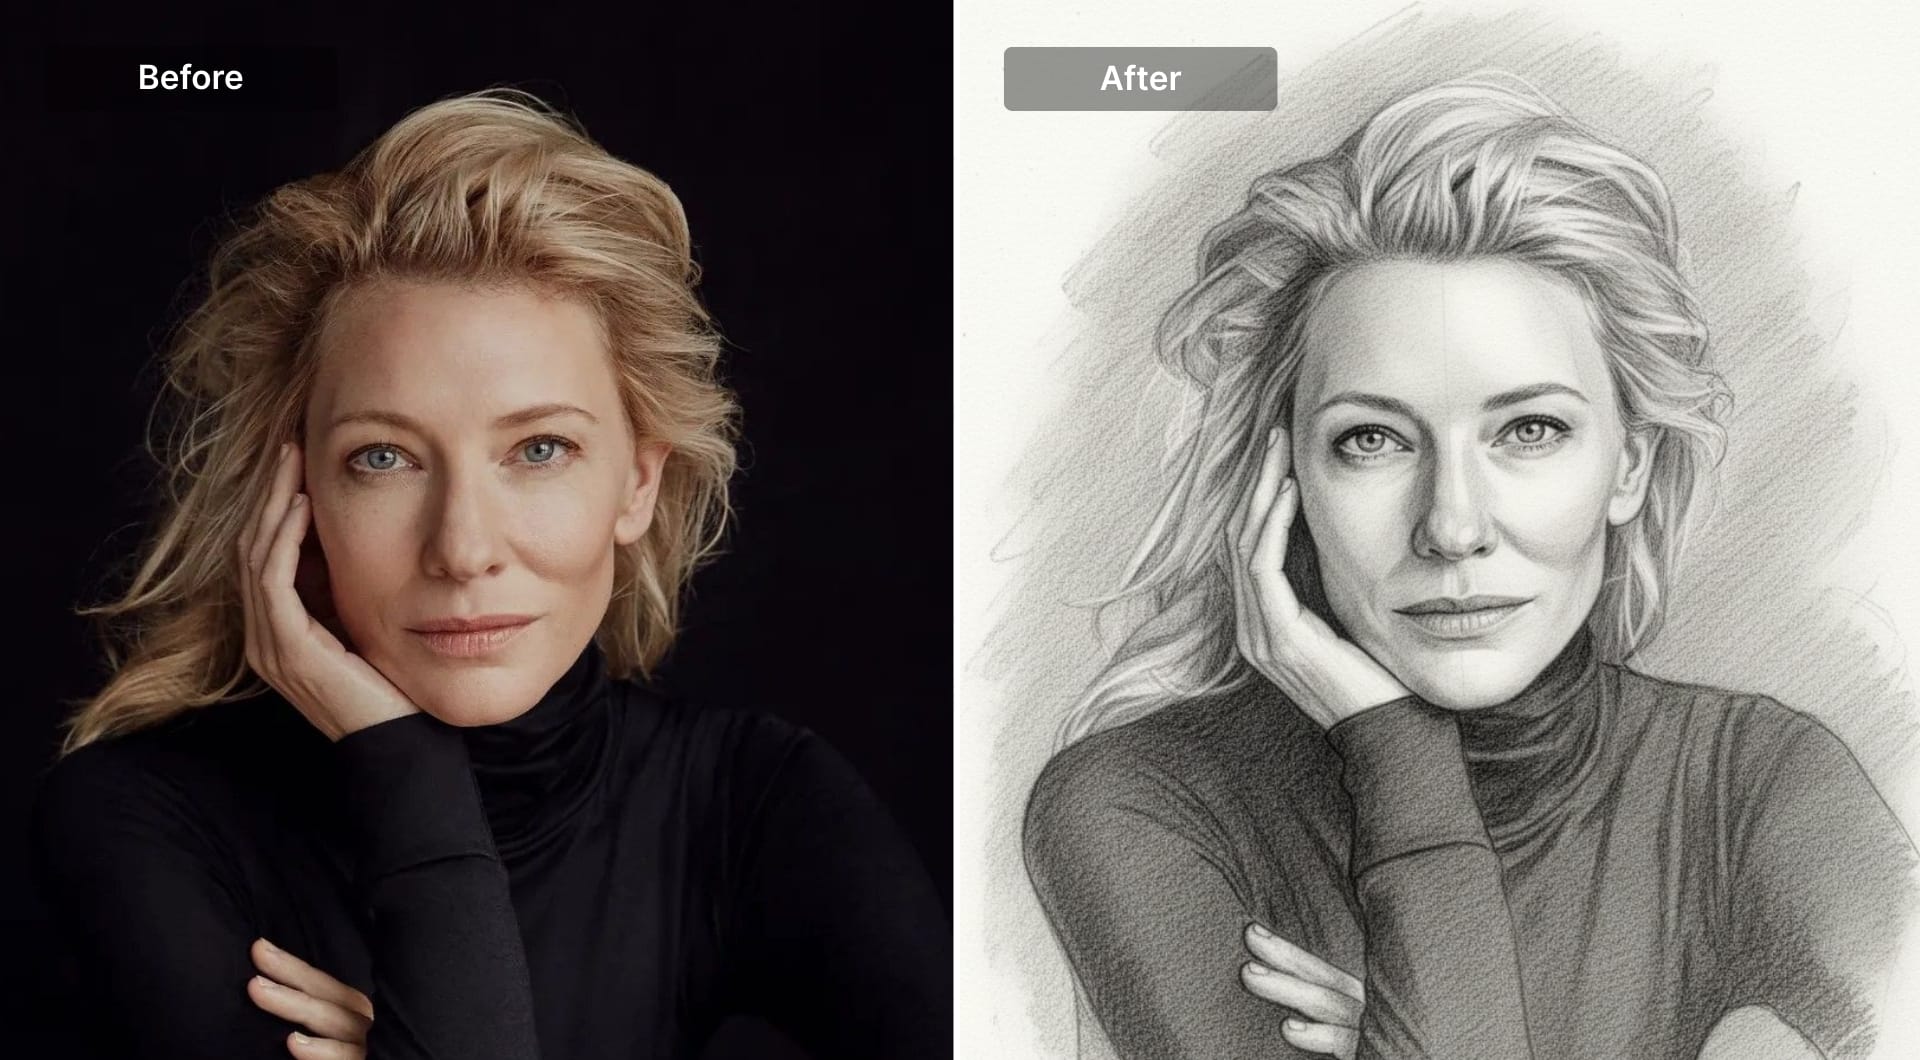
10) Pencil drawing (graphite sketch)
Graphite drawing is a strong transformation for portraits and objects because it removes photographic complexity while keeping structure. It’s used for personal portraits, gift prints, and concept sketches. The prompt should specify paper texture, line pressure variation, and shading method (hatching, smudging).
Prompt
Redraw the uploaded photo as a graphite pencil drawing on textured paper. Preserve proportions and composition. Use natural pencil linework with visible pressure variation: lighter construction lines, darker contour lines, and detailed strokes in focal areas. Shade using fine hatching and soft smudging, keeping highlights as clean paper space. Keep the background minimal and unobtrusive. No ink outlines, no charcoal blocks, no color. The result should look like a scanned pencil sketch.
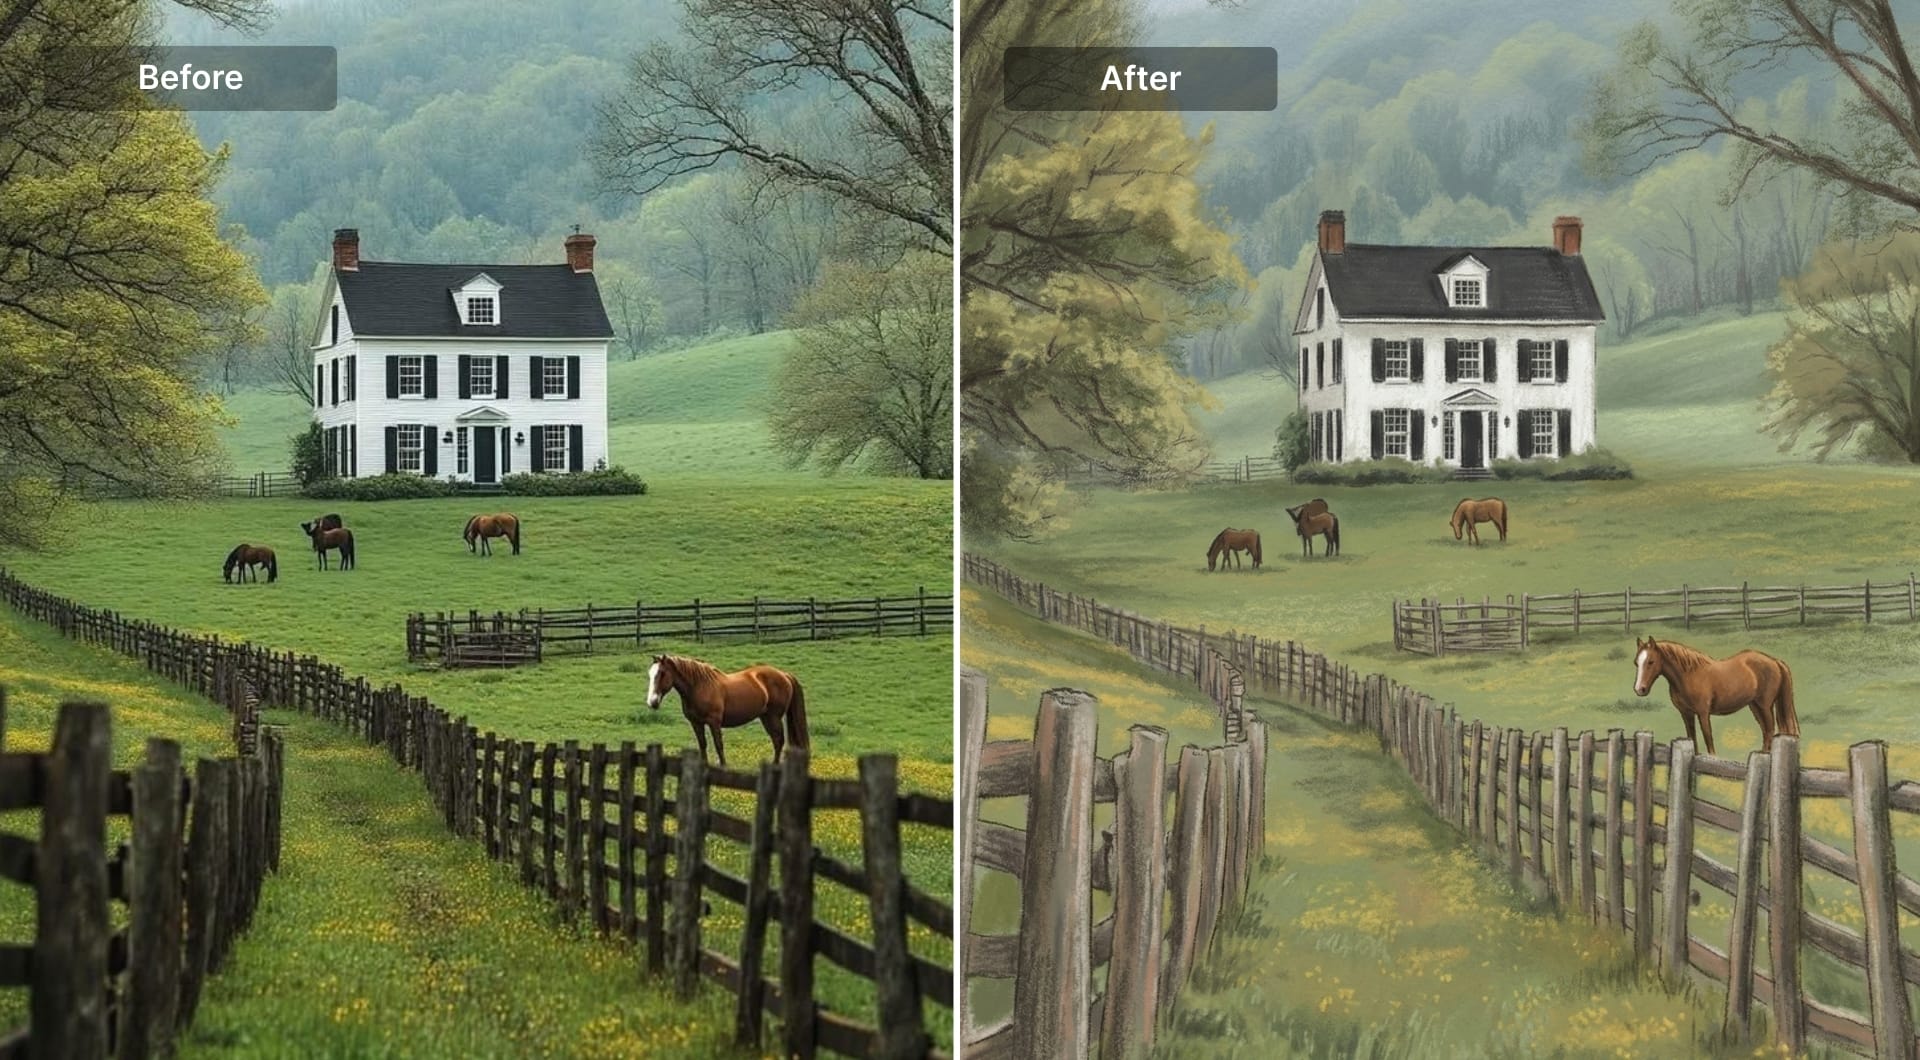
11) Pastel chalk illustration
Pastel transforms photos into soft, dusty color with visible chalk grain. It’s often used for cozy portraits and nostalgic prints. The trick is to ask for visible chalk texture and avoid glossy digital blending.
Prompt
Transform the uploaded image into a soft pastel chalk illustration. Preserve the subject identity and composition, but rebuild surfaces with visible chalk strokes and powdery texture. Use gentle blending with slightly dusty edges, keeping highlights soft and matte. Colors should be warm and muted, like real pastel on paper. Add subtle paper texture. Avoid sharp photoreal details, avoid glossy highlights, avoid digital airbrush smoothness. Background should be simple and softly blended. No text.
12) Vector flat illustration
Vector flat is a full simplification: clean shapes, flat colors, and clear silhouette. It’s used for UI visuals, onboarding illustrations, pitch decks, and brand systems because it scales cleanly and looks intentional. The prompt must forbid texture and gradients if you want true vector style.
Prompt
Convert the uploaded photo into a clean vector flat illustration. Preserve the subject silhouette and overall composition but simplify all details into geometric shapes with crisp edges. Use flat color fills only, no texture and no gradients. Reduce small details while keeping the subject recognizable through key shape cues and main colors. Add one simple shadow shape for depth if needed, but keep it flat and graphic. Background should be a minimal color field or simple abstract shapes. No realism, no painterly strokes, no text.
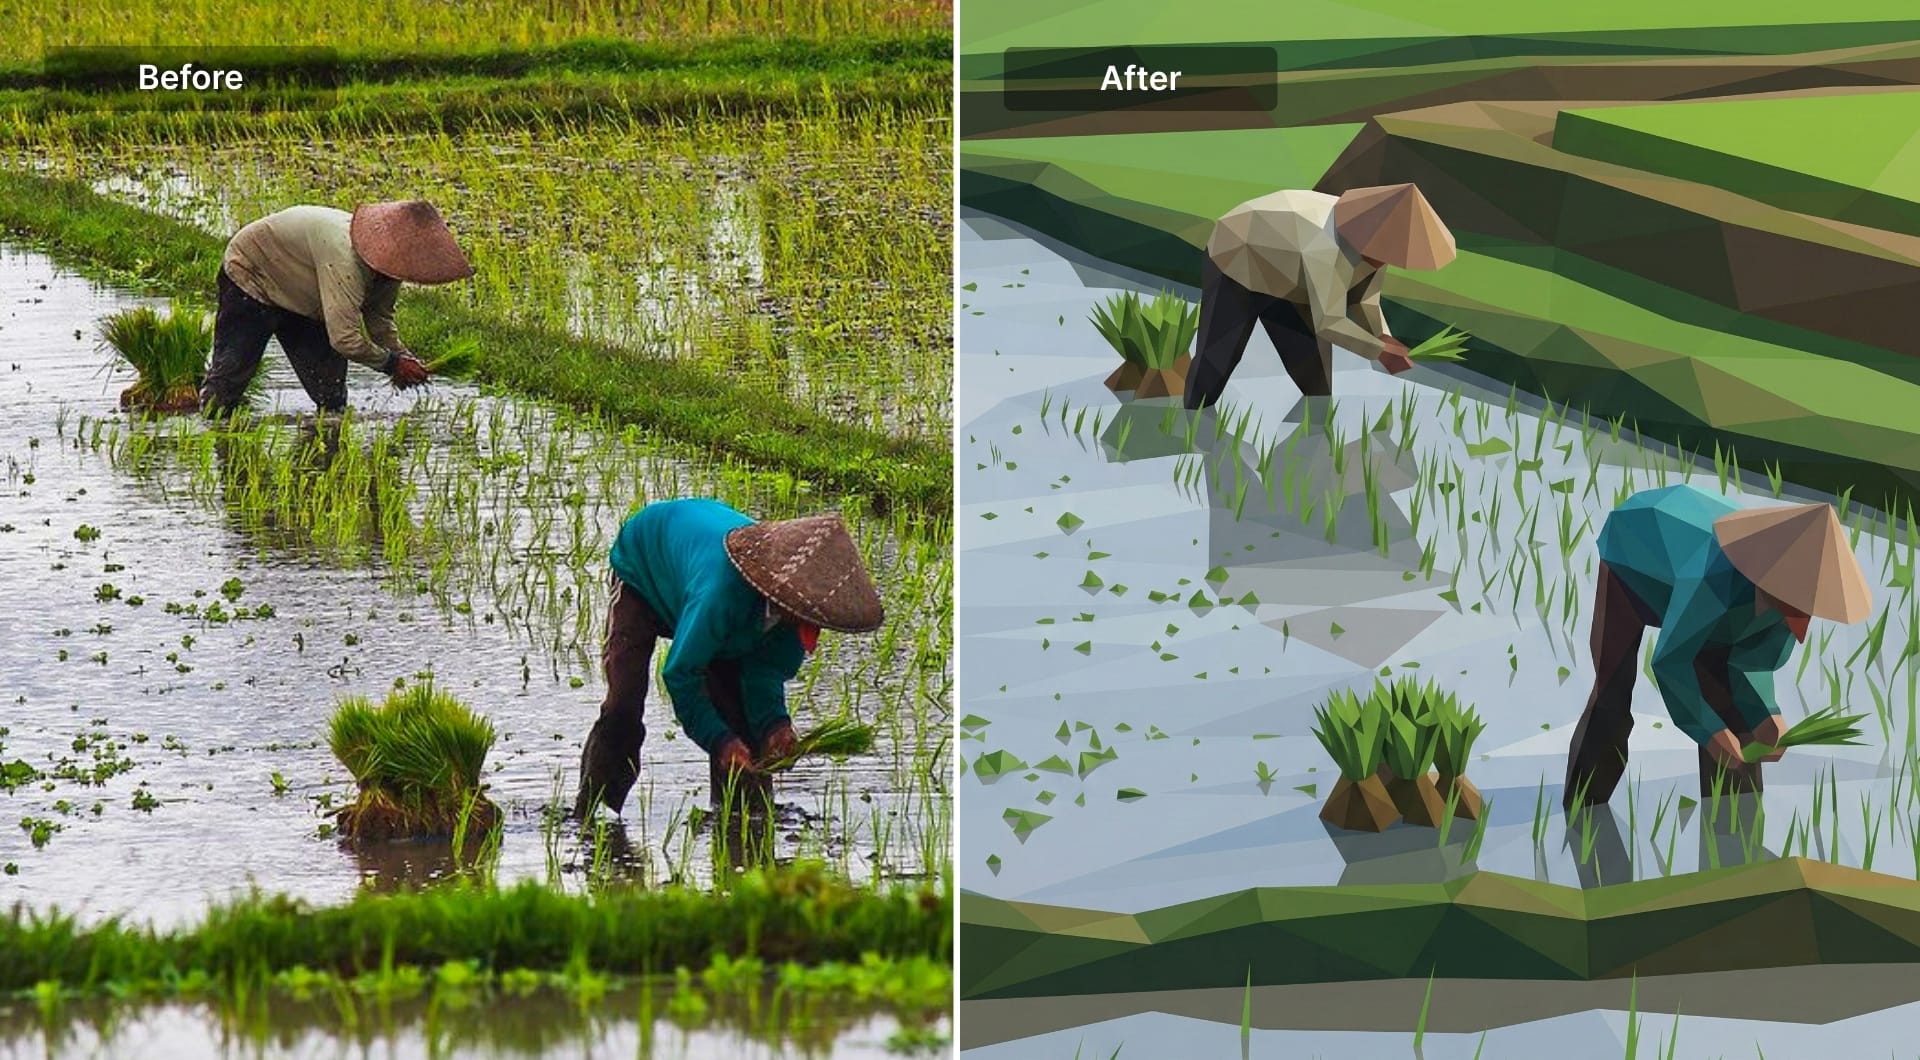
13) Low-poly 3D
Low-poly is a dramatic transformation that replaces smooth surfaces with faceted triangles. It’s popular for tech aesthetics and stylized portraits. Ask for visible facets, flat shading, and clean lighting, or the model will blur facets away.
Prompt
Rebuild the uploaded image as a low-poly 3D render. Preserve the subject silhouette and proportions. Convert surfaces into visible faceted triangles with crisp edges and flat shading. Use clean studio lighting with controlled highlights, keeping materials simple. Colors should shift between facets rather than blending smoothly. Background should be minimal and uncluttered, solid color or simple gradient. No photoreal textures, no soft airbrush shading, no text.
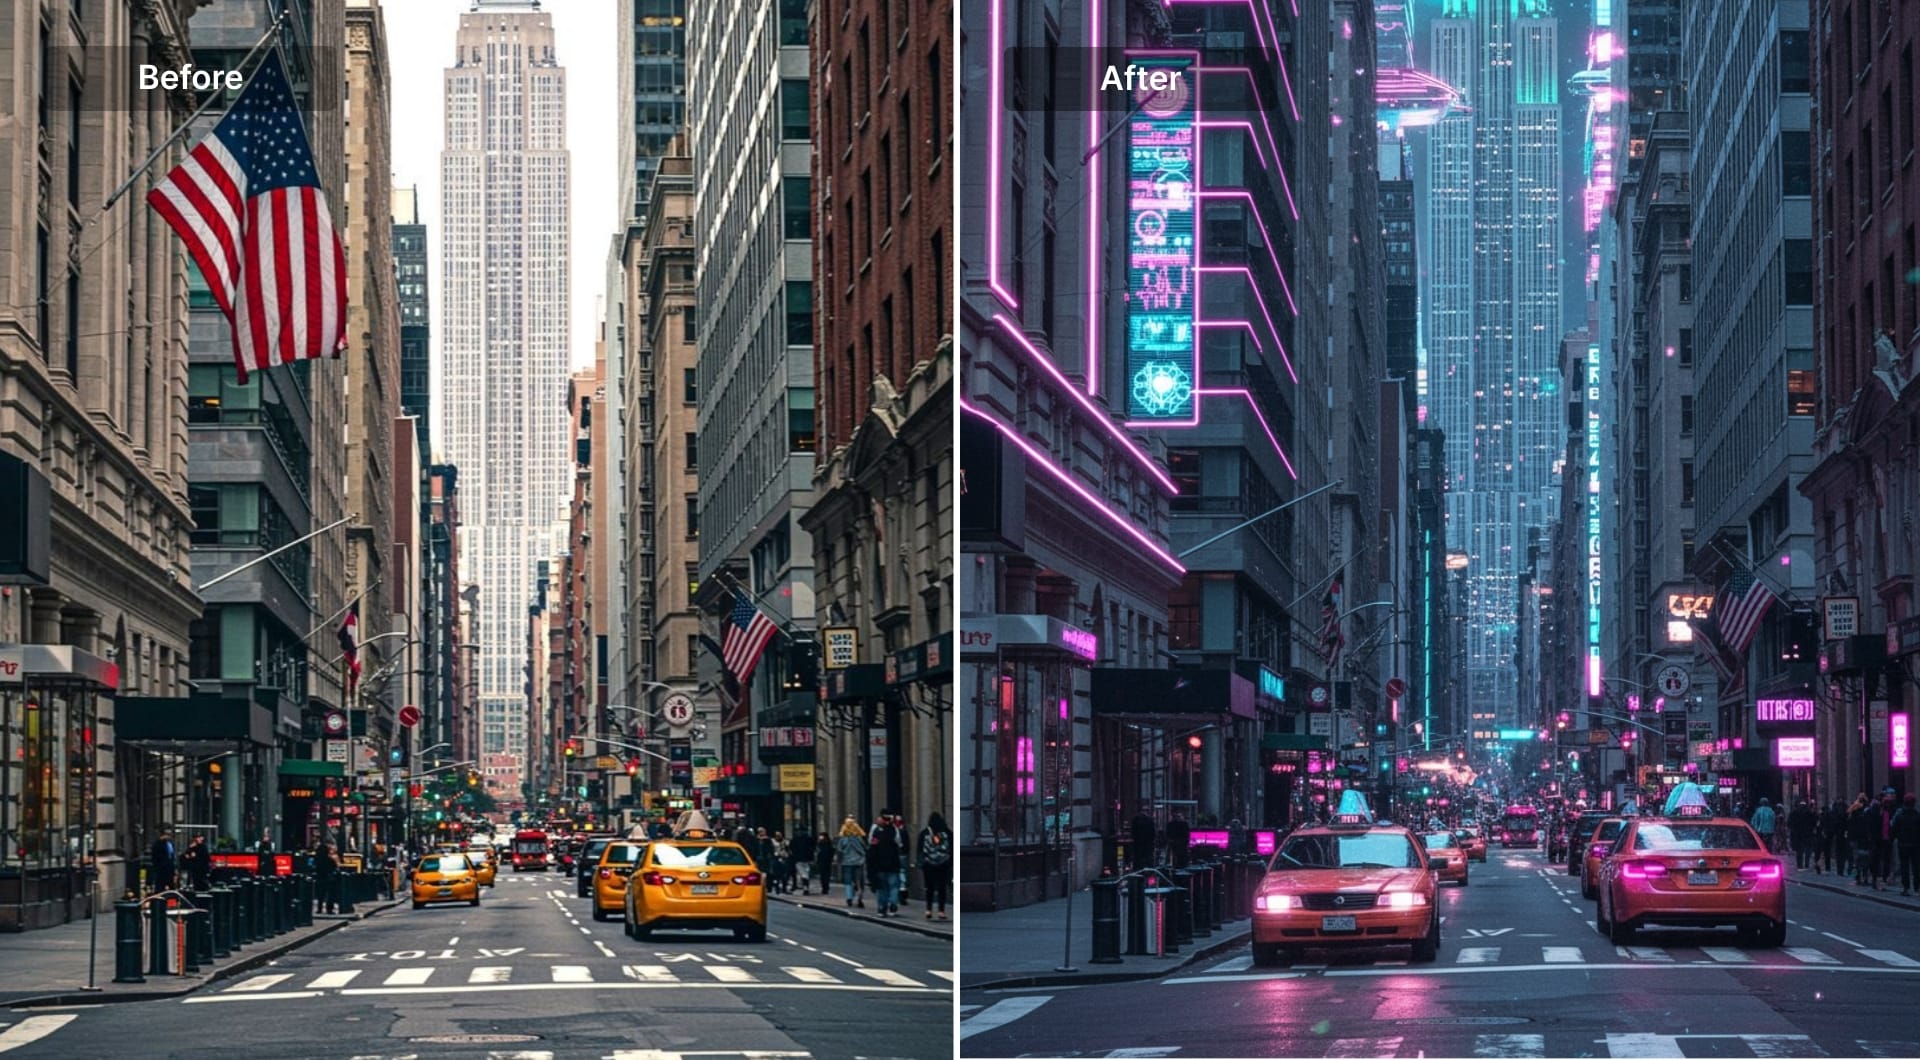
14) Neon cyberpunk
Cyberpunk is defined by lighting and color: neon reflections, high contrast, and atmospheric haze. It’s used for creator branding, posters, and dramatic portraits. The prompt should control palette (magenta/cyan) and keep the subject readable.
Prompt
Transform the uploaded image into a neon cyberpunk style scene while keeping the subject recognizable. Use strong neon lighting with magenta and cyan accents, bright rim highlights, and reflected glow on surfaces. Add subtle atmospheric haze and depth for a night-city feel. Preserve facial structure and key details, but stylize textures slightly toward a sleek futuristic look. Background should suggest a modern city or abstract neon shapes without clutter. High contrast, cinematic framing. No cartoon outlines, no painterly brushwork, no text.
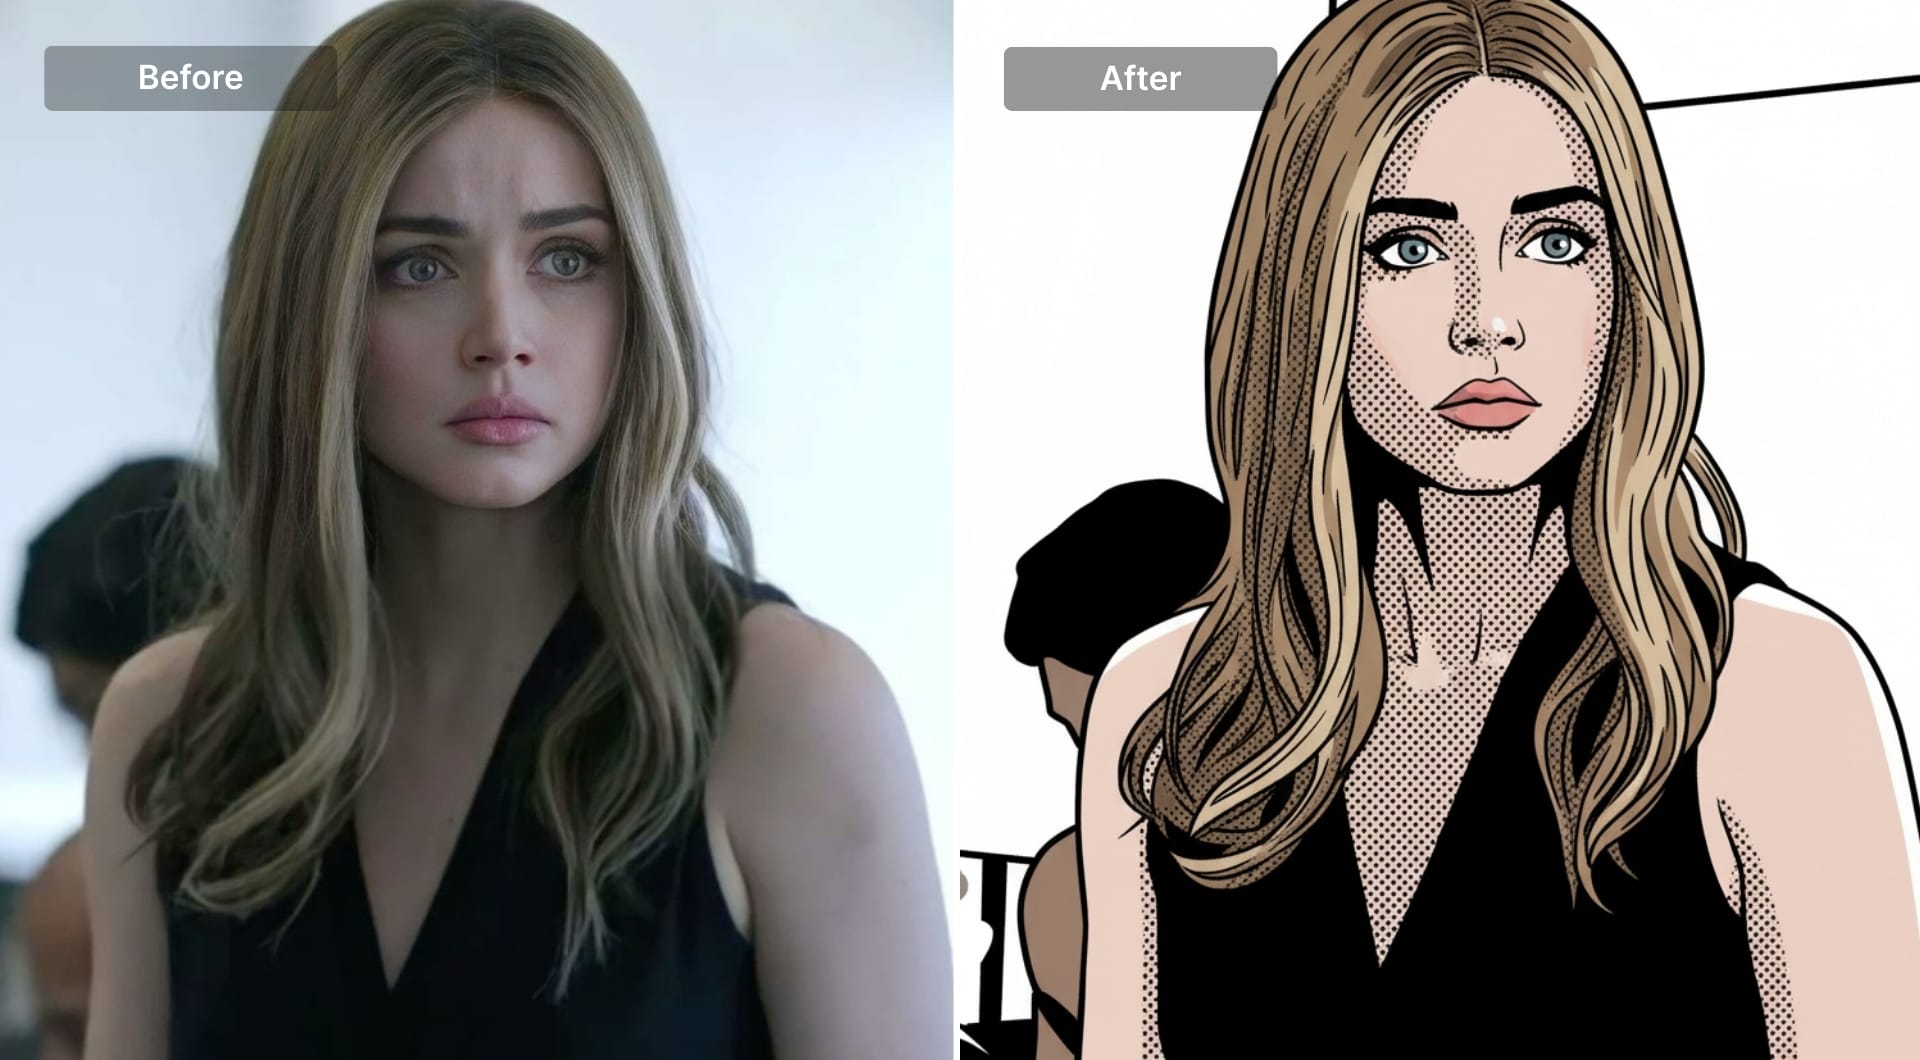
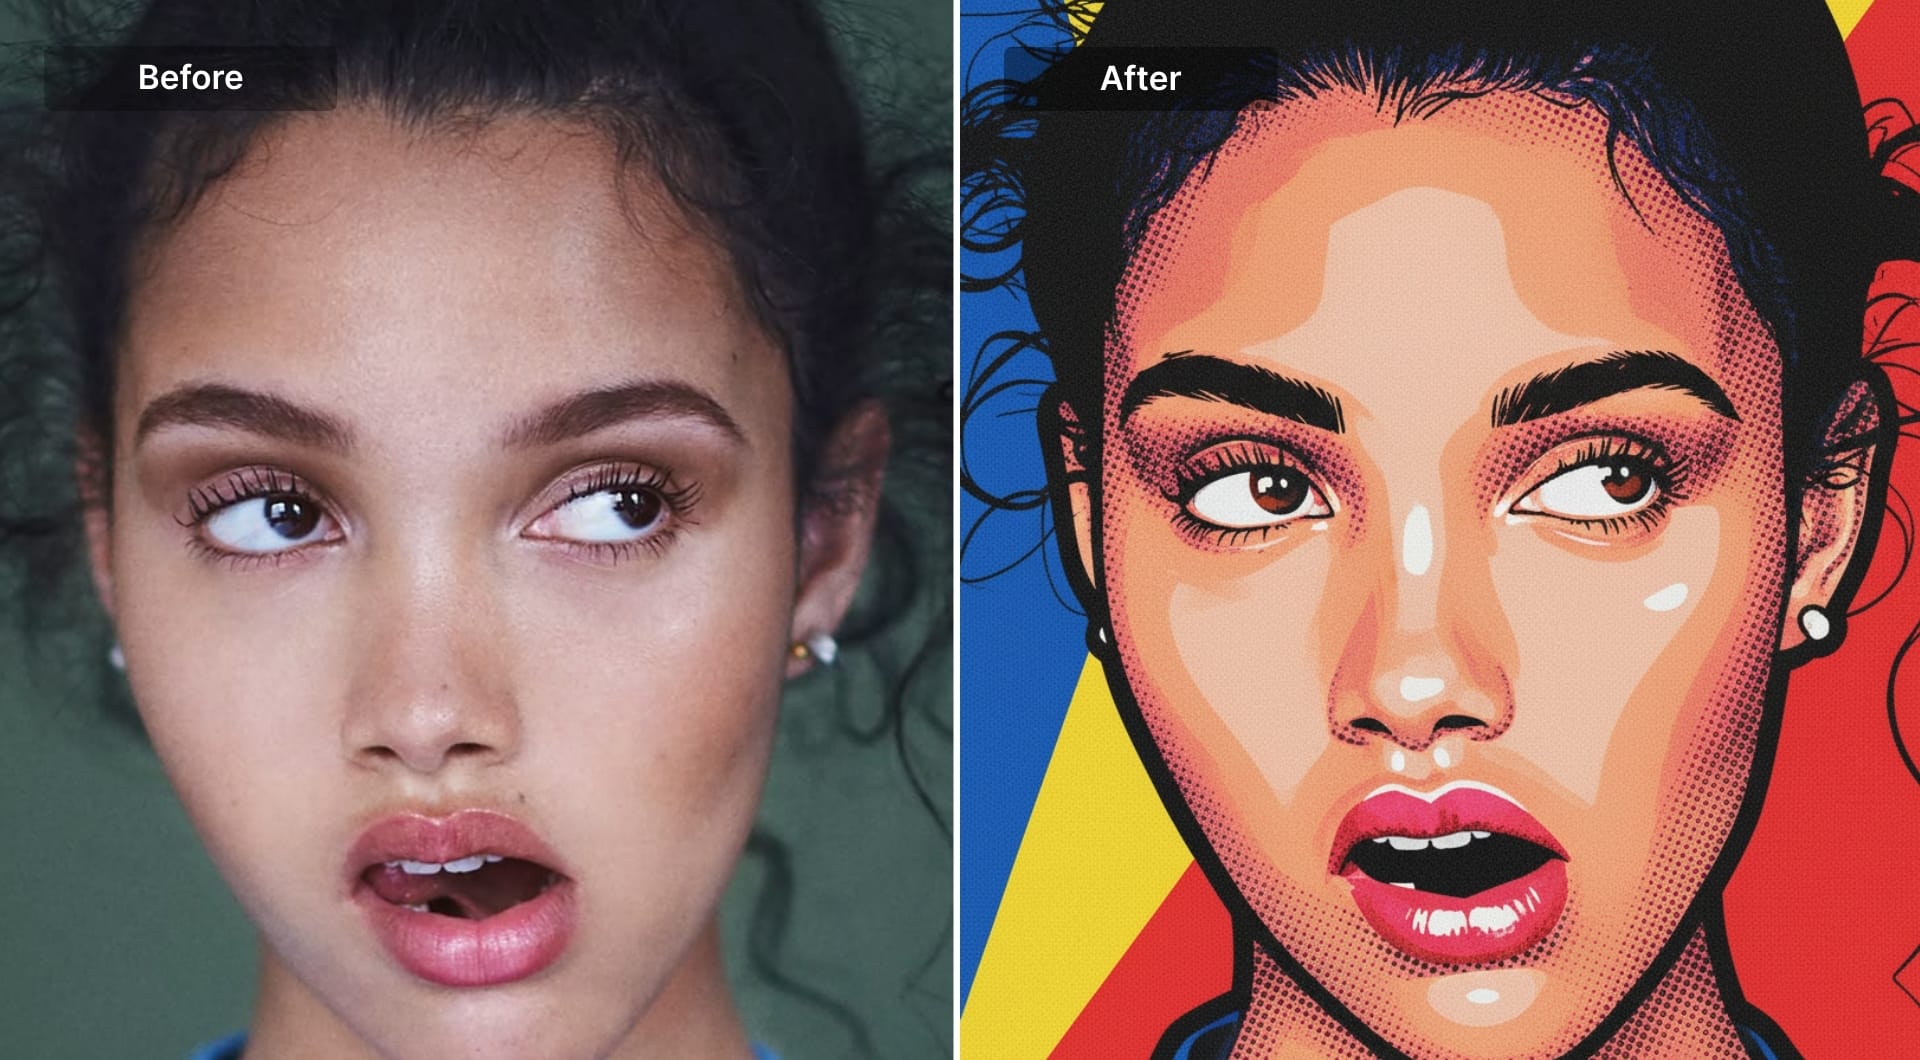
15) Pop art (bold + halftone)
Pop art is graphic impact: strong outlines, saturated color blocks, and halftone dots. It’s used for posters and social campaigns because it’s loud and readable. Ask for limited palette and print shading.
Prompt
Transform the uploaded image into pop art. Preserve subject identity and composition. Use thick bold outlines, high-contrast flat color blocks, and halftone dot shading for shadows. Keep highlights clean and flat, no gradients. Use a limited but saturated palette and simplify background into bold graphic shapes. The final image should look like a printed pop-art poster, not a filtered photo. No text, no watermarks.
16) Screen print
Screen print style is about ink layers and imperfections: limited colors, rough ink texture, slight misregistration. It’s used for merch designs and posters. You need to explicitly request ink texture and registration errors.
Prompt
Convert the uploaded image into a screen print design using a limited 3–5 ink palette. Preserve the main silhouette and simplify details into clean color separations. Apply halftone dots for mid-tone shading, keeping highlights as flat negative space. Add subtle ink texture and a slight misregistration feel (tiny layer offsets) like real print. Background should be a single flat ink color or simple shapes. No gradients, no photoreal texture, no glossy highlights, no text.
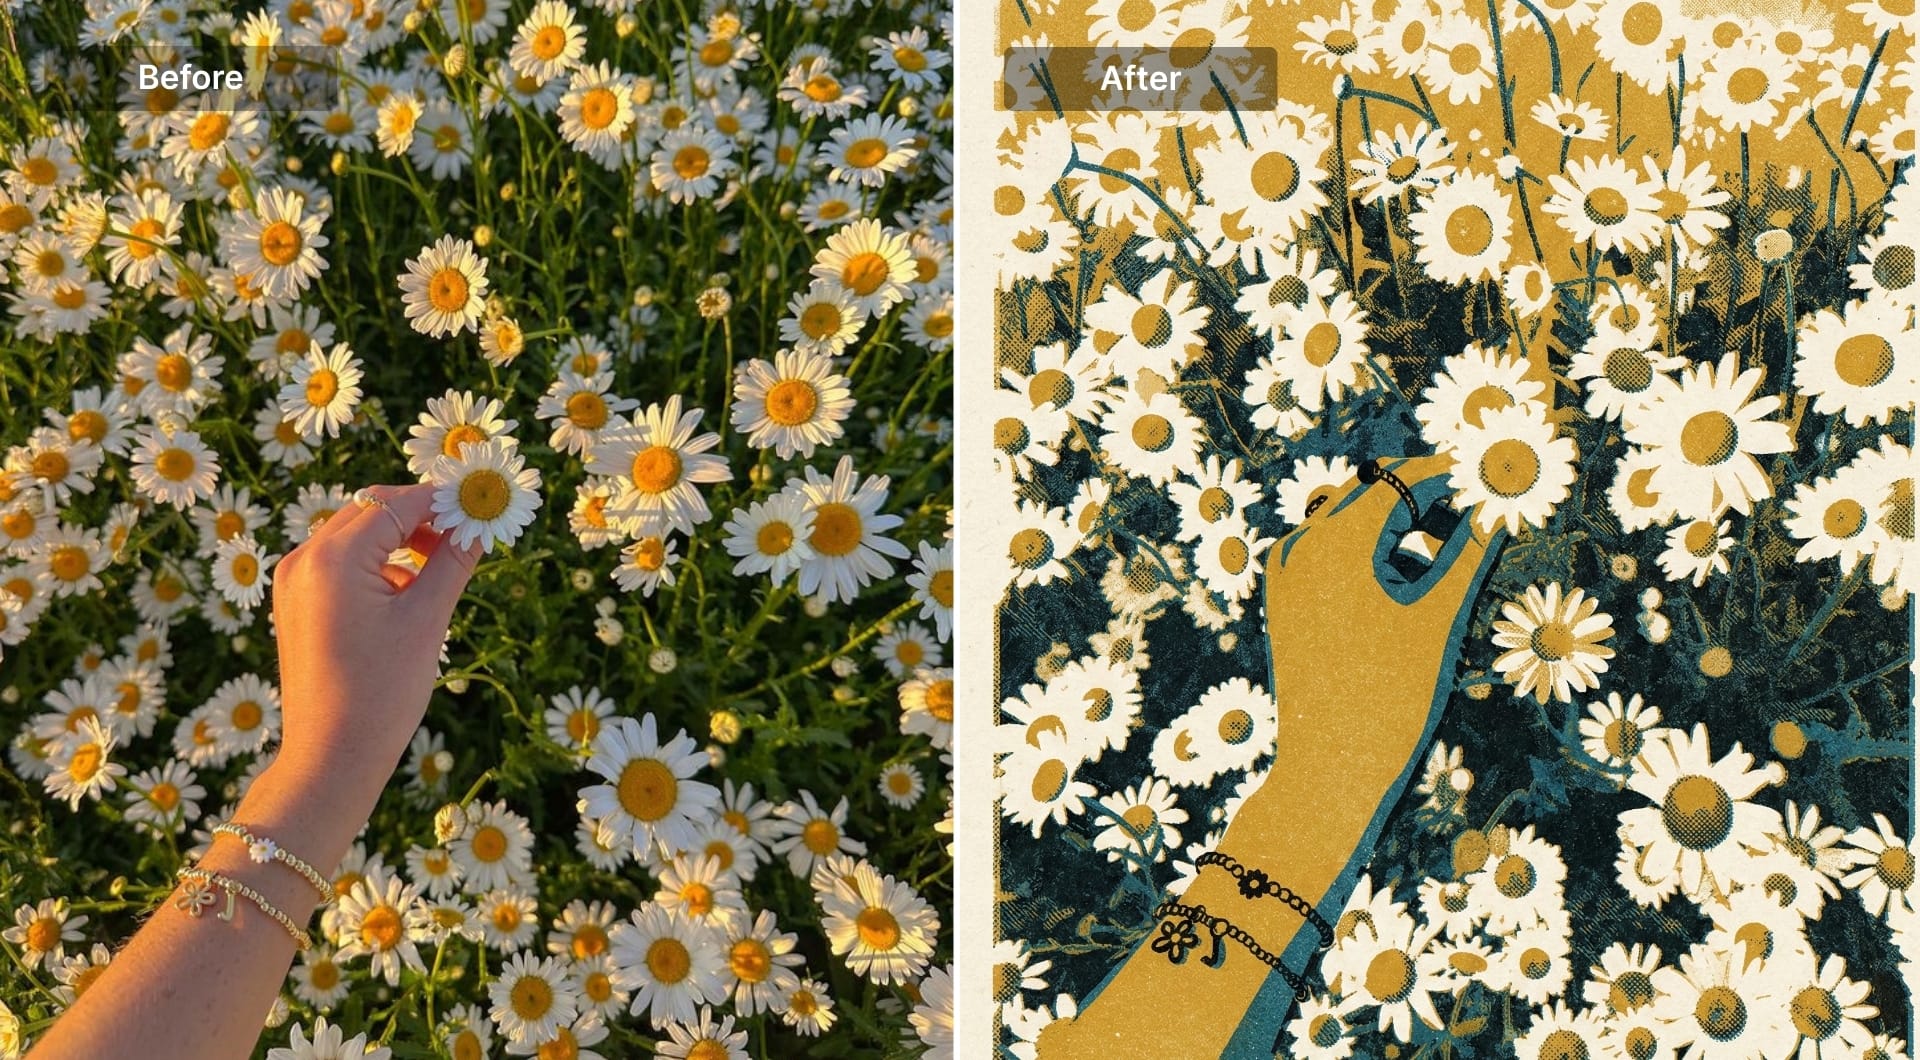
17) Risograph print
Risograph is grainy, imperfect, and charming. It’s used for zines and indie posters. The prompt should enforce spot colors, grain, and misregistration on paper.
Prompt
Transform the uploaded image into a risograph print. Use 2–4 spot colors with visible grain and uneven ink coverage. Add subtle layer misregistration so colors are slightly offset, like real riso printing. Simplify small details while preserving the subject silhouette and key features. Keep shading as textured ink patterns, not smooth gradients. Let paper texture show through lighter regions. Background should be simple and flat. No text.
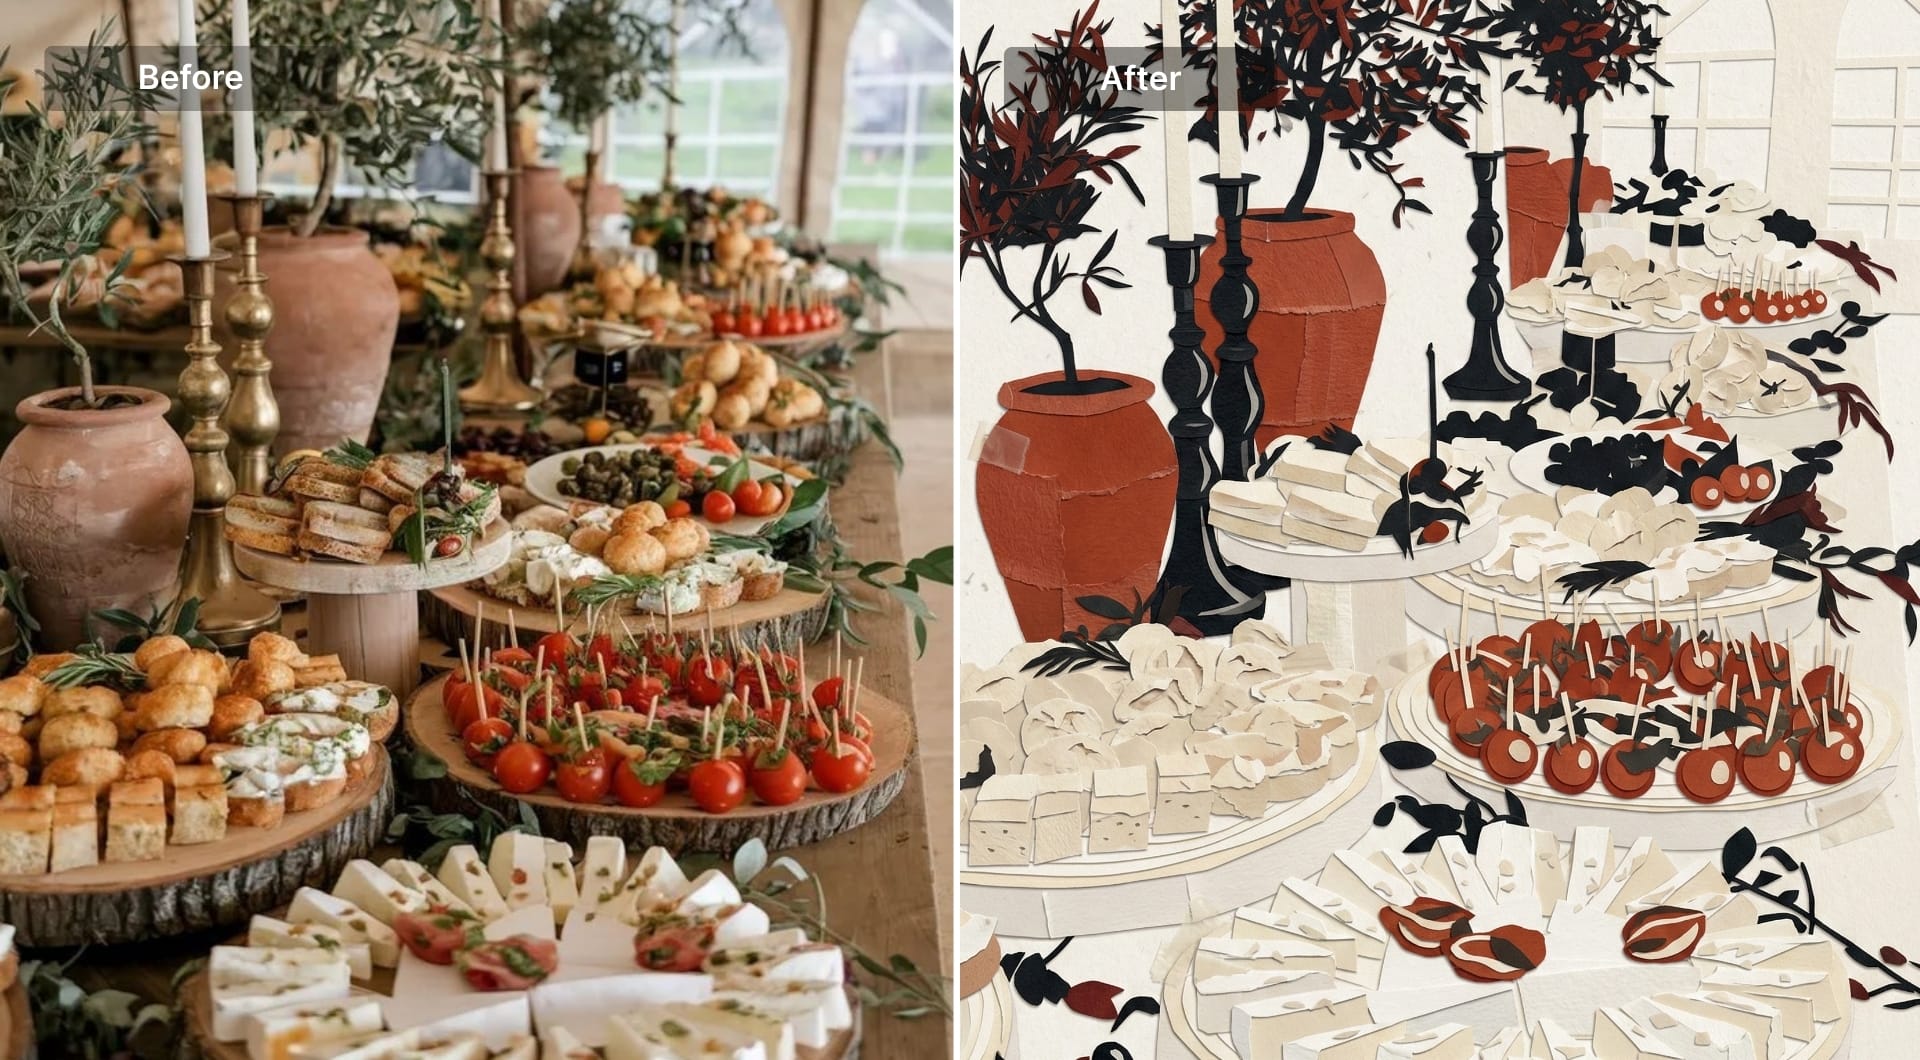
18) Paper collage (torn edges)
Collage is a strong transformation because it breaks the photo into physical fragments. It’s used in editorial and event posters. Ask for torn edges, tape marks, and scanned texture.
Prompt
Transform the uploaded image into a handmade paper collage. Preserve the subject silhouette and overall composition but rebuild it from layered paper fragments with torn edges and visible cut marks. Add subtle tape or glue marks and scanned paper texture. Include mild misalignment between layers for a handcrafted feel. Use a restrained palette: off-white paper tones, black accents, and one strong color accent. Keep the background simple and textured, not busy. Do not add any text or logos.
19) Pixel art (16-bit)
Pixel art requires strict constraints: limited palette, hard edges, optional dithering. It’s popular for nostalgic branding and icons. Ask for true sprite behavior, not “pixelated blur.”
Prompt
Convert the uploaded image into authentic 16-bit pixel art. Preserve the subject identity through a simplified silhouette and key color cues. Use hard pixel edges and a limited palette (roughly 16–32 colors). No smooth gradients. If shading is needed, use controlled dithering patterns. Keep details readable at small size and avoid noisy pixel clutter. Background should be simple and high contrast so the subject stands out. The result must look like a real game asset, not a blurred pixel filter. No text.
20) 8-bit sprite
Even stricter than 16-bit: fewer colors, chunkier pixels, simpler shapes. Great for badges and small icons.
Prompt
Turn the uploaded image into a true 8-bit sprite. Reduce the subject to a chunky pixel silhouette with a very limited palette (8–16 total colors). No anti-aliasing, no gradients. Use only a few shade steps per color. Keep only the most recognizable details: hair silhouette, main accessory, core outfit color. Background should be a single flat color or simple tile pattern. Make it feel like classic console sprite art. No text.
21) Ink poster (chaotic scribble)
This is a dramatic transformation built from strokes, not tones. It’s popular for album art and posters. Ask for scribble-based shading, flat background, and no polish.
Prompt
Redraw the uploaded image as a raw chaotic ink poster built mainly from dense curved black scribble strokes. Use the original only for proportions, silhouette, and overall structure. Reconstruct forms, shadows, and depth using overlapping uneven lines, rough cross-hatching, and tangled strokes. Keep minimal flat beige accents only where necessary. Use a solid flat orange background. High contrast. No realism, no gradients, no smooth shading, no glossy effects. Add an irregular chaotic aura around the subject with asymmetric line clusters. No text.

22) Abstract geometric portrait
This style transforms a photo into a modern art system: simplified planes, bold shapes, and intentional color blocks. It’s used for posters and brand art. The prompt must enforce geometry and forbid realism.
Prompt
Transform the uploaded image into an abstract geometric illustration. Preserve the subject silhouette and key facial structure cues, but rebuild the image from simplified flat shapes and angular planes. Use a limited cohesive color palette with strong contrast and clean edges. Shadows should be separate geometric shapes, not gradients. Background should be minimal with one or two supporting shapes. The result should feel like modern graphic art, not a photoreal portrait. No texture, no painterly strokes, no text.
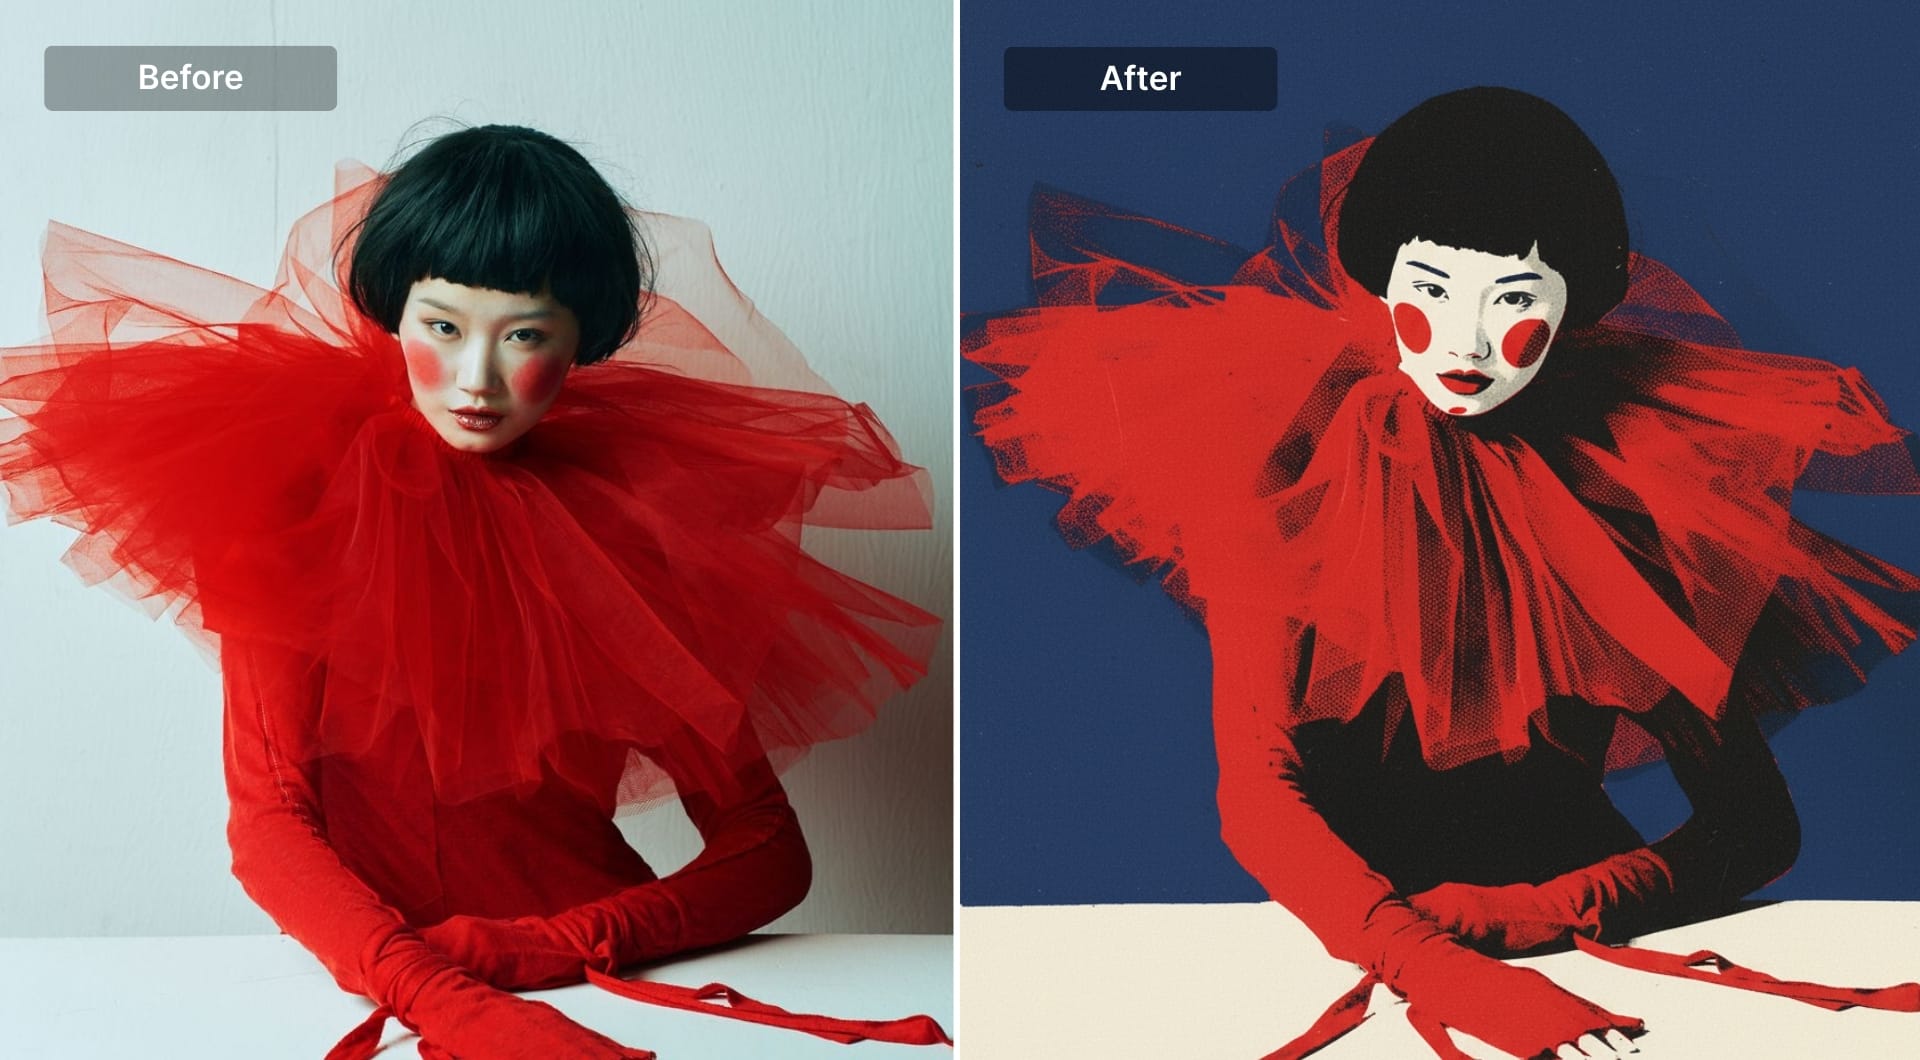
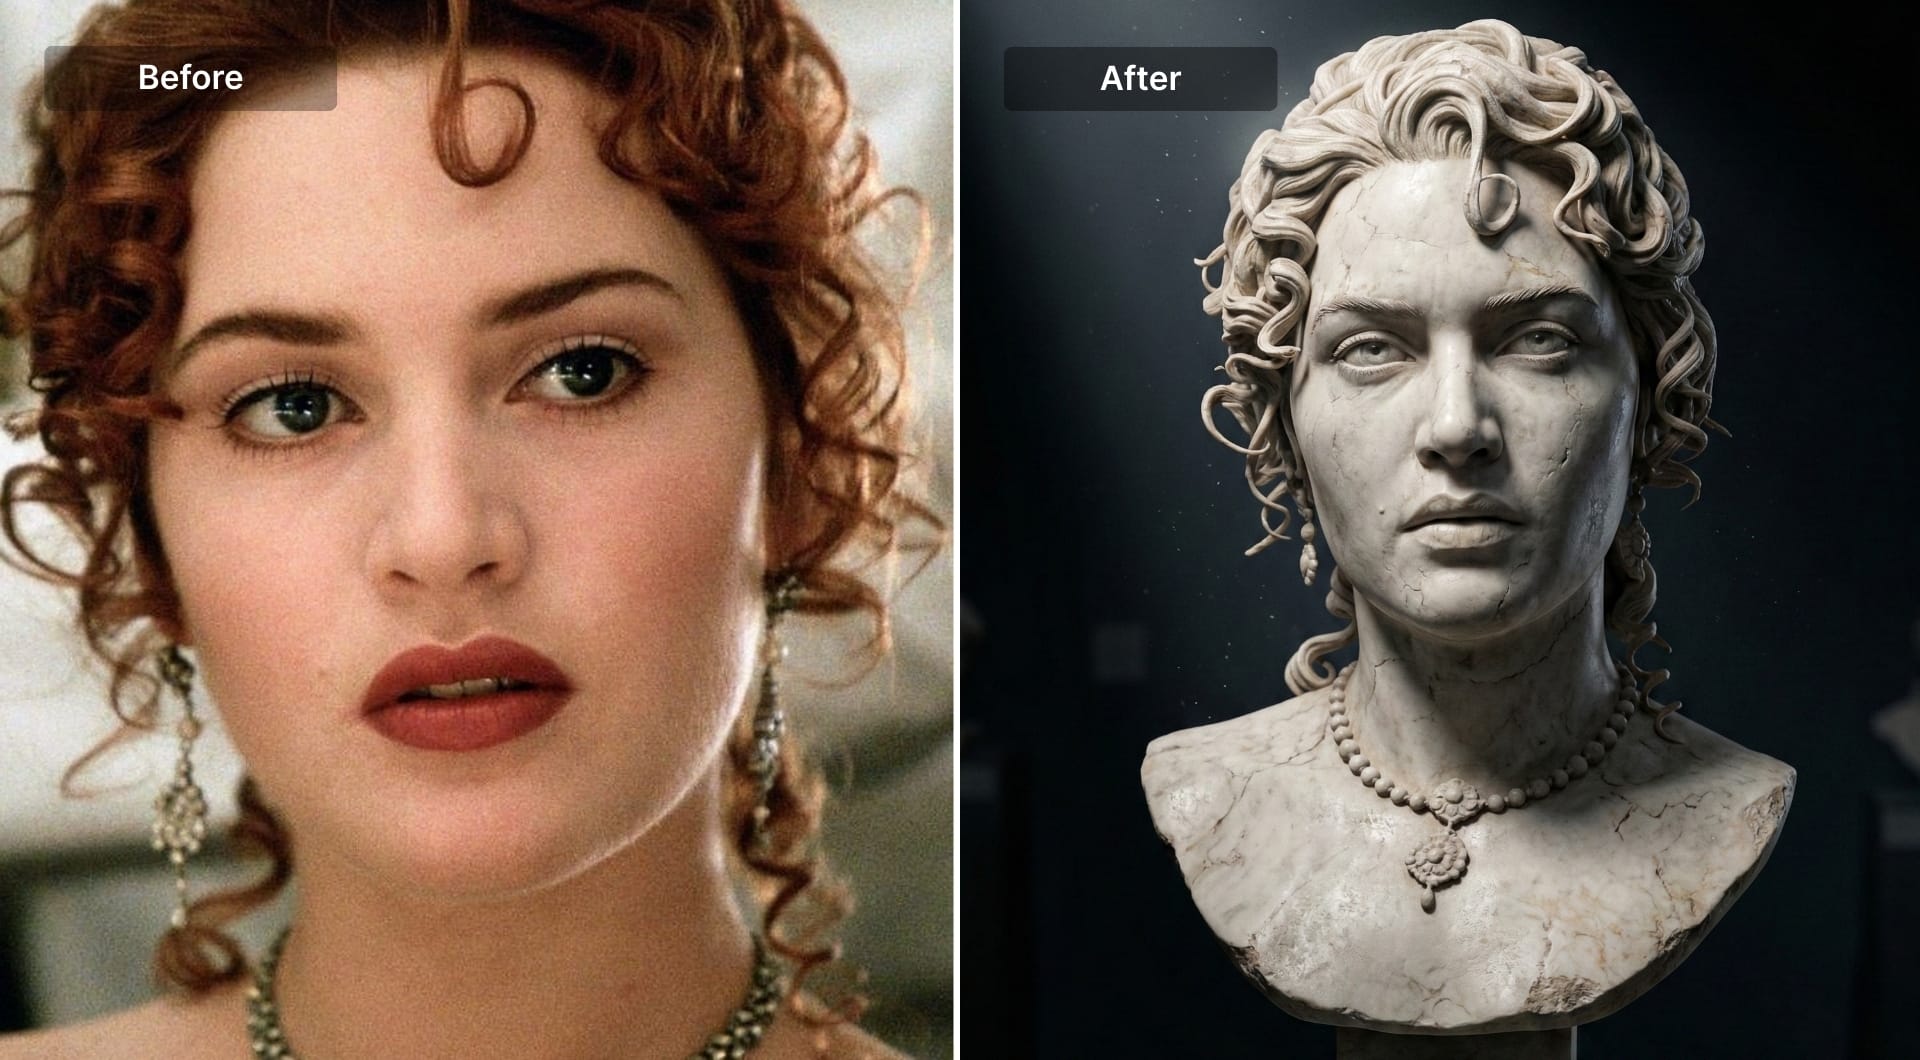
23) Chipped marble museum bust
This transformation turns a normal portrait into a museum-grade sculpture shot: face becomes a carved marble bust with believable stone micro-texture, chipped edges, and subtle wear that suggests age. What makes this style work is lighting discipline. A single dramatic spotlight creates deep shadow shape, edge separation, and that unmistakable museum display mood. You can use it for profile images, creator branding, album art, posters, and campaign visuals when you want something iconic without looking like generic “AI fantasy.”
Prompt
Transform the uploaded portrait into a chipped white marble bust displayed in a museum. Keep my pose, facial features, and identity clearly recognizable, preserving the same head angle and expression. Convert the subject into a classical Roman sculpture style: realistic carved marble with fine stone grain, subtle surface pitting, and small imperfections. Add tasteful chipping along edges (nose tip, ear edges, hair curls, and base) and slight wear marks that look natural, not damaged beyond recognition. The bust should sit on a simple museum plinth. Use dramatic museum spotlighting from above and slightly to one side, creating strong chiaroscuro shadows and crisp highlights on the marble. Background must be very dark, minimal, and gallery-like, with no extra objects and no text. Compose in a vertical 9:16 frame, centered, with clean negative space around the bust. No color cast, keep marble white/ivory with realistic light reflection.
How to make similar edits with AI
To make edits like anime, 3D, or comic from a normal photo, you need two things: a source image with enough signal (clear face/product edges, usable lighting, not heavily compressed), and an editing model that can follow art-direction constraints (what must stay the same, what must change, and how the style is constructed).
Chat Editor inside LetsEnhance fits this workflow well because it’s built for iterative edits: upload an image, describe the change, refine in follow-ups. The key detail is speed. Chat Editor intentionally outputs a 1 MP draft so you can iterate quickly, then upscale once the look is right.
Here's the step by step guide for you to try:
- Open Chat Editor workspace.
- Upload your image (portrait, product, pet, landscape).
- Paste one style prompt from the list above or anything that comes to your mind. Hit enter.
- After the processing is done, click Upscale to 4K to get a high-resolution file you can publish, print, or deliver.
Sign up and test it with 10 free credits
If you want to try the prompts in this article on your own images, start with LetsEnhance’s free tier. Free users get 10 free credits upon signing up and get test both features before committing.
If you like the results and need to edit more images, subscriptions start from 9$/month and there's also pay as you go bundles available with one time purchase.
FAQ
What is the best AI art style for turning a photo into anime?
Anime works best when the prompt defines the production rules: clean line art, cel shading with discrete shadow shapes, and a controlled background. Without those constraints, models tend to output a generic “anime-like” face that drifts away from the person in the original photo. In practice, you get the most consistent results when you anchor identity (“keep facial structure and hairstyle”) and enforce style (“crisp cel shading, no gradients”). In LetsEnhance Chat Editor, generate a draft first, then upscale once the look is correct.
How do I keep AI from changing my face when applying a style?
You need to explicitly forbid identity drift. Include constraints like “keep my pose and facial features the same,” “preserve hairstyle and accessories,” and “do not change facial structure.” This is more effective than saying “make it look like me,” because the model needs measurable anchors. If you still see drift, correct one variable at a time (for example: “make the eyes smaller and closer to the original, reduce exaggeration”).
Why does the chat editor output look low resolution at first?
Because it’s intentional. Chat editor is a fast iteration tool that outputs a 1 MP draft, and then you upscale the final image when you are satisfied. This keeps iterations fast and makes it easier to refine prompts without paying the cost of full-resolution generation every time.
Can I upscale the styled image to 4K after editing?
Yes. The intended workflow is to create the style edit first, then upscale the result using LetsEnhance’s upscaling operations.
What’s the easiest way to get consistent style results across multiple photos?
Reuse the same prompt structure and keep your inputs consistent. Consistency usually breaks because images have different crops, lighting, and background complexity. If you want consistent outputs, standardize the inputs (similar framing and background) and standardize the constraints (same palette rules, same background rule, same shading method). In Chat Editor, do one pass to establish the look, then copy that prompt as a template.
What AI art styles work best for profile pictures and avatars?
Styles that simplify detail and enforce clean separation tend to read best at small sizes: anime portrait, modern cartoon, and polished 3D character. The critical factor isn't the style name, it’s background control and silhouette readability. If the background gets busy, even a good character render will look noisy as a profile image.
Which styles are best for stickers and emotes?
Kawaii and chibi are the most reliable because they’re designed around simplified shapes and readable facial features. A sticker-style prompt should also request a clean outline and minimal background; otherwise you get an illustration that looks like a poster, not a sticker.
