Answer: To fix a pixelated image, upload it to LetsEnhance.io, choose the Strong upscaler, and click Enhance.
Want more detail & pro tips? Read on to see how to pick the best settings for any photo and get truly sharp results.
Takeaways
- Best fix: Use LetsEnhance.io. The Strong upscaler is specifically designed for maximum clarity and fixing pixelation.
- How-to: Upload to LetsEnhance.io, select Strong, choose upscale factor (1x-16x), and click Enhance.
- If you need to automatically sharpen pixelated photos in large volumes, try our API.
What causes pixelation and how to avoid it
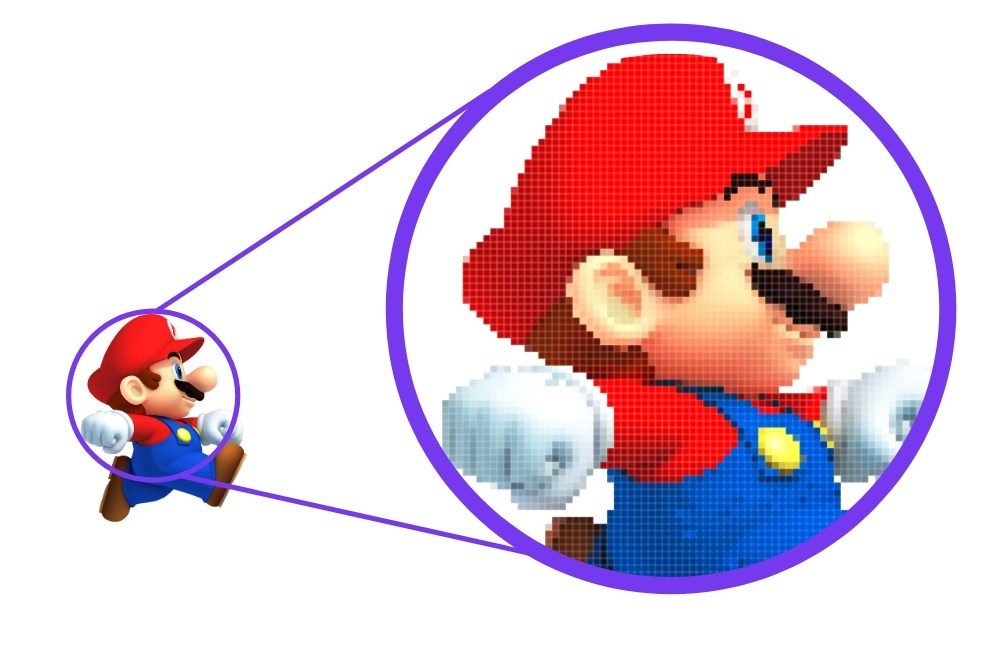
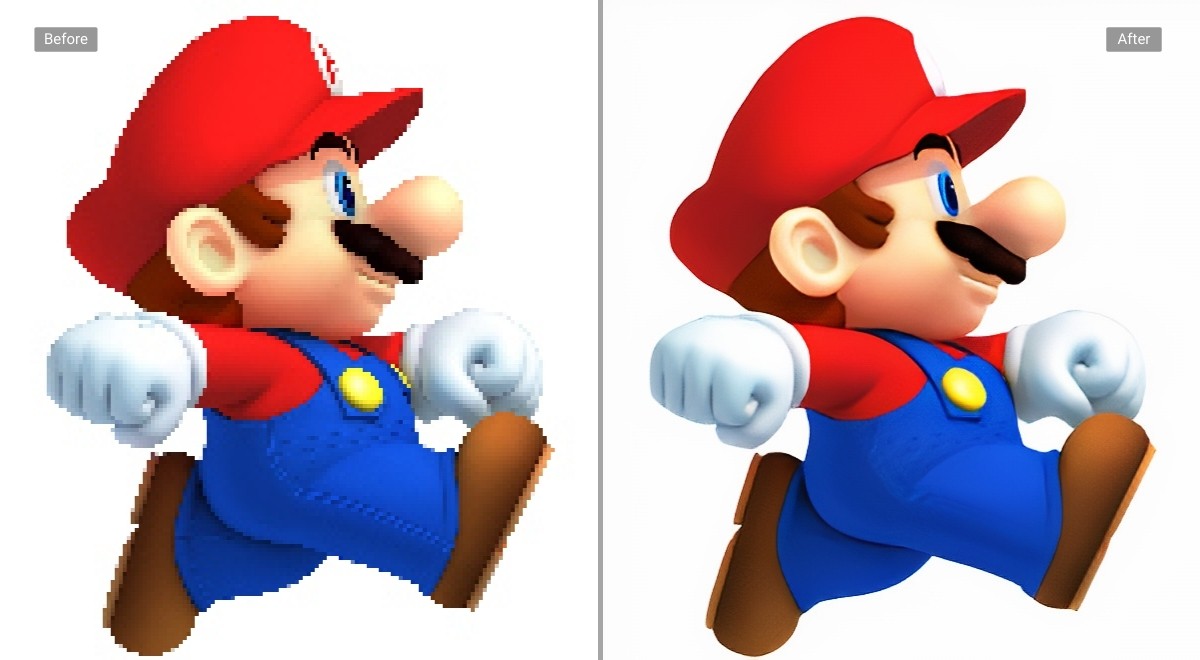
Images are made of tiny squares called pixels. When pixel density is high enough they fuse into a smooth and clear image.
But when an image is stretched beyond its original resolution, these pixels become visible, making the image look blocky or jagged. This is pixelation.
It usually occurs when websites blow out pictures uploaded by users to the required width and height.
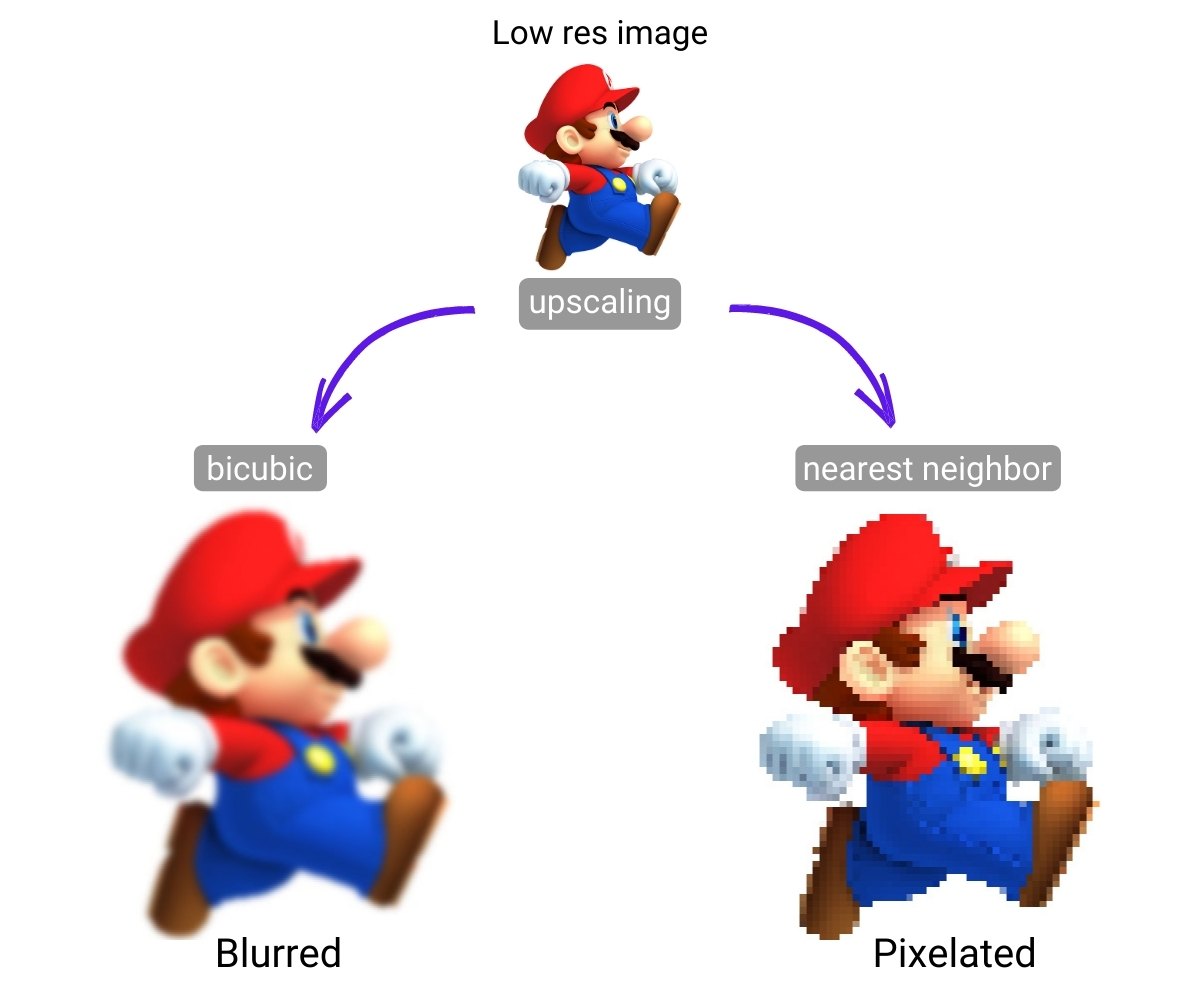
Note: Some apps smooth out upscaled images, making them blurry instead of jagged. It depends on the upscaling type.
The best way to prevent pixelation is to get an original clear image with more megapixels. But if you don’t have one, you can sharpen your pixelated photo with our online app.
How to fix a pixelated image without Photoshop
LetsEnhance.io offers several AI upscalers. For fixing significant pixelation and achieving the clearest possible result, our Strong enhancer is the top choice. It excels at:
- Fixing blurriness and pixelation.
- Enhancing unclear faces (when you enable the "Enhance faces" option).
- Cleaning up noise and compression artifacts.
- Improving the readability of blurry text.
It’s designed for high fidelity, meaning it works hard to restore and enhance the details in your existing image, rather than creatively changing it.
How to depixelate an image online for free
Step 1: Sign in to LetsEnhance
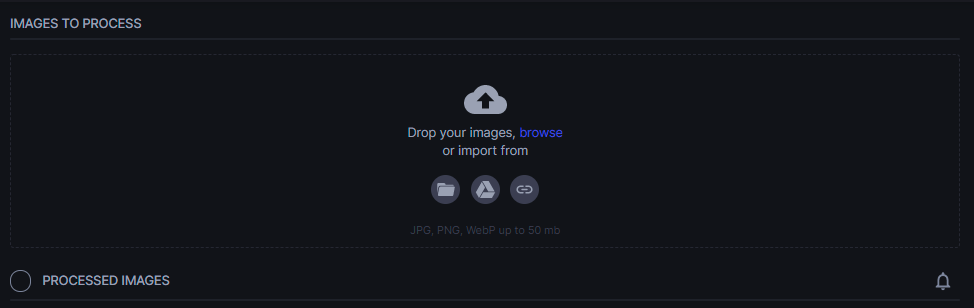
Upload: Go to LetsEnhance.io. Drag and drop your pixelated image onto the page, or click "browse" to select files. You can process up to 10 images for free.
Step 2: Select "Strong"
On the right-hand operations panel, under "Upscale & Enhance," choose the Strong upscaler.
(Optional) Enhance faces: If your image contains people, especially if faces are unclear, check the Enhance faces box. This applies extra processing to improve facial detail.
Important limitation: Currently, Strong processes input images up to 2.5 megapixels (e.g., around 1900x1300 pixels). This ensures the intensive AI can deliver maximum clarity efficiently. If your image is larger, you can use our other effective upscalers like Balanced, Magic or Ultra.
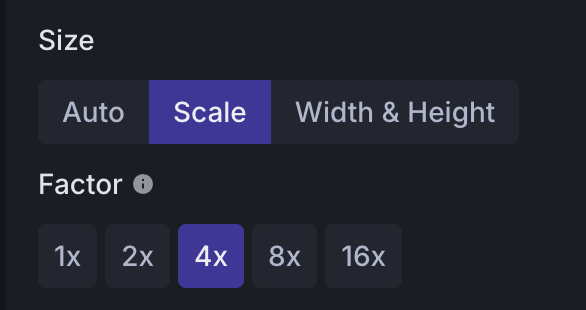
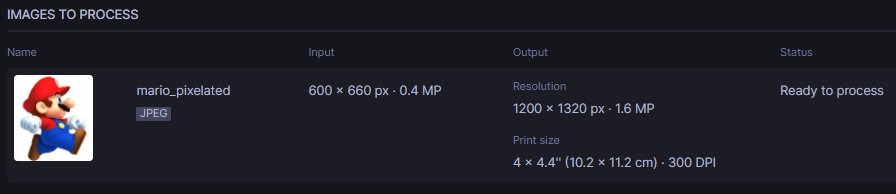
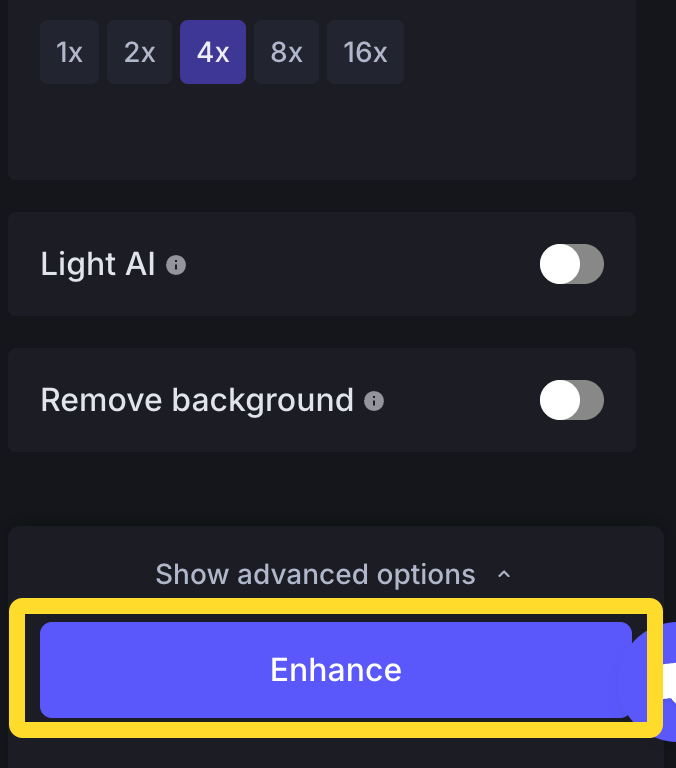
Step 3: Choose size/factor
Below the upscaler selection, you can choose an upscale factor (e.g., 2x, 4x, 8x, 16x) or set a custom resolution. Strong can upscale up to 16x or a total of 256 megapixels (500MP for business plans).
You can see the output resolution and print size at 300 DPI to the right of the image thumbnail.
Tip: You can upload multiple photos and depixelate them all at once.
Step 4: Enhance
Click the Enhance button at the bottom right.
Step 5: Download
Once processing is complete, click the download icon on the image thumbnail to save your clear, depixelated photo.
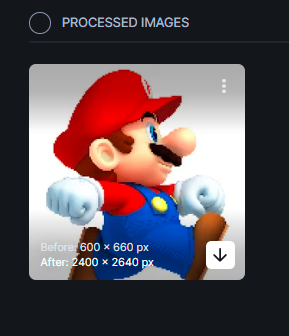
Now, you have a new beautiful depixaleted image that you can share with friends or use for anything you like.
What if my image is too large for "Strong" or needs a lighter touch?
- Balanced: If your image is over the 2.5MP limit for Strong, or if the pixelation isn't severe and you want a good general enhancement, choose Balanced. It's excellent for everyday photos.
- Gentle: If your image contains very fine text or intricate patterns where every single original detail must be preserved perfectly, Gentle is the safest choice. It provides a subtle enhancement and is very true to the original.
Note: Output quality depends on the degree of pixelation. It’s always better to have an original high-quality image. But if you don’t have one, our tool is your best bet when you want to unpixelate photos.
Beyond basic depixelation: use cases for clearer images
Fixing pixelation isn't just about one type of photo. Here’s how LetsEnhance.io helps:
- Product photos: Pixelated product images look unprofessional. Use Strong (if under 2.5MP), Balanced or our newest and most powerful Ultra AI Upscaler to make them sharp, clear, and ready for your e-commerce store.

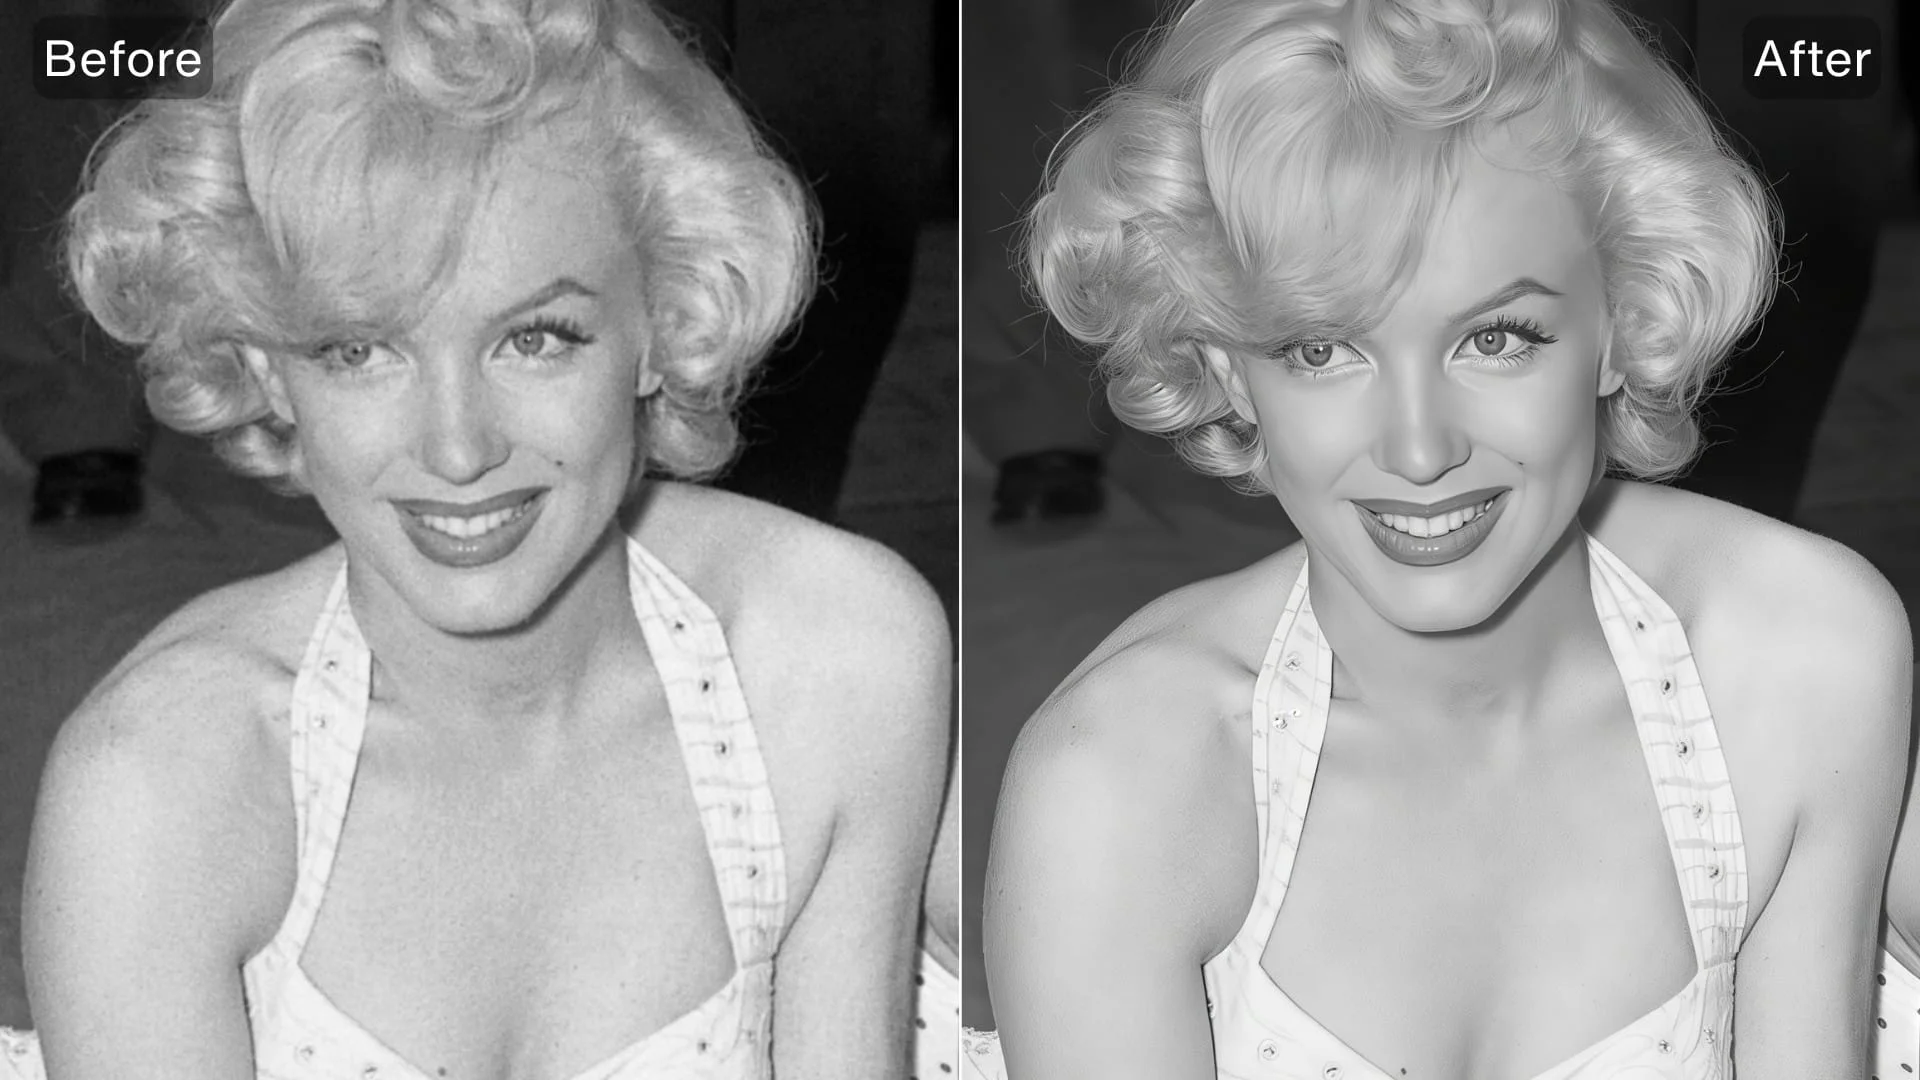
- Portraits & old photos: Rescue cherished memories. Strong with the Enhance faces option is ideal for bringing clarity back to unclear faces in old or blurry portraits.
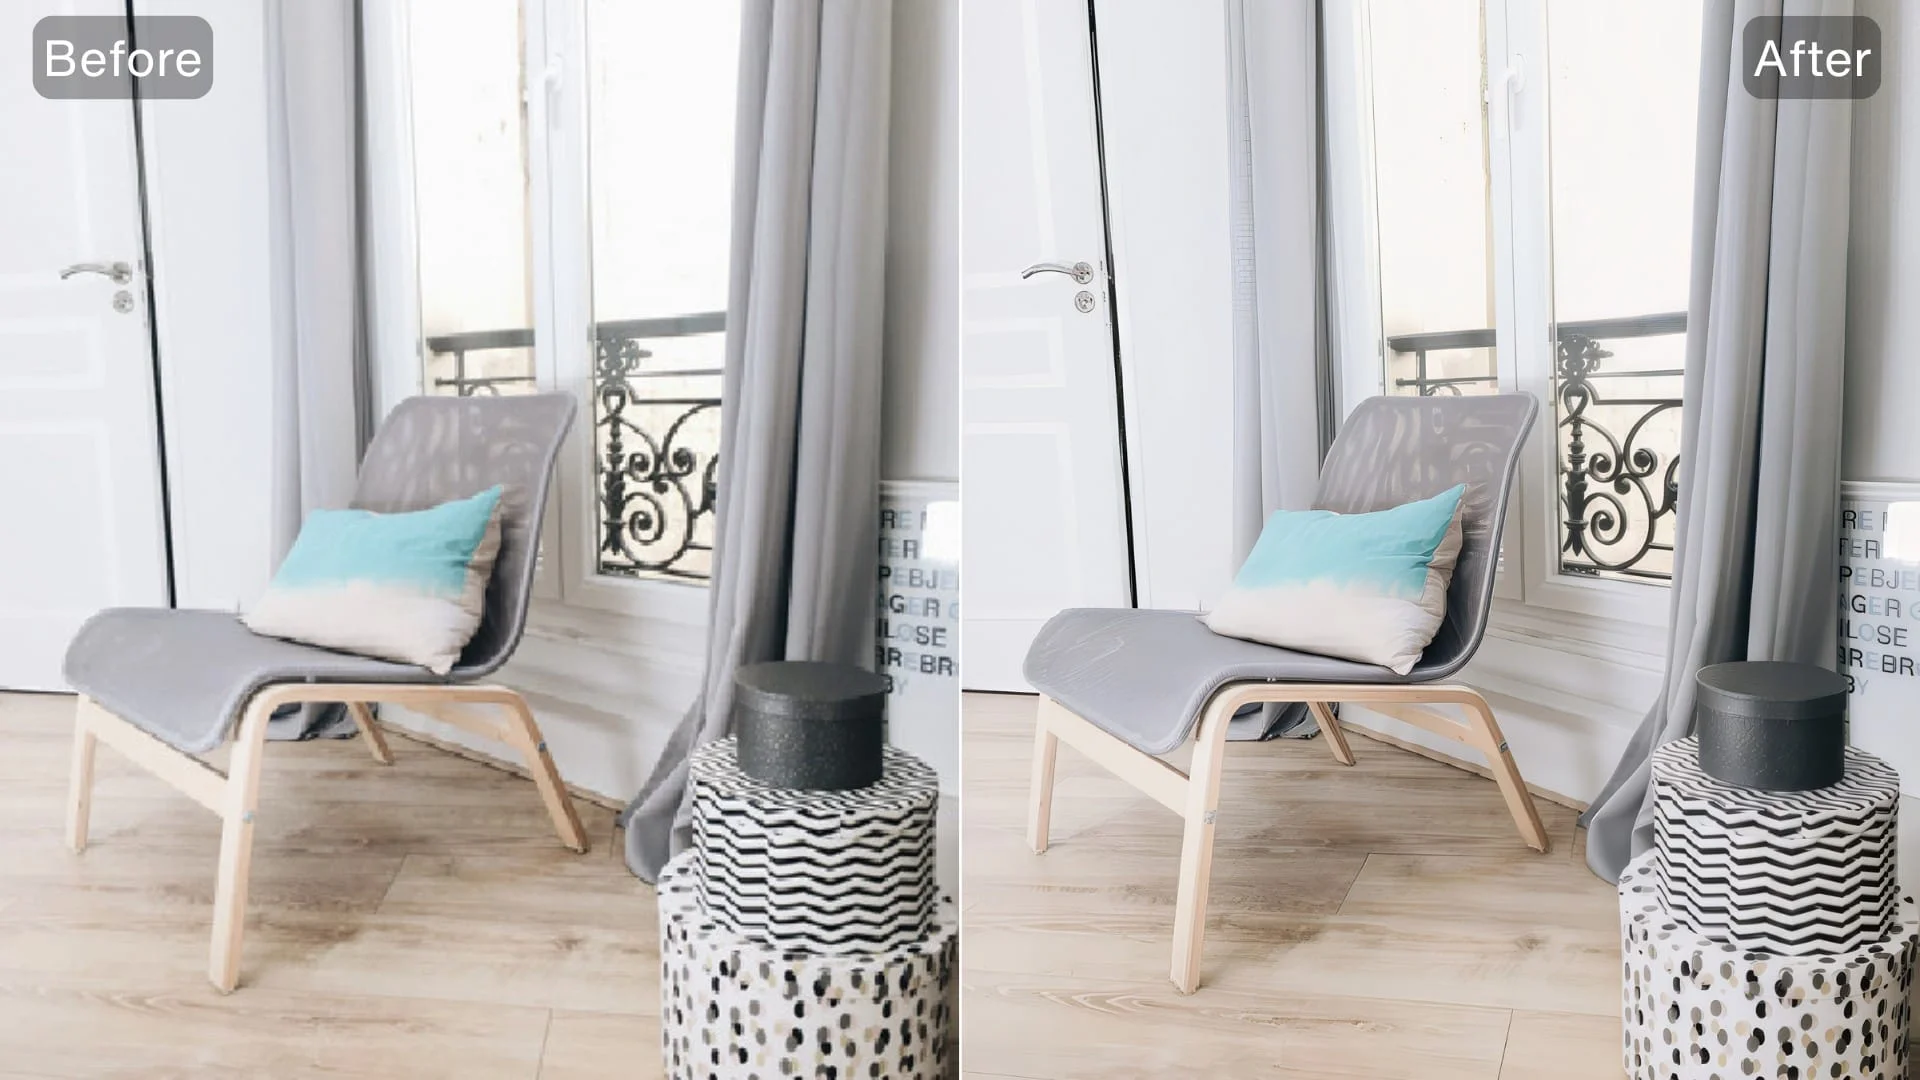
- Real estate: Make property listings more appealing with crisp, clear photos. Use Strong for images under 2.5MP to bring out details, or Balanced for larger shots.
- Enlarging small or cropped images: When you crop heavily or start with a tiny image, pixelation is common. Strong can fix this and upscale, effectively giving you a "lossless zoom" after the shot.
- Fixing pixelated text: Strong can often make blurry text within an image more readable. However, for very small, critical text where perfect accuracy is paramount, test Gentle as well, as Strong might occasionally introduce slight changes to text forms while aiming for clarity. Always review text results.
How to fix a pixelated image on iPhone
To depixelate a picture on your phone, upload it to our website, Letsenhance.io, and tap the Enhance button in the pop-up.
You don’t have to change any settings. The default mode is perfectly capable of removing pixelation.
You can follow more detailed general instructions from this post. They’re true for both desktop and mobile versions of our website.
Make your pixelated product photos clear
Step up your eCommerce game by improving the quality of your product photos. Depixelate and enlarge your images to provide a more detailed view of the things you sell to your buyers.
Use batch processing to sharpen dozens of pics at once on our website.
Or take advantage of our API to set up an advanced image processing workflow tailored to your website. Set the custom AI upscaling, noise reduction, lighting, and color enhancement to automatically adjust user-generated content to your requirements.
Learn more about how you can use our API for your business.
Depixelate real estate images
High-quality photos make a big difference in the online real estate business. According to a study, rental listings with clear images generate extra $2,348 in annual revenue, on average.
LetsEnhance automatically removes pixelization and blur from your images, making your listings more appealing to customers.
Depixelate zoomed-in and cropped images
Pixelation often occurs when you make a crop of a small region in your photo. In genres like wildlife photography, it’s often the only way to get a close view of an object.
With Let’s Enhance, you can easily fix cropped pixelated images.
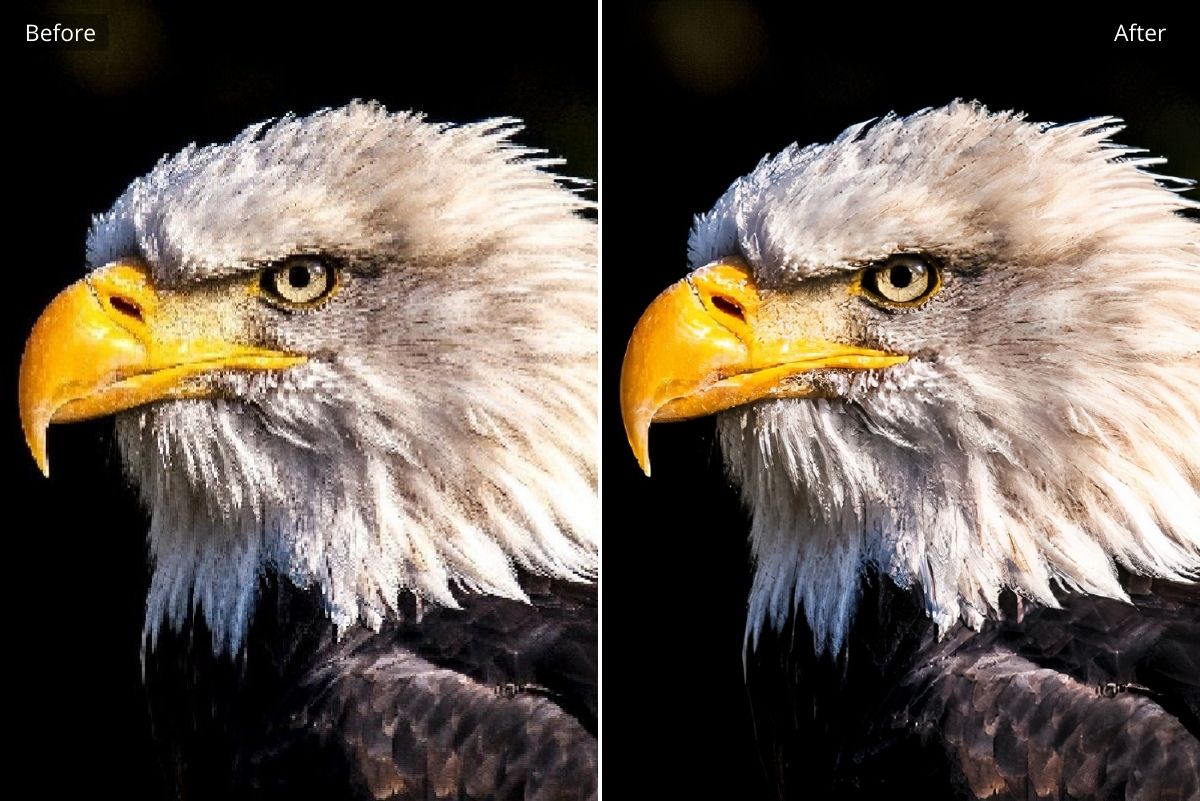
Think about it as a lossless optical zoom that you can apply anytime after taking a photo.
How to depixelate pictures in Photoshop
There’s 4 common ways to fix a minor pixelation in Photoshop:
A. Go to Filter > Noise > Despeckle.
Apply it a few times by pressing CTRL + F (Windows) or CMD + F (Mac)
B. Go to Filter > Blur > Smart Blur. Play around with Radius and Threshold sliders till you get the best result.
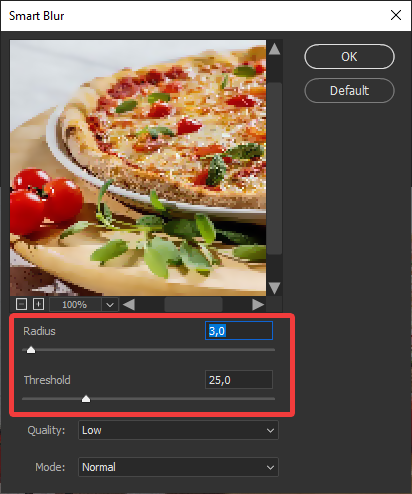
If you aren't happy with Smart blur results, you can experiment with a Gaussian blur filter. Sometimes it works better.

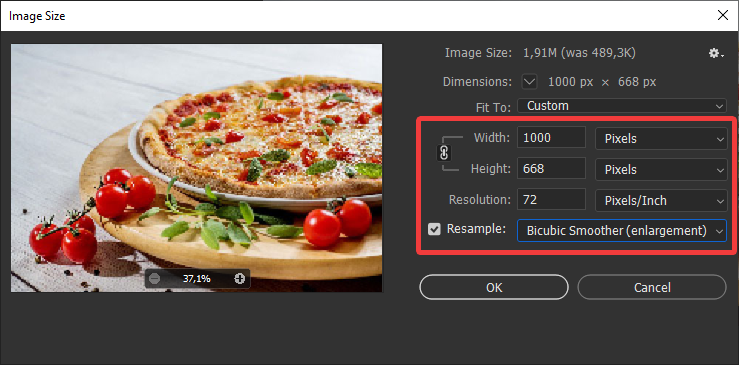
C. 1. Go to Image > Image Size.
2. Set the resolution to twice the original size.
3. Check the Resample box and apply a Bicubic Smoother enlargement.
Tip: You can combine all 3 methods to make the image smoother.
Check how it deals with heavy pixelation compared to Let’s Enhance. Photoshop offers a 7-day free trial if you’d like to test these results yourself.
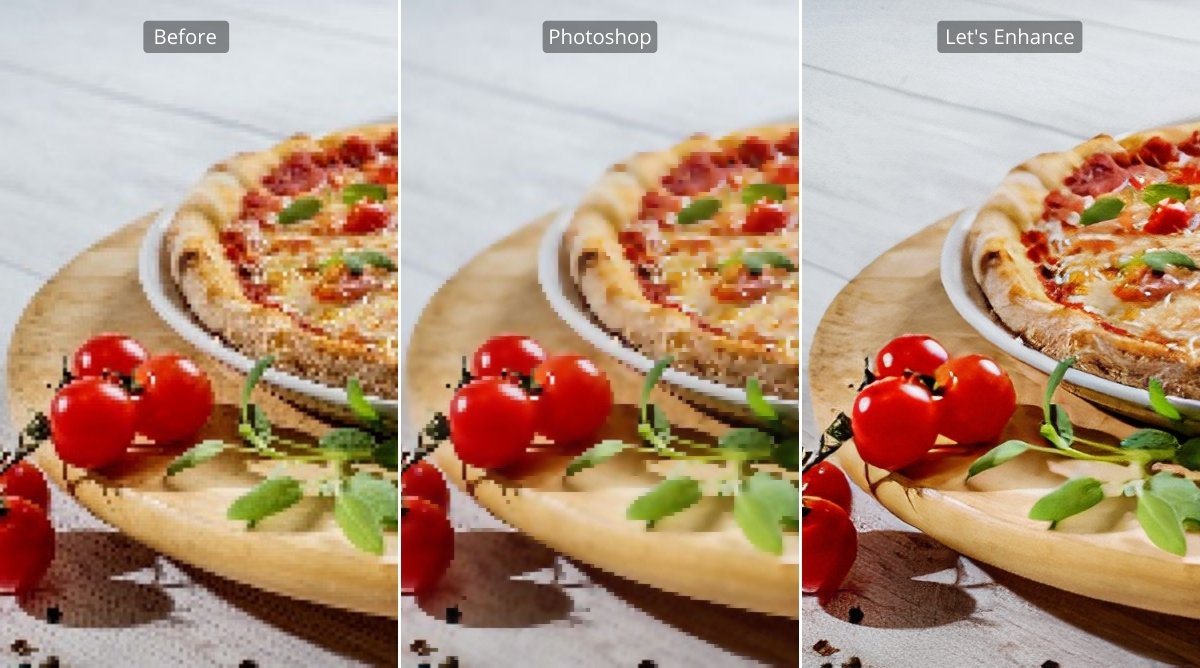
In this case, we used Smart blur and Bicubic Smoother enlargement in Photoshop. Let’s Enhance was in the default mode (Smart Enhance).
Keep in mind, Photoshop can help you reduce mild pixelation, but it’s a manual process and is best suited for users with some editing experience. Results depend heavily on your skill and patience, and it usually takes longer than automated AI tools like Let’sEnhance, which can fix pixelation in under a minute.
FAQ
How do I know if an image is pixelated?
You'll see blocky or jagged edges, especially on curves. The individual square pixels become visible, often looking like old 8-bit video game graphics.
Is blurred the same as pixelated?
Not exactly. Blur is a lack of sharpness, often from camera focus issues. Pixelation is visible square pixels from over-stretching a low-resolution image. However, AI tools like our Strong upscaler are designed to tackle both blur and pixelation.
How can I fix pixelated images quickly and easily?
The fastest and simplest way is to use Let’sEnhance. Its AI-powered upscalers can upscale images up to 16× or a total of 256 megapixels. Whether you’re working with portraits, product shots, or real estate photos, Let’sEnhance delivers high-quality, ready-to-use results in seconds.
Let’s Enhance vs Photoshop: Which is better for fixing pixelation?
If you want fast, high-quality results, Let’sEnhance is the better choice. Its AI upscalers automatically remove pixelation in seconds and it's perfect for beginners. Photoshop, on the other hand, only slightly smooths pixelation. It’s manual, time-consuming, and skill-dependent, so achieving good results takes practice.
How does AI depixelation actually work?
AI models like ours are trained on millions of image pairs (low quality vs. high quality). The AI learns to recognize patterns of pixelation, blur, and noise, and then how to reconstruct the missing details to create a clear, high-resolution version.
Stop tolerating pixelation. Get clear images now.
Don't let pixelated images hold you back. With LetsEnhance.io, restoring clarity is fast and straightforward. Ready to see the difference? Upload an image and try the Strong upscaler on LetsEnhance.io for free. Fix up to 10 images and get the crystal clear results you need!
